Netgear R7900P User Manual - Page 20
Wi-Fi Protected Setup Method, Types of Logins, Use a Web Browser to Access the Router
 |
View all Netgear R7900P manuals
Add to My Manuals
Save this manual to your list of manuals |
Page 20 highlights
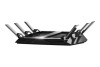
Nighthawk X6S AC3000 Tri-Band WiFi Router Model R7900P Wi-Fi Protected Setup Method Wi-Fi Protected Setup (WPS) is a standard for easily adding computers and other devices to a home network while maintaining security. To use WPS (Push 'N' Connect), make sure that all WiFi devices to be connected to the network are Wi-Fi certified and support WPS. During the connection process, the client gets the security settings from the router so that every device in the network supports the same security settings. To use WPS to connect a computer or mobile device to the WiFi network of the router: 1. Make sure that the router is receiving power (its Power LED is lit). 2. Check the WPS instructions for your computer or mobile device. 3. Press the WPS button of the router for three seconds. 4. Within two minutes, press the WPS button on your computer or mobile device, or follow the WPS instructions that came with the device. The WPS process automatically sets up the device with the network password and connects the device to the WiFi network of the router. For more information, see Use WPS to Add a Device to the WiFi Network on page 79. Types of Logins Separate types of logins serve different purposes. It is important that you understand the difference so that you know which login to use when. Several types of logins are associated with the router: • ISP login. The login that your ISP gave you logs you in to your Internet service. Your service provider gave you this login information in a letter or some other way. If you cannot find this login information, contact your service provider. • WiFi network key or password. Your router is preset with a unique WiFi network name (SSID) and password for WiFi access. This information is on the router label. • Router login. This logs you in to the router interface from a web browser as admin. Use a Web Browser to Access the Router When you connect to the network (either with WiFi or with an Ethernet cable), you can use a web browser to access the router to view or change its settings. When you access the router, the software automatically checks to see if your router can connect to your Internet service. Automatic Internet Setup You can set up your router automatically, or you can use a web browser to access the router and set up your router manually. Before you start the setup process, get your ISP information and make sure that the computers and devices in the network are using the settings described here. When your Internet service starts, your Internet service provider (ISP) typically gives you all the information needed to connect to the Internet. For DSL service, you might need the following information to set up your router: Connect to the Network and Access the Router 20
-
 1
1 -
2
-
3
-
4
-
5
-
6
-
7
-
8
-
9
-
10
-
11
-
12
-
13
-
14
-
 15
15 -
 16
16 -
 17
17 -
 18
18 -
 19
19 -
 20
20 -
 21
21 -
 22
22 -
 23
23 -
 24
24 -
 25
25 -
26
-
27
-
28
-
29
-
30
-
31
-
32
-
33
-
34
-
35
-
36
-
37
-
38
-
39
-
40
-
41
-
42
-
43
-
44
-
45
-
46
-
47
-
48
-
49
-
50
-
51
-
52
-
53
-
54
-
55
-
56
-
57
-
58
-
59
-
60
-
61
-
62
-
63
-
64
-
65
-
66
-
67
-
68
-
69
-
70
-
71
-
72
-
73
-
74
-
75
-
76
-
77
-
78
-
79
-
80
-
81
-
82
-
83
-
84
-
85
-
86
-
87
-
88
-
89
-
90
-
91
-
92
-
93
-
94
-
95
-
96
-
97
-
98
-
99
-
100
-
101
-
102
-
103
-
104
-
105
-
106
-
107
-
108
-
109
-
110
-
111
-
112
-
113
-
114
-
115
-
116
-
117
-
118
-
119
-
120
-
121
-
122
-
123
-
124
-
125
-
126
-
127
-
128
-
129
-
130
-
131
-
132
-
133
-
134
-
135
-
136
-
137
-
138
-
139
-
140
-
141
-
142
-
143
-
144
-
145
-
146
-
147
-
148
-
149
-
150
-
151
-
152
-
153
-
154
-
155
-
156
-
157
-
158
-
159
-
160
-
161
-
162
-
163
-
164
-
165
-
166
-
167
-
168
-
169
-
170
-
171
-
172
-
173
-
174
-
175
-
176
-
177
-
178
-
179
-
180
-
181
-
182
-
183
-
184
-
185
-
186
-
187
-
188
-
189
 |
 |