Netgear WN203 User Manual - Page 89
Apply, Enable Wireless Bridging, Wireless Point-to-Multi-Point Bridge, Enable Wireless Client
 |
View all Netgear WN203 manuals
Add to My Manuals
Save this manual to your list of manuals |
Page 89 highlights
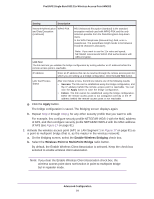
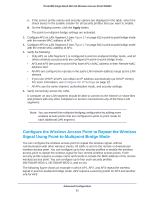
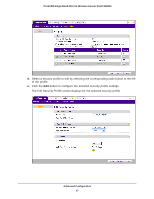
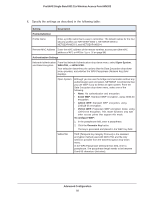
ProSAFE Single Band 802.11n Wireless Access Point WN203 Setting Description Network Authentication WPA2-PSK and Data Encryption (continued) AES (Advanced Encryption Standard) is the standard encryption method used with WPA2-PSK and the only selection possible from the Data Encryption drop-down menu. In the WPA Passphrase (Network Key) field, enter a passphrase. The passphrase length needs to be between 8 and 63 characters (inclusive). Note: If you want to use the 11n rates and speed, NETGEAR recommends WPA2-PSK authentication with AES encryption. Link Test The link test lets you validate the bridge configuration by testing whether an IP address behind the remote access point is reachable. IP Address Enter an IP address that can be reached through the remote access point for which you are setting up a bridge configuration. Click the Link Test button. Link Test Process Status After one minute or less, the link test returns one of the following results: • Success. The link can be established using the bridge configuration, and the IP address behind the remote access point is reachable. You can click the Apply button to save the bridge configuration. • Failure. The link cannot be established using the bridge configuration. Either the remote access point is not configured correctly or the IP address behind the remote access point is not reachable. g. Click the Apply button. The bridge configuration is saved. The Bridging screen displays again. h. Repeat Step d through Step g for any other security profile that you want to edit. For example, first configure security profile NETGEAR-WDS-1 with the MAC address of AP1, and then configure security profile NETGEAR-WDS-2 with the MAC address of AP3 (see Figure 18 on page 86). 2. Activate repeater mode on the wireless access point (AP2 in Figure 18 on page 86): a. On the Bridging screen, select the Enable Wireless Bridging check box. b. Select the Wireless Point-to-Multi-Point Bridge radio button. c. Clear the Enable Wireless Client Association check box. Wireless client association is disabled. No wireless clients can associate with the wireless access point. Note: If you do not clear the Enable Wireless Client Association check box, the wireless access point functions in regular point-to-multipoint bridge mode. Advanced Configuration 89
-
 1
1 -
2
-
3
-
4
-
5
-
6
-
7
-
8
-
9
-
10
-
11
-
12
-
13
-
14
-
15
-
16
-
17
-
18
-
19
-
20
-
21
-
22
-
23
-
24
-
25
-
26
-
27
-
28
-
29
-
30
-
31
-
32
-
33
-
34
-
35
-
36
-
37
-
38
-
39
-
40
-
41
-
42
-
43
-
44
-
45
-
46
-
47
-
48
-
49
-
50
-
51
-
52
-
53
-
54
-
55
-
56
-
57
-
58
-
59
-
60
-
61
-
62
-
63
-
64
-
65
-
66
-
67
-
68
-
69
-
70
-
71
-
72
-
73
-
74
-
75
-
76
-
77
-
78
-
79
-
80
-
81
-
82
-
83
-
 84
84 -
 85
85 -
 86
86 -
 87
87 -
 88
88 -
 89
89 -
 90
90 -
 91
91 -
 92
92 -
 93
93 -
 94
94 -
95
-
96
-
97
-
98
-
99
-
100
-
101
-
102
-
103
-
104
-
105
-
106
-
107
-
108
-
109
-
110
-
111
-
112
-
113
-
114
-
115
-
116
-
117
-
118
-
119
-
120
-
121
-
122
-
123
-
124
-
125
-
126
-
127
-
128
-
129
-
130
-
131
-
132
-
133
 |
 |