Panasonic AG-HPX600PJ Operating Instructions - Page 146
Connection through the <USB2.0> terminal, USB connection to a computer in the device mode - ag hpx600 manual
 |
View all Panasonic AG-HPX600PJ manuals
Add to My Manuals
Save this manual to your list of manuals |
Page 146 highlights
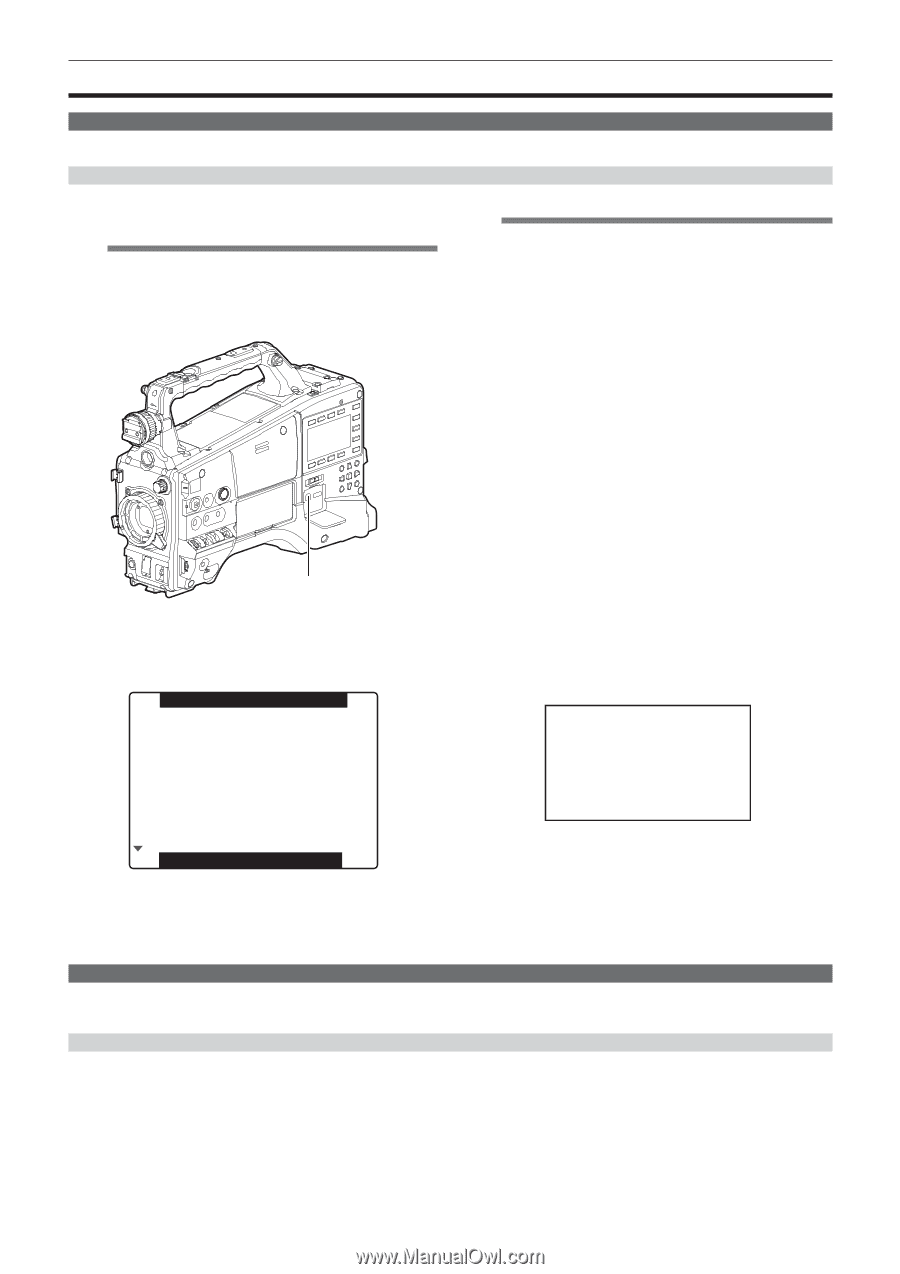
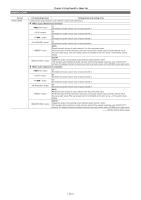
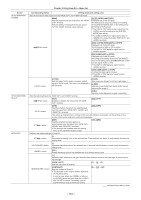
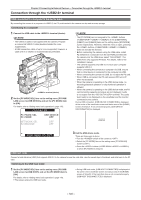
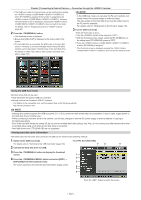
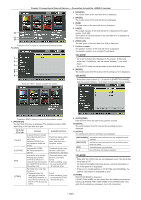
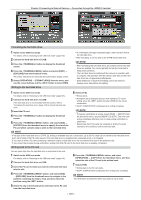
Chapter 9 Connecting to External Devices - Connection through the terminal Connection through the terminal USB connection to a computer in the device mode By connecting the camera to a computer via USB 2.0, the P2 card inserted in the camera can be used as mass storage. Connecting to a computer 1 Connect the USB cable to the terminal (device). @@NOTE tt The USB 2.0 cable is not supplied with the camera. Prepare a commercial USB 2.0 cable (double-shielded for noise suppression). tt A USB connection cable of up to 5 m is supported, however, a cable of 3 m or shorter is recommended as preferable. terminal (device) 2 Set the [PC MODE SEL] item on the setting menu [PC/USB/ LAN] screen to [USB DEVICE], and set the [PC MODE] item to [ON]. For details, refer to "Setting menu basic operations" (page 118). PC/USB/LAN @@NOTE tt The [PC MODE] can be assigned to the buttons (//) at the [USER MAIN], [USER1], and [USER2] items on the setting menu [SW MODE] screen respectively. However, when the menu is open, pressing the buttons (//) does not activate the function. tt Before connecting the camera using the USB cable, install P2 software to a computer from the CD-ROM provided with the camera. For the USB driver, select "AG‑HPX600". The USB driver only supports Windows. For details, refer to the installation manual. tt The camera supports only USB 2.0. Ensure your computer supports USB 2.0. tt When connecting the camera to a computer via USB, ensure that no other device is connected to the computer via USB. tt When connecting the camera via USB, do not eject the P2 card. tt When USB is connected, the P2 card access LED turns off when not accessed. tt When the camera is operating in the USB device mode, no recording/playback operation or clip thumbnail operation is allowed. tt When the camera is operating in the USB device mode, the P2 card remaining capacity and status are not displayed. Audio is not output from the terminal. The audio level meter is not displayed on the viewfinder and the monitor connected to the camera. During USB connection, [USB DEVICE CONNECTED] is displayed at the center of the viewfinder screen and status area of the [HOME] screen of SmartUI. If not connected properly, [USB DEVICE DISCONNECTED] is displayed. PC MODE SEL PC MODE NETWORK SEL P2 BROWSE USB DEVICE OFF OFF OFF USB DEVICE CONNECTED PUSH MENU TO EXIT 3 Exit the USB device mode. There are three ways to do so: ffTurn the switch of the camera to . ffSwitch the [PC MODE] item on the setting menu [PC/USB/LAN] screen to [OFF]. ffPress the buttons (//) to which [PC MODE] is assigned. USB host mode Connect a hard disk drive (HDD) that supports USB 2.0 to the camera to save the card data, view the saved clips in thumbnail, and write back to the P2 card. Switching to the USB host mode 1 Set the [PC MODE SEL] item on the setting menu [PC/USB/ LAN] screen to [USB HOST], and set the [PC MODE] item to [ON]. For details, refer to "Setting menu basic operations" (page 118). ffThe camera enters the USB host mode. ffDuring USB host mode, [USB HOST CONNECTED] is displayed at the center of the viewfinder screen and status area of the [HOME] screen of SmartUI. If the hard disk drive is not connected properly, [USB HOST DISCONNECTED] is displayed. - 146 -
-
 1
1 -
2
-
3
-
4
-
5
-
6
-
7
-
8
-
9
-
10
-
11
-
12
-
13
-
14
-
15
-
16
-
17
-
18
-
19
-
20
-
21
-
22
-
23
-
24
-
25
-
26
-
27
-
28
-
29
-
30
-
31
-
32
-
33
-
34
-
35
-
36
-
37
-
38
-
39
-
40
-
41
-
42
-
43
-
44
-
45
-
46
-
47
-
48
-
49
-
50
-
51
-
52
-
53
-
54
-
55
-
56
-
57
-
58
-
59
-
60
-
61
-
62
-
63
-
64
-
65
-
66
-
67
-
68
-
69
-
70
-
71
-
72
-
73
-
74
-
75
-
76
-
77
-
78
-
79
-
80
-
81
-
82
-
83
-
84
-
85
-
86
-
87
-
88
-
89
-
90
-
91
-
92
-
93
-
94
-
95
-
96
-
97
-
98
-
99
-
100
-
101
-
102
-
103
-
104
-
105
-
106
-
107
-
108
-
109
-
110
-
111
-
112
-
113
-
114
-
115
-
116
-
117
-
118
-
119
-
120
-
121
-
122
-
123
-
124
-
125
-
126
-
127
-
128
-
129
-
130
-
131
-
132
-
133
-
134
-
135
-
136
-
137
-
138
-
139
-
140
-
 141
141 -
 142
142 -
 143
143 -
 144
144 -
 145
145 -
 146
146 -
 147
147 -
 148
148 -
 149
149 -
 150
150 -
 151
151 -
152
-
153
-
154
-
155
-
156
-
157
-
158
-
159
-
160
-
161
-
162
-
163
-
164
-
165
-
166
-
167
-
168
-
169
-
170
-
171
-
172
-
173
-
174
-
175
-
176
-
177
-
178
 |
 |