Panasonic WJ-HD716/1000 Operating Instructions - Page 119
Delete images recorded on the hard disk drives manually, Step 1, Important
 |
View all Panasonic WJ-HD716/1000 manuals
Add to My Manuals
Save this manual to your list of manuals |
Page 119 highlights
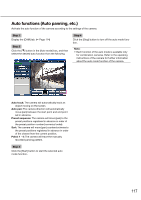
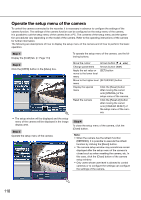
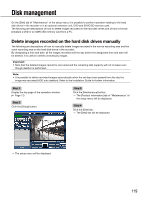
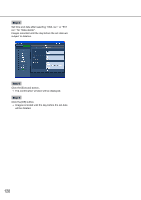
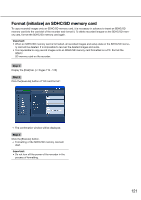
Disk management On the [Disk] tab of "Maintenance" of the setup menu, it is possible to perform operation relating to the hard disk drives in the recorder or in an optional extension unit, DVD and SDHC/SD memory card. The following are descriptions of how to delete images recorded on the hard disk drives and of how to format (initialize) a DVD or an SDHC/SD memory card from a PC. Delete images recorded on the hard disk drives manually The following are descriptions of how to manually delete images recorded in the normal recording area and the event recording area on the hard disk drives in the recorder. By designating a time and date, all the images recorded until the day before the designated time and date will be deleted. It is useful to delete unnecessary images. Important: • Note that the deleted images cannot be recovered and the remaining disk capacity will not increase even though deletion is performed. Note: • It is possible to delete recorded images automatically when the set days have passed from the day the image was recorded (HDD auto deletion). Refer to the Installation Guide for further information. Step 1 Display the top page of the operation window. (☞ Page 77) Step 2 Click the [Setup] button. Step 3 Click the [Maintenance] button. → The [Product information] tab of "Maintenance" of the setup menu will be displayed. Step 4 Click the [Disk] tab. → The [Disk] tab will be displayed. → The setup menu will be displayed. 119
-
 1
1 -
2
-
3
-
4
-
5
-
6
-
7
-
8
-
9
-
10
-
11
-
12
-
13
-
14
-
15
-
16
-
17
-
18
-
19
-
20
-
21
-
22
-
23
-
24
-
25
-
26
-
27
-
28
-
29
-
30
-
31
-
32
-
33
-
34
-
35
-
36
-
37
-
38
-
39
-
40
-
41
-
42
-
43
-
44
-
45
-
46
-
47
-
48
-
49
-
50
-
51
-
52
-
53
-
54
-
55
-
56
-
57
-
58
-
59
-
60
-
61
-
62
-
63
-
64
-
65
-
66
-
67
-
68
-
69
-
70
-
71
-
72
-
73
-
74
-
75
-
76
-
77
-
78
-
79
-
80
-
81
-
82
-
83
-
84
-
85
-
86
-
87
-
88
-
89
-
90
-
91
-
92
-
93
-
94
-
95
-
96
-
97
-
98
-
99
-
100
-
101
-
102
-
103
-
104
-
105
-
106
-
107
-
108
-
109
-
110
-
111
-
112
-
113
-
 114
114 -
 115
115 -
 116
116 -
 117
117 -
 118
118 -
 119
119 -
 120
120 -
 121
121 -
 122
122 -
 123
123 -
 124
124 -
125
-
126
-
127
-
128
-
129
-
130
-
131
-
132
-
133
 |
 |