Panasonic WJ-HD716/1000 Operating Instructions - Page 46
How to operate, Number of the listed data Total
 |
View all Panasonic WJ-HD716/1000 manuals
Add to My Manuals
Save this manual to your list of manuals |
Page 46 highlights
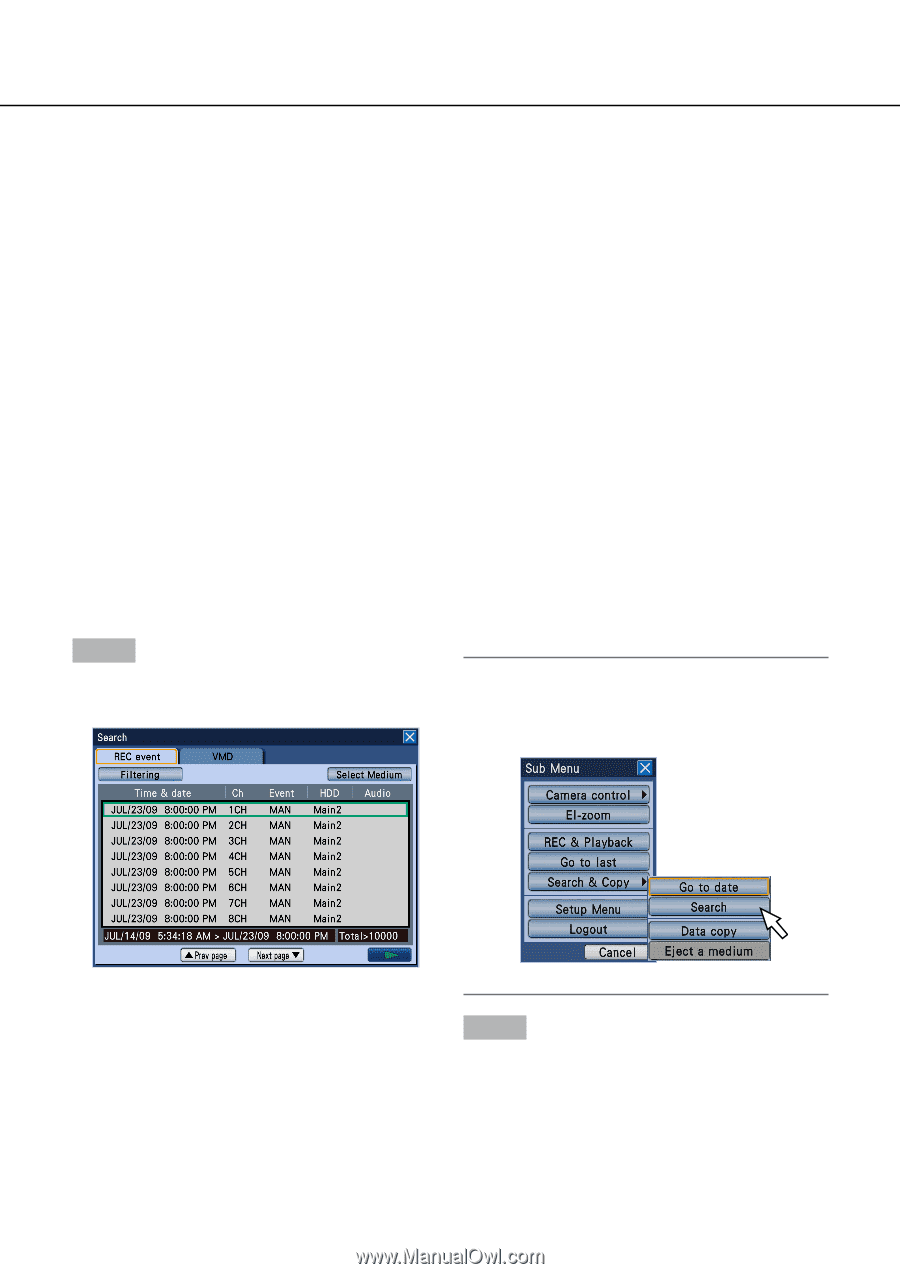
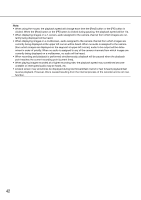
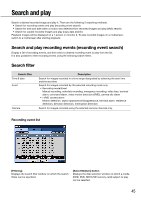
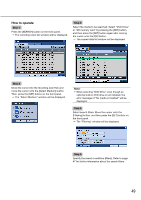
Time & date Displays the start time and date of the recording. Time and date range of the listed data Displays a time and date range of the listed data. Ch Displays the camera channel used for recording. Playback of images recorded using the displayed camera channel will start on a 1-screen. Number of the listed data (Total) Displays the total number of listed data. When more than 10 000 data matched, the ">10000" indication will be displayed. Event Displays the event type. Refer to page 8 for further information about the event type. HDD Displays the hard disk drive number on which images were recorded. Audio Displays the icon to indicate whether audio is attached to the data or not. [Prev page] button Displays the previous page. [Next page] button Displays the next page. [B] (play) button Starts playback of recorded images of the selected recording event. How to operate Step 1 Press the [SEARCH] button on the front panel. → The recording event list window will be displayed. Note: • When using the mouse, click "Search" from the submenu to display the recording event list window. Step 2 Select search filters. Move the cursor onto [Filtering] by pressing the [SET] button on the front panel, and then press the [SET] button on the front panel. → The "Filtering" window will be displayed. 46
-
 1
1 -
2
-
3
-
4
-
5
-
6
-
7
-
8
-
9
-
10
-
11
-
12
-
13
-
14
-
15
-
16
-
17
-
18
-
19
-
20
-
21
-
22
-
23
-
24
-
25
-
26
-
27
-
28
-
29
-
30
-
31
-
32
-
33
-
34
-
35
-
36
-
37
-
38
-
39
-
40
-
 41
41 -
 42
42 -
 43
43 -
 44
44 -
 45
45 -
 46
46 -
 47
47 -
 48
48 -
 49
49 -
 50
50 -
 51
51 -
52
-
53
-
54
-
55
-
56
-
57
-
58
-
59
-
60
-
61
-
62
-
63
-
64
-
65
-
66
-
67
-
68
-
69
-
70
-
71
-
72
-
73
-
74
-
75
-
76
-
77
-
78
-
79
-
80
-
81
-
82
-
83
-
84
-
85
-
86
-
87
-
88
-
89
-
90
-
91
-
92
-
93
-
94
-
95
-
96
-
97
-
98
-
99
-
100
-
101
-
102
-
103
-
104
-
105
-
106
-
107
-
108
-
109
-
110
-
111
-
112
-
113
-
114
-
115
-
116
-
117
-
118
-
119
-
120
-
121
-
122
-
123
-
124
-
125
-
126
-
127
-
128
-
129
-
130
-
131
-
132
-
133
 |
 |