Panasonic WJ-HD716/1000 Operating Instructions - Page 21
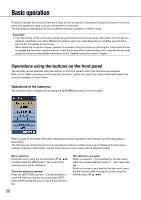
Operations of the software keyboard for time and date entry, Press the [SETUP/ESC] button.
 |
View all Panasonic WJ-HD716/1000 manuals
Add to My Manuals
Save this manual to your list of manuals |
Page 21 highlights
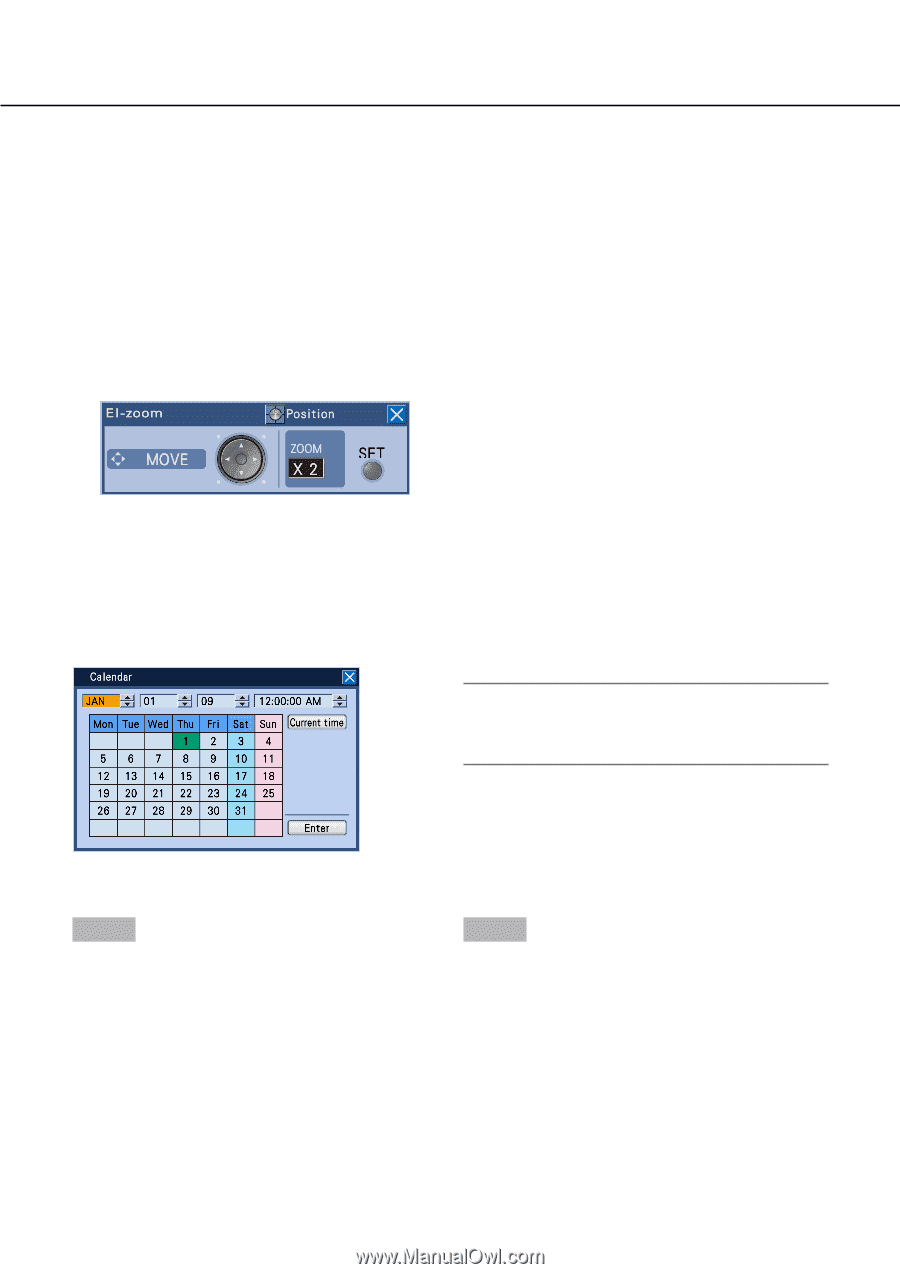
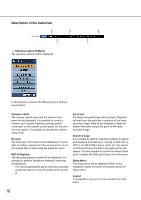
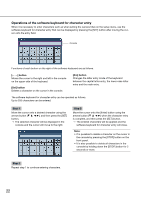
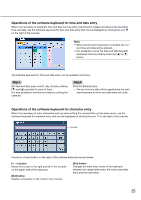
Move the position of a panel It is possible to move a panel to the other corner of the screen by rotating the jog dial (inside). When rotating the jog dial (inside) clockwise, the panel will move to the next corner in order clockwise. When rotating the jog dial counterclockwise, it will move counterclockwise. Operations on panels Panels can be operated by pressing buttons on the front panel including the arrows button (C, D, A, B). Example: When operating the El-zoom panel • Enlarge images from the camera using the electronic zoom Each time the [SET] button is pressed, the zoom factor will change between x2, x4 and x1. • Move the display area of images from cameras When the zoom factor is x2 or x4, it is possible to move the image display area by pressing the arrows button (C, D, A, B). Close the panel Press the [SETUP/ESC] button. Operations of the software keyboard for time and date entry When it is necessary to designate time and date such as when searching for a recording event, use the software keyboard for time and date entry that can be displayed by pressing the [SET] button after moving the cursor onto the time and date entry field. Note: • When the [SET] button is pressed after moving the cursor onto the [Current time] button, the current time and date will be entered. The software keyboard for time and date entry can be operated as follows. Step 1 Step 2 Move the cursor onto each entry field (year, month, day, time) using the arrows button (C, D, A, B), and select values for them using the jog dial (inside). → When the time and date are set, the date mark on the calendar will move to the appropriate position. Move the cursor onto the [Enter] button using the arrows button (C D A B), and then press the [SET] button. → The set time and date will be applied and the soft- ware keyboard for time and date entry will close. 21
-
 1
1 -
2
-
3
-
4
-
5
-
6
-
7
-
8
-
9
-
10
-
11
-
12
-
13
-
14
-
15
-
 16
16 -
 17
17 -
 18
18 -
 19
19 -
 20
20 -
 21
21 -
 22
22 -
 23
23 -
 24
24 -
 25
25 -
 26
26 -
27
-
28
-
29
-
30
-
31
-
32
-
33
-
34
-
35
-
36
-
37
-
38
-
39
-
40
-
41
-
42
-
43
-
44
-
45
-
46
-
47
-
48
-
49
-
50
-
51
-
52
-
53
-
54
-
55
-
56
-
57
-
58
-
59
-
60
-
61
-
62
-
63
-
64
-
65
-
66
-
67
-
68
-
69
-
70
-
71
-
72
-
73
-
74
-
75
-
76
-
77
-
78
-
79
-
80
-
81
-
82
-
83
-
84
-
85
-
86
-
87
-
88
-
89
-
90
-
91
-
92
-
93
-
94
-
95
-
96
-
97
-
98
-
99
-
100
-
101
-
102
-
103
-
104
-
105
-
106
-
107
-
108
-
109
-
110
-
111
-
112
-
113
-
114
-
115
-
116
-
117
-
118
-
119
-
120
-
121
-
122
-
123
-
124
-
125
-
126
-
127
-
128
-
129
-
130
-
131
-
132
-
133
 |
 |