Panasonic WJ-HD716/1000 Operating Instructions - Page 65
Panning/Tilting, Zooming, Step 1
 |
View all Panasonic WJ-HD716/1000 manuals
Add to My Manuals
Save this manual to your list of manuals |
Page 65 highlights
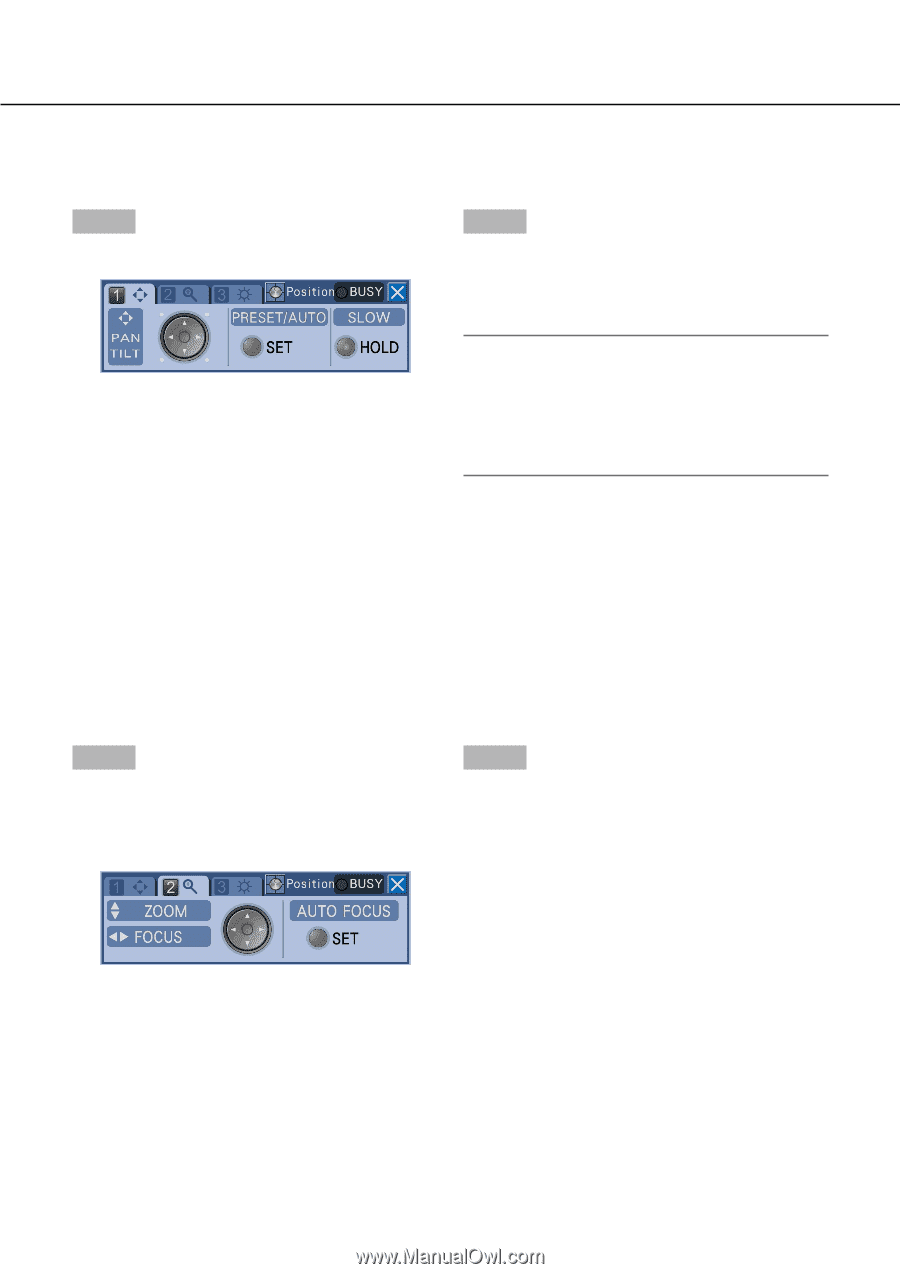
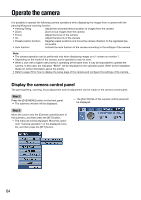
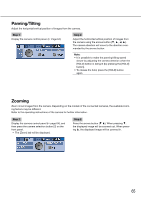
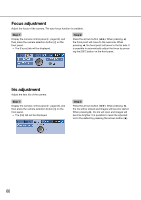
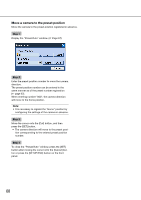
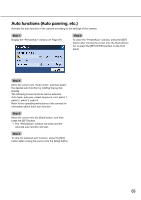
Panning/Tilting Adjust the horizontal/vertical position of images from the camera. Step 1 Step 2 Display the camera control panel. (☞ Page 64) Adjust the horizontal/vertical position of images from the camera using the arrows button (C, D, A, B). The camera direction will move to the direction commanded by the arrows button. Note: • It is possible to make the panning/tilting speed slower by adjusting the camera direction when the [HOLD] button is being lit (by pressing the [HOLD] button). • To release the hold, press the [HOLD] button again. Zooming Zoom in/out images from the camera. Depending on the models of the connected cameras, the available zooming factors may be different. Refer to the operating instructions of the camera for further information. Step 1 Step 2 Display the camera control panel (☞ page 64), and then press the camera selection button [2] on the front panel. → The [Zoom] tab will be displayed. Press the arrows button (C D). When pressing C, the displayed image will be zoomed out. When pressing D, the displayed image will be zoomed in. 65
-
 1
1 -
2
-
3
-
4
-
5
-
6
-
7
-
8
-
9
-
10
-
11
-
12
-
13
-
14
-
15
-
16
-
17
-
18
-
19
-
20
-
21
-
22
-
23
-
24
-
25
-
26
-
27
-
28
-
29
-
30
-
31
-
32
-
33
-
34
-
35
-
36
-
37
-
38
-
39
-
40
-
41
-
42
-
43
-
44
-
45
-
46
-
47
-
48
-
49
-
50
-
51
-
52
-
53
-
54
-
55
-
56
-
57
-
58
-
59
-
 60
60 -
 61
61 -
 62
62 -
 63
63 -
 64
64 -
 65
65 -
 66
66 -
 67
67 -
 68
68 -
 69
69 -
 70
70 -
71
-
72
-
73
-
74
-
75
-
76
-
77
-
78
-
79
-
80
-
81
-
82
-
83
-
84
-
85
-
86
-
87
-
88
-
89
-
90
-
91
-
92
-
93
-
94
-
95
-
96
-
97
-
98
-
99
-
100
-
101
-
102
-
103
-
104
-
105
-
106
-
107
-
108
-
109
-
110
-
111
-
112
-
113
-
114
-
115
-
116
-
117
-
118
-
119
-
120
-
121
-
122
-
123
-
124
-
125
-
126
-
127
-
128
-
129
-
130
-
131
-
132
-
133
 |
 |