Panasonic WJ-HD716/1000 Operating Instructions - Page 67
Preset position function, Registration of preset positions
 |
View all Panasonic WJ-HD716/1000 manuals
Add to My Manuals
Save this manual to your list of manuals |
Page 67 highlights
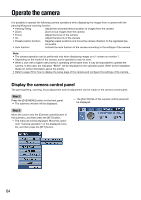
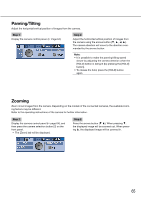
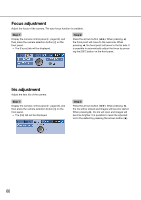
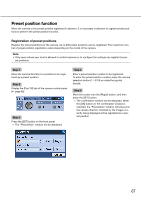
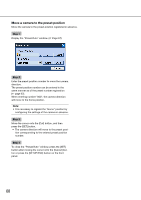
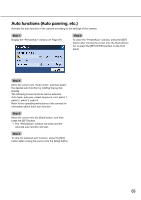
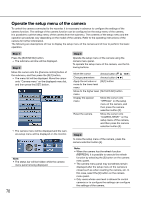
Preset position function Move the camera to the preset position registered in advance. It is necessary in advance to register preset positions to perform the preset position function. Registration of preset positions Register the preset positions for the camera. Up to 256 preset positions can be registered. The maximum number of preset position registration varies depending on the model of the camera. Note: • Only users whose user level is allowed to control cameras or to configure the settings can register the pre- set positions. Step 1 Move the camera direction to a position to be registered as a preset position. Step 2 Display the [Pan/Tilt] tab of the camera control panel (☞ page 65) Step 3 Press the [SET] button on the front panel. → The "Preset/Auto" window will be displayed. Step 4 Enter a preset position number to be registered. To enter the preset position number, press the camera selection button (1 - 0/10) or rotate the jog dial (inside). Step 5 Move the cursor onto the [Regist] button, and then press the [SET] button. → The confirmation window will be displayed. When the [OK] button on the confirmation window is selected, the "Preset/Auto" window will close and the camera direction checked by the images currently being displayed will be registered as a preset position. 67
-
 1
1 -
2
-
3
-
4
-
5
-
6
-
7
-
8
-
9
-
10
-
11
-
12
-
13
-
14
-
15
-
16
-
17
-
18
-
19
-
20
-
21
-
22
-
23
-
24
-
25
-
26
-
27
-
28
-
29
-
30
-
31
-
32
-
33
-
34
-
35
-
36
-
37
-
38
-
39
-
40
-
41
-
42
-
43
-
44
-
45
-
46
-
47
-
48
-
49
-
50
-
51
-
52
-
53
-
54
-
55
-
56
-
57
-
58
-
59
-
60
-
61
-
 62
62 -
 63
63 -
 64
64 -
 65
65 -
 66
66 -
 67
67 -
 68
68 -
 69
69 -
 70
70 -
 71
71 -
 72
72 -
73
-
74
-
75
-
76
-
77
-
78
-
79
-
80
-
81
-
82
-
83
-
84
-
85
-
86
-
87
-
88
-
89
-
90
-
91
-
92
-
93
-
94
-
95
-
96
-
97
-
98
-
99
-
100
-
101
-
102
-
103
-
104
-
105
-
106
-
107
-
108
-
109
-
110
-
111
-
112
-
113
-
114
-
115
-
116
-
117
-
118
-
119
-
120
-
121
-
122
-
123
-
124
-
125
-
126
-
127
-
128
-
129
-
130
-
131
-
132
-
133
 |
 |