Pioneer AVIC-Z110BT Owner's Manual - Page 91
Setting the automatic rejection, function, Clearing memory, Updating the Bluetooth, wireless - firmware update
 |
UPC - 012562956404
View all Pioneer AVIC-Z110BT manuals
Add to My Manuals
Save this manual to your list of manuals |
Page 91 highlights
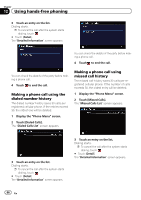
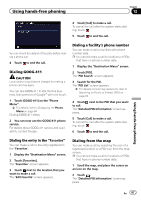
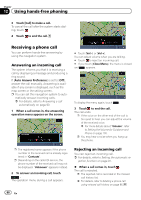
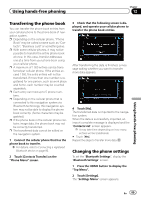
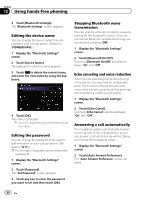
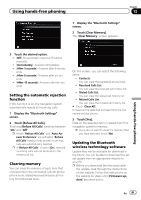
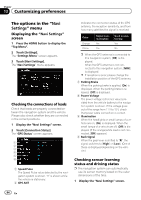
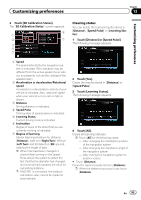
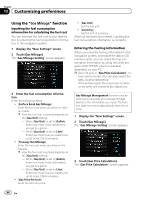
Using hands-free phoning Chapter 12 1 Display the "Bluetooth Settings" screen. 2 Touch [Clear Memory]. The "Clear Memory" screen appears. Using hands-free phoning 3 Touch the desired option. ! [Off]: No automatic response. Respond manually ! [Immediately]: Answers immediately ! [After 3 seconds]: Answers after three seconds ! [After 6 seconds]: Answers after six seconds ! [After 10 seconds]: Answers after ten seconds Setting the automatic rejection function If this function is on, the navigation system automatically rejects all incoming calls. 1 Display the "Bluetooth Settings" screen. 2 Touch [Refuse All Calls]. Touching [Refuse All Calls] switches between "On" and "Off". p If both "Refuse All Calls" and "Auto Answer Preference" are activated, "Refuse All Calls" takes priority and all incoming calls are automatically rejected. p If "Refuse All Calls" is set to [On], rejected incoming calls will not be stored in the missed call list. Clearing memory You can clear the memory of each item that corresponds to the connected cellular phone: phone book, dialed/received/missed call history list and preset dials. On this screen, you can select the following items: ! Contacts: You can clear the registered phone book. ! Received Calls List: You can clear the received call history list. ! Dialed Calls List: You can clear the dialed call history list. ! Missed Calls List: You can clear the missed call history list. # Touch [Clear All]. It clears all the data that correspond to the connected cellular phone. 3 Touch [Yes]. Data on the selected item is cleared from this navigation system's memory. p If you do not want to clear the memory that you have selected, touch [No]. Updating the Bluetooth wireless technology software Update files will be available for download in the future. You will be able to download the latest update from an appropriate website to your PC. p Before you download the files and install the update, read through the instructions on the website. Follow the instructions on the website for steps until [Firmware update] becomes active. En 91
-
 1
1 -
2
-
3
-
4
-
5
-
6
-
7
-
8
-
9
-
10
-
11
-
12
-
13
-
14
-
15
-
16
-
17
-
18
-
19
-
20
-
21
-
22
-
23
-
24
-
25
-
26
-
27
-
28
-
29
-
30
-
31
-
32
-
33
-
34
-
35
-
36
-
37
-
38
-
39
-
40
-
41
-
42
-
43
-
44
-
45
-
46
-
47
-
48
-
49
-
50
-
51
-
52
-
53
-
54
-
55
-
56
-
57
-
58
-
59
-
60
-
61
-
62
-
63
-
64
-
65
-
66
-
67
-
68
-
69
-
70
-
71
-
72
-
73
-
74
-
75
-
76
-
77
-
78
-
79
-
80
-
81
-
82
-
83
-
84
-
85
-
 86
86 -
 87
87 -
 88
88 -
 89
89 -
 90
90 -
 91
91 -
 92
92 -
 93
93 -
 94
94 -
 95
95 -
 96
96 -
97
-
98
-
99
-
100
-
101
-
102
-
103
-
104
-
105
-
106
-
107
-
108
-
109
-
110
-
111
-
112
-
113
-
114
-
115
-
116
-
117
-
118
-
119
-
120
-
121
-
122
-
123
-
124
-
125
-
126
-
127
-
128
-
129
-
130
-
131
-
132
-
133
-
134
-
135
-
136
-
137
-
138
-
139
-
140
-
141
-
142
-
143
-
144
-
145
-
146
-
147
-
148
-
149
-
150
-
151
-
152
-
153
-
154
-
155
-
156
-
157
-
158
-
159
-
160
-
161
-
162
-
163
-
164
-
165
-
166
-
167
-
168
-
169
-
170
-
171
-
172
-
173
-
174
-
175
-
176
-
177
-
178
-
179
-
180
-
181
-
182
-
183
-
184
-
185
-
186
-
187
-
188
-
189
-
190
-
191
-
192
-
193
-
194
-
195
-
196
-
197
-
198
-
199
-
200
-
201
-
202
-
203
-
204
-
205
-
206
-
207
-
208
-
209
-
210
-
211
-
212
-
213
-
214
-
215
-
216
 |
 |