Pioneer AVIC-Z110BT Owner's Manual - Page 94
The options in the, Customizing preferences - dimensions
 |
UPC - 012562956404
View all Pioneer AVIC-Z110BT manuals
Add to My Manuals
Save this manual to your list of manuals |
Page 94 highlights
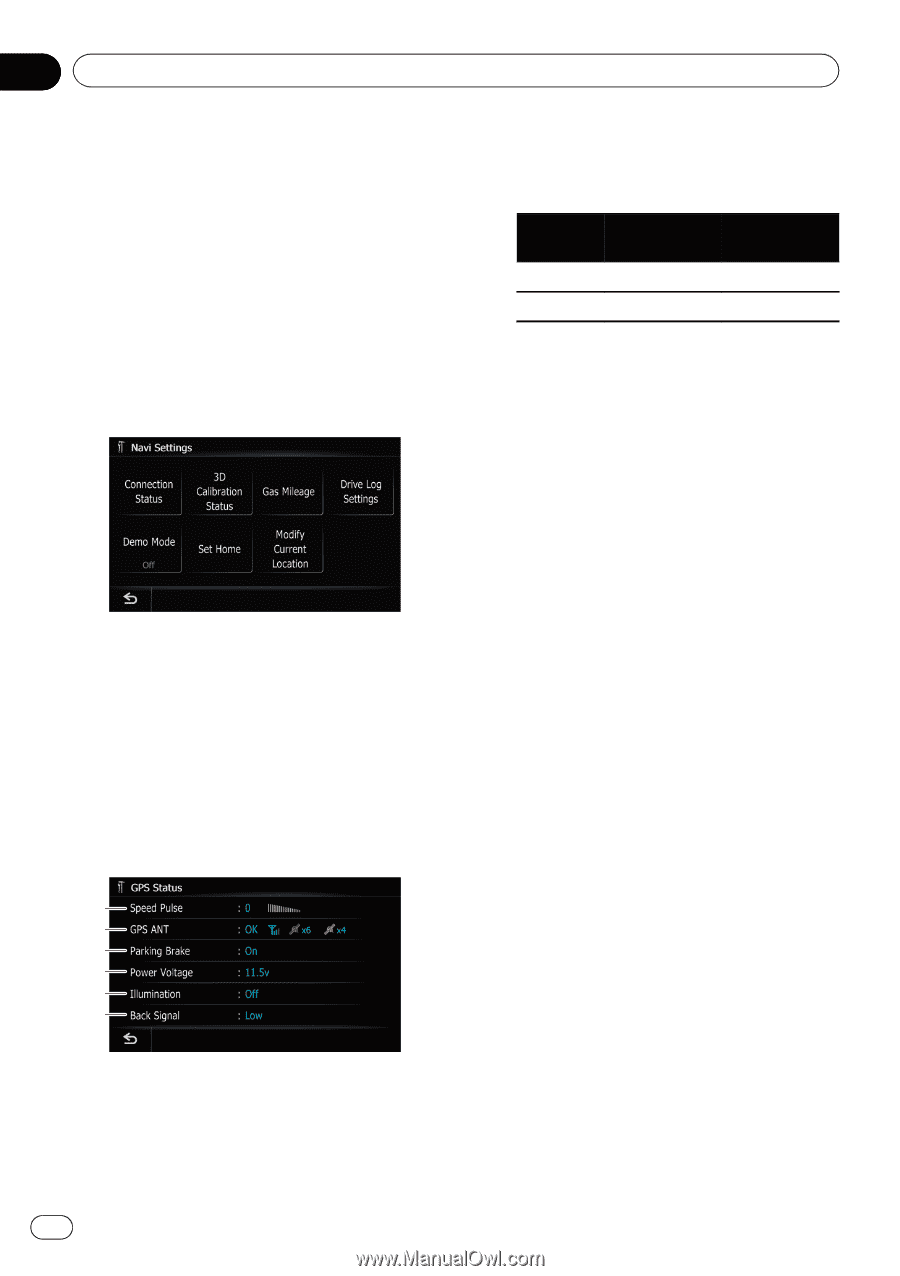
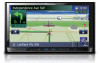
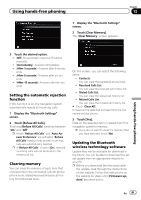
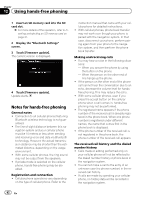
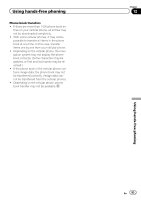
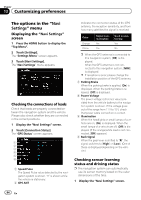
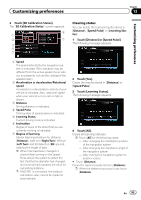
Chapter 13 Customizing preferences The options in the "Navi Settings" menu Displaying the "Navi Settings" screen 1 Press the HOME button to display the "Top Menu". 2 Touch [Settings]. The "Settings Menu" screen appears. 3 Touch [Navi Settings]. The "Navi Settings" menu appears. Checking the connections of leads Check that leads are properly connected between the navigation system and the vehicle. Please also check whether they are connected in the correct positions. 1 Display the "Navi Settings" screen. 2 Touch [Connection Status]. The "GPS Status" screen appears. 1 2 3 4 5 6 1 Speed Pulse The Speed Pulse value detected by the navigation system is shown. "0" is shown while the vehicle is stationary. 2 GPS ANT Indicates the connection status of the GPS antenna, the reception sensitivity, and from how many satellites the signal is received. Color Orange Yellow Signal communication Yes Yes Used in positioning Yes No p When the GPS antenna is connected to this navigation system, [OK] is displayed. When the GPS antenna is not connected to this navigation system, [NOK] is displayed. p If reception is poor, please change the installation position of the GPS antenna. 3 Parking Brake When the parking brake is applied, [On] is displayed. When the parking brake is released, [Off] is displayed. 4 Power Voltage The power voltage (reference value) provided from the vehicle battery to the navigation system is shown. If the voltage goes out of the range from 11 V to 15 V, check that power cable connection is correct. 5 Illumination When the headlights or small lamps of a vehicle are on, [On] is displayed. When the small lamps of a vehicle are off, [Off] is displayed. (If the orange/white lead is not connected, [Off] appears.) 6 Back Signal When the gear lever is shifted to "R", the signal switches to [High] or [Low]. (One of these is displayed depending on the vehicle.) Checking sensor learning status and driving status p The navigation system can automatically use its sensor memory based on the outer dimensions of the tires. 1 Display the "Navi Settings" screen. 94 En
-
 1
1 -
2
-
3
-
4
-
5
-
6
-
7
-
8
-
9
-
10
-
11
-
12
-
13
-
14
-
15
-
16
-
17
-
18
-
19
-
20
-
21
-
22
-
23
-
24
-
25
-
26
-
27
-
28
-
29
-
30
-
31
-
32
-
33
-
34
-
35
-
36
-
37
-
38
-
39
-
40
-
41
-
42
-
43
-
44
-
45
-
46
-
47
-
48
-
49
-
50
-
51
-
52
-
53
-
54
-
55
-
56
-
57
-
58
-
59
-
60
-
61
-
62
-
63
-
64
-
65
-
66
-
67
-
68
-
69
-
70
-
71
-
72
-
73
-
74
-
75
-
76
-
77
-
78
-
79
-
80
-
81
-
82
-
83
-
84
-
85
-
86
-
87
-
88
-
 89
89 -
 90
90 -
 91
91 -
 92
92 -
 93
93 -
 94
94 -
 95
95 -
 96
96 -
 97
97 -
 98
98 -
 99
99 -
100
-
101
-
102
-
103
-
104
-
105
-
106
-
107
-
108
-
109
-
110
-
111
-
112
-
113
-
114
-
115
-
116
-
117
-
118
-
119
-
120
-
121
-
122
-
123
-
124
-
125
-
126
-
127
-
128
-
129
-
130
-
131
-
132
-
133
-
134
-
135
-
136
-
137
-
138
-
139
-
140
-
141
-
142
-
143
-
144
-
145
-
146
-
147
-
148
-
149
-
150
-
151
-
152
-
153
-
154
-
155
-
156
-
157
-
158
-
159
-
160
-
161
-
162
-
163
-
164
-
165
-
166
-
167
-
168
-
169
-
170
-
171
-
172
-
173
-
174
-
175
-
176
-
177
-
178
-
179
-
180
-
181
-
182
-
183
-
184
-
185
-
186
-
187
-
188
-
189
-
190
-
191
-
192
-
193
-
194
-
195
-
196
-
197
-
198
-
199
-
200
-
201
-
202
-
203
-
204
-
205
-
206
-
207
-
208
-
209
-
210
-
211
-
212
-
213
-
214
-
215
-
216
 |
 |