Samsung SGH-I997 User Manual (user Manual) (ver.f8) (English) - Page 129
Date and Time, About Phone, Select date format - firmware
 |
View all Samsung SGH-I997 manuals
Add to My Manuals
Save this manual to your list of manuals |
Page 129 highlights
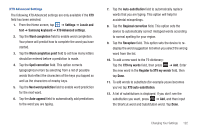
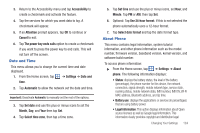
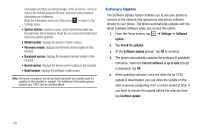
3. Return to the Accessibility menu and tap Accessibility to create a checkmark and activate the feature. 4. Tap the services for which you want data to log. A checkmark will appear. 5. If an Attention prompt appears, tap OK to continue or Cancel to exit. 6. Tap The power key ends calls option to create a checkmark if you want to press the power key to end calls. This will not turn off the screen. Date and Time This menu allows you to change the current time and date displayed. 1. From the Home screen, tap ➔ Settings ➔ Date and time. 2. Tap Automatic to allow the network set the date and time. Important!: Deactivate Automatic to manually set the rest of the options. 3. Tap Set date and use the plus or minus icons to set the Month, Day, and Year then tap Set. 4. Tap Select time zone, then tap a time zone. 5. Tap Set time and use the plus or minus icons, set Hour, and Minute. Tap PM or AM, then tap Set. 6. Optional: Tap Use 24-hour format. If this is not selected the phone automatically uses a 12-hour format. 7. Tap Select date format and tap the date format type. About Phone This menu contains legal information, system tutorial information, and other phone information such as the model number, firmware version, baseband version, kernal version, and software build number. To access phone information: ᮣ From the Home screen, tap ➔ Settings ➔ About phone. The following information displays: • Status: displays the battery status, the level of the battery (percentage), the phone number for this device, the network connection, signal strength, mobile network type, service state, roaming status, mobile network state, IMEI number, IMEI SV, Wi-Fi MAC address, Bluetooth address, and Up time. • Battery use: displays the applications or services (in percentages) that are using battery power. • Legal information: This option displays information about Open source licenses as well as Google legal information. This information clearly provides copyright and distribution legal Changing Your Settings 124
-
 1
1 -
2
-
3
-
4
-
5
-
6
-
7
-
8
-
9
-
10
-
11
-
12
-
13
-
14
-
15
-
16
-
17
-
18
-
19
-
20
-
21
-
22
-
23
-
24
-
25
-
26
-
27
-
28
-
29
-
30
-
31
-
32
-
33
-
34
-
35
-
36
-
37
-
38
-
39
-
40
-
41
-
42
-
43
-
44
-
45
-
46
-
47
-
48
-
49
-
50
-
51
-
52
-
53
-
54
-
55
-
56
-
57
-
58
-
59
-
60
-
61
-
62
-
63
-
64
-
65
-
66
-
67
-
68
-
69
-
70
-
71
-
72
-
73
-
74
-
75
-
76
-
77
-
78
-
79
-
80
-
81
-
82
-
83
-
84
-
85
-
86
-
87
-
88
-
89
-
90
-
91
-
92
-
93
-
94
-
95
-
96
-
97
-
98
-
99
-
100
-
101
-
102
-
103
-
104
-
105
-
106
-
107
-
108
-
109
-
110
-
111
-
112
-
113
-
114
-
115
-
116
-
117
-
118
-
119
-
120
-
121
-
122
-
123
-
 124
124 -
 125
125 -
 126
126 -
 127
127 -
 128
128 -
 129
129 -
 130
130 -
 131
131 -
 132
132 -
 133
133 -
 134
134 -
135
-
136
-
137
-
138
-
139
-
140
-
141
-
142
-
143
-
144
-
145
-
146
-
147
-
148
-
149
-
150
-
151
-
152
-
153
-
154
-
155
-
156
-
157
-
158
-
159
-
160
-
161
-
162
-
163
-
164
-
165
-
166
-
167
-
168
-
169
-
170
-
171
-
172
-
173
-
174
-
175
-
176
-
177
-
178
-
179
-
180
-
181
-
182
-
183
-
184
-
185
-
186
-
187
-
188
-
189
-
190
-
191
-
192
-
193
-
194
-
195
-
196
-
197
-
198
-
199
-
200
-
201
-
202
-
203
-
204
-
205
 |
 |