Samsung SGH-I997 User Manual (user Manual) (ver.f8) (English) - Page 92
Camcorder Options - flash file
 |
View all Samsung SGH-I997 manuals
Add to My Manuals
Save this manual to your list of manuals |
Page 92 highlights
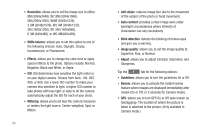
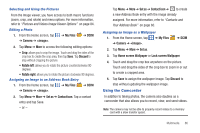
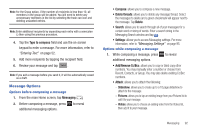
Shooting Video Tip: When shooting video in direct sunlight or in bright conditions, it is recommended that you provide your subject with sufficient light by having the light source behind you. 1. From the main Home screen, tap Camera the camera mode. to activate 2. Tap the Camera mode icon ( ) to switch to Camcorder mode ( ). 3. Using the phone's main display screen as a viewfinder, adjust the image by aiming the camcorder at the subject. 4. Press the Video key ( ) to begin shooting video. 5. Tap to pause the recording or tap to stop the recording and save the video file to your Camera folder. 6. Once the file has been saved, tap for review. to play your video 7. Press to return to the viewer. 87 Camcorder Options Options are represented by icons across both sides of the screen. Note: The options disappear after a few seconds. Tap the screen to make them reappear. Camera / Camcorder Mode: allows you to take a photo in various modes. Once you change the mode, the corresponding indicator appears at the top left of the display. Choose from Camera or Camcorder. Recording mode: allows you to set the recording mode to either: Normal, which is limited only by available space on the destination location, or Limit for MMS, which is limited by MMS size restrictions. Flash: allows you to set the flash options to Off or On. Exposure value: allows you to adjust the brightness level by moving the slider across the page. 1280 Resolution: allows you to set the video size to either: 720 1280x720, 720x480, 640x480, 320x240, or 176x144.
-
 1
1 -
2
-
3
-
4
-
5
-
6
-
7
-
8
-
9
-
10
-
11
-
12
-
13
-
14
-
15
-
16
-
17
-
18
-
19
-
20
-
21
-
22
-
23
-
24
-
25
-
26
-
27
-
28
-
29
-
30
-
31
-
32
-
33
-
34
-
35
-
36
-
37
-
38
-
39
-
40
-
41
-
42
-
43
-
44
-
45
-
46
-
47
-
48
-
49
-
50
-
51
-
52
-
53
-
54
-
55
-
56
-
57
-
58
-
59
-
60
-
61
-
62
-
63
-
64
-
65
-
66
-
67
-
68
-
69
-
70
-
71
-
72
-
73
-
74
-
75
-
76
-
77
-
78
-
79
-
80
-
81
-
82
-
83
-
84
-
85
-
86
-
 87
87 -
 88
88 -
 89
89 -
 90
90 -
 91
91 -
 92
92 -
 93
93 -
 94
94 -
 95
95 -
 96
96 -
 97
97 -
98
-
99
-
100
-
101
-
102
-
103
-
104
-
105
-
106
-
107
-
108
-
109
-
110
-
111
-
112
-
113
-
114
-
115
-
116
-
117
-
118
-
119
-
120
-
121
-
122
-
123
-
124
-
125
-
126
-
127
-
128
-
129
-
130
-
131
-
132
-
133
-
134
-
135
-
136
-
137
-
138
-
139
-
140
-
141
-
142
-
143
-
144
-
145
-
146
-
147
-
148
-
149
-
150
-
151
-
152
-
153
-
154
-
155
-
156
-
157
-
158
-
159
-
160
-
161
-
162
-
163
-
164
-
165
-
166
-
167
-
168
-
169
-
170
-
171
-
172
-
173
-
174
-
175
-
176
-
177
-
178
-
179
-
180
-
181
-
182
-
183
-
184
-
185
-
186
-
187
-
188
-
189
-
190
-
191
-
192
-
193
-
194
-
195
-
196
-
197
-
198
-
199
-
200
-
201
-
202
-
203
-
204
-
205
 |
 |