Sharp MX-C300W Operating Guide - Page 115
SETTINGS THE DESTINATION, Viewing the destination list - fax setup
 |
View all Sharp MX-C300W manuals
Add to My Manuals
Save this manual to your list of manuals |
Page 115 highlights
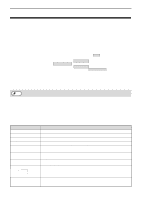
FAX FUNCTIONS SETTINGS THE DESTINATION Specify a sending source of received data and forwarding destination network folder to configure a forwarding table. Up to 10 forwarding tables can be configured. For each forwarding table, set the following items: ● Forward Condition (enabling/disabling forwarding, and the conditions to determine forwarding) ● Sender number (fax number) ● Forwarding destinations (network folder) Note • The names of the destination number (Forward destination 1 to 10) cannot be changed. • Only the network folder can be specified for a forwarding destination. E-mail address, Scan to FTP, Scan to Desktop, and fax number cannot be specified. Viewing the destination list 1 Click [Destination]. The destination list appears. Item Inbound Routing Number Forward Condition [Delete] button [Clear Checked] button Description Displays whether Inbound Routing function is enabled. Displays the forwarding destination number (Forward Destination 1 to 10). Each of setup menu is displayed by clicking each number. Displays the forward condition of the destination (enabling/disabling and determining the destination setting). To delete the forwarding condition stored in a destination number, select the "Number" checkbox of the destination number and click the [Delete] button. Clicking this clears all "Number" checkboxes. Settings the destination 1 Click [Destination] and click the destination number to be set. 2 Select [Enable] in "Forward Condition" and select the determining condition for forwarding. Select [Forward (All)] or [Forward (Sender)]. 3 If you wish to forward received data from a specific sender, enter the sender's fax number in "Sender Number". Enter the fax number using up to 20 digits. To enter the fax number from the fax addresses stored in the machine, click the [Select from Address Book] button. The "Fax Destination" screen appears, and you can select the sender's number from the fax address list. 4 Enter the destination network folder in "Forward Destination (Max.5)". Up to five network folder can be specified as the destination. Two types of methods are available for entering the destination. The set network folder are displayed in "Forwarding Destination Settings". • Entering an network folder directly Click the [Direct Entry] button. When the "Forwarding Destination Settings (Direct Entry)" appears, enter a network folder information ("Hostname or IP Address", "User Name", "Password"), and click the [Submit] button. • Selecting an network folder from the address book Click the [Select From Address Book] button. The "Destination List" screen appears, and you can select an network folder from the network folder list. To delete a set network folder, select the checkbox at the left of the network folder you wish to delete, and then Note click the [Delete] button. 115
-
 1
1 -
2
-
3
-
4
-
5
-
6
-
7
-
8
-
9
-
10
-
11
-
12
-
13
-
14
-
15
-
16
-
17
-
18
-
19
-
20
-
21
-
22
-
23
-
24
-
25
-
26
-
27
-
28
-
29
-
30
-
31
-
32
-
33
-
34
-
35
-
36
-
37
-
38
-
39
-
40
-
41
-
42
-
43
-
44
-
45
-
46
-
47
-
48
-
49
-
50
-
51
-
52
-
53
-
54
-
55
-
56
-
57
-
58
-
59
-
60
-
61
-
62
-
63
-
64
-
65
-
66
-
67
-
68
-
69
-
70
-
71
-
72
-
73
-
74
-
75
-
76
-
77
-
78
-
79
-
80
-
81
-
82
-
83
-
84
-
85
-
86
-
87
-
88
-
89
-
90
-
91
-
92
-
93
-
94
-
95
-
96
-
97
-
98
-
99
-
100
-
101
-
102
-
103
-
104
-
105
-
106
-
107
-
108
-
109
-
 110
110 -
 111
111 -
 112
112 -
 113
113 -
 114
114 -
 115
115 -
 116
116 -
 117
117 -
 118
118 -
 119
119 -
 120
120 -
121
-
122
-
123
-
124
-
125
-
126
-
127
-
128
-
129
-
130
-
131
-
132
-
133
-
134
-
135
-
136
-
137
-
138
-
139
-
140
-
141
-
142
-
143
-
144
-
145
-
146
-
147
-
148
-
149
-
150
-
151
-
152
-
153
-
154
-
155
-
156
-
157
-
158
-
159
-
160
-
161
-
162
-
163
-
164
-
165
-
166
-
167
-
168
-
169
-
170
-
171
-
172
-
173
-
174
-
175
-
176
-
177
-
178
-
179
-
180
-
181
-
182
-
183
-
184
-
185
-
186
-
187
-
188
-
189
-
190
-
191
-
192
-
193
-
194
-
195
-
196
-
197
-
198
-
199
-
200
-
201
-
202
-
203
-
204
-
205
-
206
-
207
-
208
-
209
-
210
 |
 |
