Sharp MX-C300W Operating Guide - Page 186
Sending Function, Print Station # In Rcvd Data
 |
View all Sharp MX-C300W manuals
Add to My Manuals
Save this manual to your list of manuals |
Page 186 highlights
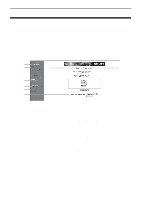
SYSTEM SETTINGS Sending Function These settings are used to change the default settings (initially set at the factory) for the various fax transmission functions to settings that better meet your needs. Select the [Sending Function] to configure the settings. Original Size Enter Set the size of originals scanned on the document glass. Normally 8-1/2" x 11" is set. Set Res. Con. This setting is used to adjust the exposure level when scanning an original to be faxed. The initial setting is standard resolution and auto exposure mode. Send Mode This setting is used to select whether the default mode for sending faxes is memory transmission or direct transmission. The initial setting is "Memory TX". Quick On Line TX This setting is used to select whether or not quick on-line transmission (transmission while original pages are being scanned into memory) takes place when a memory transmission is performed. If quick on-line transmission is disabled, transmission will not begin until all original pages have been scanned into memory. Normally quick on-line transmission is enabled. When this function is disabled, transmission will not begin until all pages of the document have been scanned. Note that this setting does not apply to manual transmission. (See "Storing transmission jobs (memory transmission)" (p.90).) • Quick on-line is enabled and a checkmark appears in the checkbox. • If this procedure is performed when quick on-line is enabled, the checkmark will be cleared and quick on-line disabled. Print Station # In Rcvd Data This setting lets you select the position (inside or outside the original image) of the date and sender's information that are printed at the top of each fax page you send. Normally outside the original image is selected. To have your name and number printed inside the original image, select "In Data". For more detailed information on the position of each setting, see "INCLUDING SENDER INFORMATION ON FAXES (OWN NUMBER SENDING)" (p.109). Address Review You can specify whether a screen appears for confirmation of the destination when sending a fax. Note When the "Only apply to direct entry" checkbox is selected, the Address Review screen only appears when the fax number is entered with the numeric keys or the [REDIAL] key. Recall Setting (Busy) This setting is used to set the number of recall attempts and the interval between recall attempts when a transmission is not successful due to the line being busy or other reason. Normally the machine is set to make 2 recall attempts at intervals of 3 minutes. If you do not wish to have recalling take place, set the number of attempts to "0". Note Even if this setting is enabled, the machine will not re-attempt the call when a fax is sent by manual transmission. Recall Set (Err) When sending a fax, this setting is used to select whether or not the machine will automatically re-attempt the call if the transmission fails due to a line error. Normally the machine is set to make 1 recall attempt at intervals of 1 minute. If you do not wish to have recalling take place, set the number of attempts to "0". Note • If the recall interval is set to "0", the machine will immediately call again after the connection is broken due to the line error. • Even if this setting is enabled, the machine will not re-attempt the call when a fax is sent by manual transmission. Ring Timeout In Auto TX When sending a fax by automatic transmission (see "Storing transmission jobs (memory transmission)" (p.90)), this setting lets you select the amount of time that the machine waits before breaking the connection when the other machine does not answer your machine's call. If the other machine does not respond within this set time, your machine will automatically break the connection. Time selections are "30 sec." and "45 sec.". Normally "45 sec." is selected. 186
-
 1
1 -
2
-
3
-
4
-
5
-
6
-
7
-
8
-
9
-
10
-
11
-
12
-
13
-
14
-
15
-
16
-
17
-
18
-
19
-
20
-
21
-
22
-
23
-
24
-
25
-
26
-
27
-
28
-
29
-
30
-
31
-
32
-
33
-
34
-
35
-
36
-
37
-
38
-
39
-
40
-
41
-
42
-
43
-
44
-
45
-
46
-
47
-
48
-
49
-
50
-
51
-
52
-
53
-
54
-
55
-
56
-
57
-
58
-
59
-
60
-
61
-
62
-
63
-
64
-
65
-
66
-
67
-
68
-
69
-
70
-
71
-
72
-
73
-
74
-
75
-
76
-
77
-
78
-
79
-
80
-
81
-
82
-
83
-
84
-
85
-
86
-
87
-
88
-
89
-
90
-
91
-
92
-
93
-
94
-
95
-
96
-
97
-
98
-
99
-
100
-
101
-
102
-
103
-
104
-
105
-
106
-
107
-
108
-
109
-
110
-
111
-
112
-
113
-
114
-
115
-
116
-
117
-
118
-
119
-
120
-
121
-
122
-
123
-
124
-
125
-
126
-
127
-
128
-
129
-
130
-
131
-
132
-
133
-
134
-
135
-
136
-
137
-
138
-
139
-
140
-
141
-
142
-
143
-
144
-
145
-
146
-
147
-
148
-
149
-
150
-
151
-
152
-
153
-
154
-
155
-
156
-
157
-
158
-
159
-
160
-
161
-
162
-
163
-
164
-
165
-
166
-
167
-
168
-
169
-
170
-
171
-
172
-
173
-
174
-
175
-
176
-
177
-
178
-
179
-
180
-
 181
181 -
 182
182 -
 183
183 -
 184
184 -
 185
185 -
 186
186 -
 187
187 -
 188
188 -
 189
189 -
 190
190 -
 191
191 -
192
-
193
-
194
-
195
-
196
-
197
-
198
-
199
-
200
-
201
-
202
-
203
-
204
-
205
-
206
-
207
-
208
-
209
-
210
 |
 |
