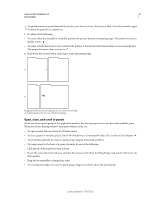
Adobe 25520388 User Guide - Page 17
Tools panel and Options panel, Tools
 |
UPC - 718659493202
View all Adobe 25520388 manuals
Add to My Manuals
Save this manual to your list of manuals |
Page 17 highlights
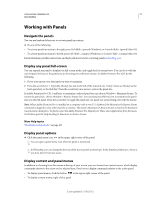
USING ADOBE PREMIERE PRO 12 User interface Tools panel and Options panel When you open the Options panel, it opens by default in the horizontal docking area running just under the menu bar, forming the Options bar. You can undock, move, and redock the Options panel like any other panel. By default, the Options panel contains a menu of workspaces and a link to CS Services. You can also dock the Tools panel to the Options panel. Tools When you select a tool, the pointer changes shape according to the selection. For example, when you select the Razor tool and position the pointer over a clip in a Timeline panel, the icon changes to a razor . However, the Selection tool icon can change to reflect the task currently being performed. In some cases, pressing a modifier key (such as Shift) as you use a tool changes its function, and its icon changes accordingly. Select tools from the Tools panel, or use a keyboard shortcut. You can resize the Tools panel and orient it vertically or horizontally. Note: The Selection tool is the default tool. It's used for everything other than specialized functions. If the program isn't responding as you expect, make sure that the Selection tool is selected. A G B H C I D J E F K Toolbox A. Selection tool B. Ripple Edit tool C. Rate Stretch tool D. Slip tool E. Pen tool F. Hand tool G. Track Select tool H. Rolling Edit tool I. Razor tool J. Slide tool K. Zoom tool Select any tool to activate it for use in a Timeline panel by clicking it or pressing its keyboard shortcut. Let the cursor hover over a tool to see its name and keyboard shortcut. Selection Tool The standard tool for selecting clips, menu items, and other objects in the user interface. It's generally a good practice to select the Selection Tool as soon as you are done using any of the other, more specialized, tools. For more information about using the Selection Tool, see "Select one or more clips" on page 197. Track Selection Tool Select this tool to select all the clips to the right of the cursor in a sequence. To select a clip and all clips to the right in its own track, click the clip. To select a clip and all clips to its right in all tracks, Shift-click the clip. Pressing Shift changes the Track Selection Tool into the Multi-track Selection Tool. For more information about using the Track Selection Tool, see "Select one or more clips" on page 197 and "Delete all clips on one track" on page 204. Ripple Edit Tool Select this tool to trim the In or Out point of a clip in a Timeline. The Ripple Edit Tool closes gaps caused by the edit and preserves all edits to the left or right of the trimmed clip. For more information about using the Ripple Edit tool, see "Making rolling and ripple edits" on page 187 or this video tutorial about the Ripple Edit Tool by Andrew Devis Rolling Edit Tool Select this tool to roll the edit point between two clips in a Timeline. The Rolling Edit Tool trims the In point of one and the Out point of the other, while leaving the combined duration of the two clips unchanged. For more information about using the Rolling Edit tool, see "Making rolling and ripple edits" on page 187 or this video tutorial about the Rolling Edit Tool by Andrew Devis. Rate Stretch Tool Select this tool to shorten a clip in a Timeline by speeding up its playback, or to lengthen it by slowing it down. The Rate Stretch Tool changes speed and duration, but leaves the In and Out points of the clip Last updated 1/16/2012
-
 1
1 -
2
-
3
-
4
-
5
-
6
-
7
-
8
-
9
-
10
-
11
-
 12
12 -
 13
13 -
 14
14 -
 15
15 -
 16
16 -
 17
17 -
 18
18 -
 19
19 -
 20
20 -
 21
21 -
 22
22 -
23
-
24
-
25
-
26
-
27
-
28
-
29
-
30
-
31
-
32
-
33
-
34
-
35
-
36
-
37
-
38
-
39
-
40
-
41
-
42
-
43
-
44
-
45
-
46
-
47
-
48
-
49
-
50
-
51
-
52
-
53
-
54
-
55
-
56
-
57
-
58
-
59
-
60
-
61
-
62
-
63
-
64
-
65
-
66
-
67
-
68
-
69
-
70
-
71
-
72
-
73
-
74
-
75
-
76
-
77
-
78
-
79
-
80
-
81
-
82
-
83
-
84
-
85
-
86
-
87
-
88
-
89
-
90
-
91
-
92
-
93
-
94
-
95
-
96
-
97
-
98
-
99
-
100
-
101
-
102
-
103
-
104
-
105
-
106
-
107
-
108
-
109
-
110
-
111
-
112
-
113
-
114
-
115
-
116
-
117
-
118
-
119
-
120
-
121
-
122
-
123
-
124
-
125
-
126
-
127
-
128
-
129
-
130
-
131
-
132
-
133
-
134
-
135
-
136
-
137
-
138
-
139
-
140
-
141
-
142
-
143
-
144
-
145
-
146
-
147
-
148
-
149
-
150
-
151
-
152
-
153
-
154
-
155
-
156
-
157
-
158
-
159
-
160
-
161
-
162
-
163
-
164
-
165
-
166
-
167
-
168
-
169
-
170
-
171
-
172
-
173
-
174
-
175
-
176
-
177
-
178
-
179
-
180
-
181
-
182
-
183
-
184
-
185
-
186
-
187
-
188
-
189
-
190
-
191
-
192
-
193
-
194
-
195
-
196
-
197
-
198
-
199
-
200
-
201
-
202
-
203
-
204
-
205
-
206
-
207
-
208
-
209
-
210
-
211
-
212
-
213
-
214
-
215
-
216
-
217
-
218
-
219
-
220
-
221
-
222
-
223
-
224
-
225
-
226
-
227
-
228
-
229
-
230
-
231
-
232
-
233
-
234
-
235
-
236
-
237
-
238
-
239
-
240
-
241
-
242
-
243
-
244
-
245
-
246
-
247
-
248
-
249
-
250
-
251
-
252
-
253
-
254
-
255
-
256
-
257
-
258
-
259
-
260
-
261
-
262
-
263
-
264
-
265
-
266
-
267
-
268
-
269
-
270
-
271
-
272
-
273
-
274
-
275
-
276
-
277
-
278
-
279
-
280
-
281
-
282
-
283
-
284
-
285
-
286
-
287
-
288
-
289
-
290
-
291
-
292
-
293
-
294
-
295
-
296
-
297
-
298
-
299
-
300
-
301
-
302
-
303
-
304
-
305
-
306
-
307
-
308
-
309
-
310
-
311
-
312
-
313
-
314
-
315
-
316
-
317
-
318
-
319
-
320
-
321
-
322
-
323
-
324
-
325
-
326
-
327
-
328
-
329
-
330
-
331
-
332
-
333
-
334
-
335
-
336
-
337
-
338
-
339
-
340
-
341
-
342
-
343
-
344
-
345
-
346
-
347
-
348
-
349
-
350
-
351
-
352
-
353
-
354
-
355
-
356
-
357
-
358
-
359
-
360
-
361
-
362
-
363
-
364
-
365
-
366
-
367
-
368
-
369
-
370
-
371
-
372
-
373
-
374
-
375
-
376
-
377
-
378
-
379
-
380
-
381
-
382
-
383
-
384
-
385
-
386
-
387
-
388
-
389
-
390
-
391
-
392
-
393
-
394
-
395
-
396
-
397
-
398
-
399
-
400
-
401
-
402
-
403
-
404
-
405
-
406
-
407
-
408
-
409
-
410
-
411
-
412
-
413
-
414
-
415
-
416
-
417
-
418
-
419
-
420
-
421
-
422
-
423
-
424
-
425
-
426
-
427
-
428
-
429
-
430
-
431
-
432
-
433
-
434
-
435
-
436
-
437
-
438
-
439
-
440
-
441
-
442
-
443
-
444
-
445
-
446
-
447
-
448
-
449
-
450
-
451
-
452
-
453
-
454
-
455
-
456
-
457
-
458
-
459
-
460
-
461
-
462
-
463
-
464
 |
 |
