Adobe 25520388 User Guide - Page 288
View keyframes for an effect property in the Timeline panel
 |
UPC - 718659493202
View all Adobe 25520388 manuals
Add to My Manuals
Save this manual to your list of manuals |
Page 288 highlights
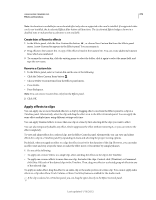
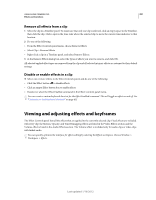
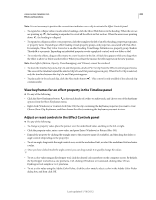
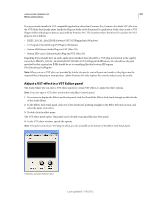
USING ADOBE PREMIERE PRO 283 Effects and transitions Note: It is not necessary to position the current-time indicator over a clip to activate the Effect Controls panel. • To expand or collapse video or audio effects headings, click the Show/Hide button in the heading. When the arrows are pointing up , the heading is expanded to reveal all the effects in that section. When the arrows are pointing down , the heading is collapsed. • To expand or collapse an effect or its properties, click the triangle to the left of an effect heading, property group name, or property name. Expanding an effect heading reveals property groups, and properties, associated with that effect. For example, Three-Way Color Corrector is an effect heading. Tonal Range Definition is a property group. Shadow Threshold is a property. Expanding an individual property reveals a graphical control, such as a slider or dial. • To reorder the effects, drag an effect name to a new location in the list. A black line appears while you drag when the effect is above or below another effect. When you release the mouse, the effect appears in the new position. Note: Fixed effects (Motion, Opacity, Time Remapping, and Volume) cannot be reordered. • To show the timeline beyond a clip's In and Out points, deselect Pin To Clip from the Effect Controls panel menu. The areas of the timeline beyond the selected clip's In and Out points appear in gray. When Pin To Clip is selected, only the timeline between the clip's In and Out points appear. • To play audio in the selected clip, click the Play Audio button . This control is only available if the selected clip contains audio. View keyframes for an effect property in the Timeline panel ❖ Do any of the following: • Click the Show Keyframes button in the track header of a video or audio track, and choose one of the keyframe options from the Show Keyframes menu. • Right-click (Windows) or Control-click (Mac OS) the clip containing the keyframe properties you want to view. Choose Show Clip Keyframes, and then choose the effect containing the keyframes you want to view. Adjust or reset controls in the Effect Controls panel ❖ Do any of the following: • To change a property value, place the pointer over the underlined value, and drag to the left or right. • Click the property value, enter a new value, and press Enter (Windows) or Return (Mac OS). • Expand the property by clicking the triangle next to the property name (if available), and then drag the slider or angle control (depending on the property). • To set an angle, drag inside the angle control area, scrub the underlined text, or select the underlined text and enter a value. Once you have clicked inside the angle control, you can drag outside it to quickly change the values. • To set a color value using an Eyedropper tool, click the desired color anywhere on the computer screen. By default, the Eyedropper tool selects a one pixel area. Ctrl-clicking (Windows) or Command-clicking (Mac OS) an Eyedropper tool samples a 5 x 5 pixel area. • To set a color value using the Adobe Color Picker, click the color swatch, select a color in the Adobe Color Picker dialog box, and then click OK. Last updated 1/16/2012
-
 1
1 -
2
-
3
-
4
-
5
-
6
-
7
-
8
-
9
-
10
-
11
-
12
-
13
-
14
-
15
-
16
-
17
-
18
-
19
-
20
-
21
-
22
-
23
-
24
-
25
-
26
-
27
-
28
-
29
-
30
-
31
-
32
-
33
-
34
-
35
-
36
-
37
-
38
-
39
-
40
-
41
-
42
-
43
-
44
-
45
-
46
-
47
-
48
-
49
-
50
-
51
-
52
-
53
-
54
-
55
-
56
-
57
-
58
-
59
-
60
-
61
-
62
-
63
-
64
-
65
-
66
-
67
-
68
-
69
-
70
-
71
-
72
-
73
-
74
-
75
-
76
-
77
-
78
-
79
-
80
-
81
-
82
-
83
-
84
-
85
-
86
-
87
-
88
-
89
-
90
-
91
-
92
-
93
-
94
-
95
-
96
-
97
-
98
-
99
-
100
-
101
-
102
-
103
-
104
-
105
-
106
-
107
-
108
-
109
-
110
-
111
-
112
-
113
-
114
-
115
-
116
-
117
-
118
-
119
-
120
-
121
-
122
-
123
-
124
-
125
-
126
-
127
-
128
-
129
-
130
-
131
-
132
-
133
-
134
-
135
-
136
-
137
-
138
-
139
-
140
-
141
-
142
-
143
-
144
-
145
-
146
-
147
-
148
-
149
-
150
-
151
-
152
-
153
-
154
-
155
-
156
-
157
-
158
-
159
-
160
-
161
-
162
-
163
-
164
-
165
-
166
-
167
-
168
-
169
-
170
-
171
-
172
-
173
-
174
-
175
-
176
-
177
-
178
-
179
-
180
-
181
-
182
-
183
-
184
-
185
-
186
-
187
-
188
-
189
-
190
-
191
-
192
-
193
-
194
-
195
-
196
-
197
-
198
-
199
-
200
-
201
-
202
-
203
-
204
-
205
-
206
-
207
-
208
-
209
-
210
-
211
-
212
-
213
-
214
-
215
-
216
-
217
-
218
-
219
-
220
-
221
-
222
-
223
-
224
-
225
-
226
-
227
-
228
-
229
-
230
-
231
-
232
-
233
-
234
-
235
-
236
-
237
-
238
-
239
-
240
-
241
-
242
-
243
-
244
-
245
-
246
-
247
-
248
-
249
-
250
-
251
-
252
-
253
-
254
-
255
-
256
-
257
-
258
-
259
-
260
-
261
-
262
-
263
-
264
-
265
-
266
-
267
-
268
-
269
-
270
-
271
-
272
-
273
-
274
-
275
-
276
-
277
-
278
-
279
-
280
-
281
-
282
-
 283
283 -
 284
284 -
 285
285 -
 286
286 -
 287
287 -
 288
288 -
 289
289 -
 290
290 -
 291
291 -
 292
292 -
 293
293 -
294
-
295
-
296
-
297
-
298
-
299
-
300
-
301
-
302
-
303
-
304
-
305
-
306
-
307
-
308
-
309
-
310
-
311
-
312
-
313
-
314
-
315
-
316
-
317
-
318
-
319
-
320
-
321
-
322
-
323
-
324
-
325
-
326
-
327
-
328
-
329
-
330
-
331
-
332
-
333
-
334
-
335
-
336
-
337
-
338
-
339
-
340
-
341
-
342
-
343
-
344
-
345
-
346
-
347
-
348
-
349
-
350
-
351
-
352
-
353
-
354
-
355
-
356
-
357
-
358
-
359
-
360
-
361
-
362
-
363
-
364
-
365
-
366
-
367
-
368
-
369
-
370
-
371
-
372
-
373
-
374
-
375
-
376
-
377
-
378
-
379
-
380
-
381
-
382
-
383
-
384
-
385
-
386
-
387
-
388
-
389
-
390
-
391
-
392
-
393
-
394
-
395
-
396
-
397
-
398
-
399
-
400
-
401
-
402
-
403
-
404
-
405
-
406
-
407
-
408
-
409
-
410
-
411
-
412
-
413
-
414
-
415
-
416
-
417
-
418
-
419
-
420
-
421
-
422
-
423
-
424
-
425
-
426
-
427
-
428
-
429
-
430
-
431
-
432
-
433
-
434
-
435
-
436
-
437
-
438
-
439
-
440
-
441
-
442
-
443
-
444
-
445
-
446
-
447
-
448
-
449
-
450
-
451
-
452
-
453
-
454
-
455
-
456
-
457
-
458
-
459
-
460
-
461
-
462
-
463
-
464
 |
 |