Adobe 25520388 User Guide - Page 302
Change Position keyframes in a motion path, Move a clip along a curve
 |
UPC - 718659493202
View all Adobe 25520388 manuals
Add to My Manuals
Save this manual to your list of manuals |
Page 302 highlights
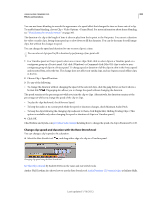
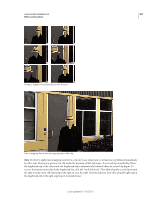
USING ADOBE PREMIERE PRO 297 Effects and transitions Change Position keyframes in a motion path You can change the value of a Position keyframe, and thereby adjust your motion path, simply by dragging the Position keyframe (indicated by a white X) in the Program Monitor. 1 Select a clip that has Motion effect keyframes. 2 In the Effect Controls panel, click the Transform icon Program Monitor. next to Motion. The clip's motion path appears in the 3 Do any of the following: • To move an existing keyframe, drag the keyframe handle in the Program Monitor. • To create a new position keyframe, set the current-time indicator between existing keyframes and drag the clip in the Program Monitor to the desired location. A new keyframe appears in the Effect Controls panel, the Program Monitor, and in the clip in the Timeline panel. Note: This procedure changes the position value at a keyframe. To change the timing of keyframes, move Keyframe icons in the Effect Controls panel. Move a clip along a curve You can move a clip along a curve using Bezier handles in the Program Monitor. 1 Select a clip in a Timeline panel. 2 Move the current-time indicator in either a Timeline panel or the Effect Controls panel to the time where you want to start the animation-any frame between the clip's current In point and its Out point. 3 Click the triangle next to the Motion control in the Effects Controls panel. 4 Click the Toggle Animation button next to the Position control to set the first keyframe. 5 Drag the current-time indicator in either a Timeline panel or the Effect Controls panel to the frame where you want to end the animation. 6 In the Program Monitor, drag the clip to the location where you want the clip at the end of its movement. A motion path appears in the Program Monitor connecting the start and end points of the clip's motion. Small Bezier handles appear near either end of this motion path. 7 Drag either or both of the Bezier handles in any direction to create curves in the motion path. 8 In the Effect Controls panel, right-click (Windows) or Control-click (Mac OS) a Position keyframe. 9 Select a type of acceleration from either the Temporal Interpolation or the Spatial Interpolation menu. 10 Drag the current-time indicator to the first keyframe and press Enter (Windows) or Return (Mac OS) to preview the motion of the clip. Adjust or animate clip anchor points By default, a clip anchor point is set at the exact center of a clip. You can change the position of a clip in relation to its frame or motion path, however, by moving the clip anchor point. Further, you can change the location of the clip anchor point over time, allowing the clip to move in relation to its frame or motion path. Animating the clip anchor point can be used, for example, to create an image-panning effect. 1 In a Timeline panel, place the current-time indicator at the beginning of a clip. 2 Click on the clip in the Program Monitor. The clip anchor point becomes visible at the center of the clip. Last updated 1/16/2012
-
 1
1 -
2
-
3
-
4
-
5
-
6
-
7
-
8
-
9
-
10
-
11
-
12
-
13
-
14
-
15
-
16
-
17
-
18
-
19
-
20
-
21
-
22
-
23
-
24
-
25
-
26
-
27
-
28
-
29
-
30
-
31
-
32
-
33
-
34
-
35
-
36
-
37
-
38
-
39
-
40
-
41
-
42
-
43
-
44
-
45
-
46
-
47
-
48
-
49
-
50
-
51
-
52
-
53
-
54
-
55
-
56
-
57
-
58
-
59
-
60
-
61
-
62
-
63
-
64
-
65
-
66
-
67
-
68
-
69
-
70
-
71
-
72
-
73
-
74
-
75
-
76
-
77
-
78
-
79
-
80
-
81
-
82
-
83
-
84
-
85
-
86
-
87
-
88
-
89
-
90
-
91
-
92
-
93
-
94
-
95
-
96
-
97
-
98
-
99
-
100
-
101
-
102
-
103
-
104
-
105
-
106
-
107
-
108
-
109
-
110
-
111
-
112
-
113
-
114
-
115
-
116
-
117
-
118
-
119
-
120
-
121
-
122
-
123
-
124
-
125
-
126
-
127
-
128
-
129
-
130
-
131
-
132
-
133
-
134
-
135
-
136
-
137
-
138
-
139
-
140
-
141
-
142
-
143
-
144
-
145
-
146
-
147
-
148
-
149
-
150
-
151
-
152
-
153
-
154
-
155
-
156
-
157
-
158
-
159
-
160
-
161
-
162
-
163
-
164
-
165
-
166
-
167
-
168
-
169
-
170
-
171
-
172
-
173
-
174
-
175
-
176
-
177
-
178
-
179
-
180
-
181
-
182
-
183
-
184
-
185
-
186
-
187
-
188
-
189
-
190
-
191
-
192
-
193
-
194
-
195
-
196
-
197
-
198
-
199
-
200
-
201
-
202
-
203
-
204
-
205
-
206
-
207
-
208
-
209
-
210
-
211
-
212
-
213
-
214
-
215
-
216
-
217
-
218
-
219
-
220
-
221
-
222
-
223
-
224
-
225
-
226
-
227
-
228
-
229
-
230
-
231
-
232
-
233
-
234
-
235
-
236
-
237
-
238
-
239
-
240
-
241
-
242
-
243
-
244
-
245
-
246
-
247
-
248
-
249
-
250
-
251
-
252
-
253
-
254
-
255
-
256
-
257
-
258
-
259
-
260
-
261
-
262
-
263
-
264
-
265
-
266
-
267
-
268
-
269
-
270
-
271
-
272
-
273
-
274
-
275
-
276
-
277
-
278
-
279
-
280
-
281
-
282
-
283
-
284
-
285
-
286
-
287
-
288
-
289
-
290
-
291
-
292
-
293
-
294
-
295
-
296
-
 297
297 -
 298
298 -
 299
299 -
 300
300 -
 301
301 -
 302
302 -
 303
303 -
 304
304 -
 305
305 -
 306
306 -
 307
307 -
308
-
309
-
310
-
311
-
312
-
313
-
314
-
315
-
316
-
317
-
318
-
319
-
320
-
321
-
322
-
323
-
324
-
325
-
326
-
327
-
328
-
329
-
330
-
331
-
332
-
333
-
334
-
335
-
336
-
337
-
338
-
339
-
340
-
341
-
342
-
343
-
344
-
345
-
346
-
347
-
348
-
349
-
350
-
351
-
352
-
353
-
354
-
355
-
356
-
357
-
358
-
359
-
360
-
361
-
362
-
363
-
364
-
365
-
366
-
367
-
368
-
369
-
370
-
371
-
372
-
373
-
374
-
375
-
376
-
377
-
378
-
379
-
380
-
381
-
382
-
383
-
384
-
385
-
386
-
387
-
388
-
389
-
390
-
391
-
392
-
393
-
394
-
395
-
396
-
397
-
398
-
399
-
400
-
401
-
402
-
403
-
404
-
405
-
406
-
407
-
408
-
409
-
410
-
411
-
412
-
413
-
414
-
415
-
416
-
417
-
418
-
419
-
420
-
421
-
422
-
423
-
424
-
425
-
426
-
427
-
428
-
429
-
430
-
431
-
432
-
433
-
434
-
435
-
436
-
437
-
438
-
439
-
440
-
441
-
442
-
443
-
444
-
445
-
446
-
447
-
448
-
449
-
450
-
451
-
452
-
453
-
454
-
455
-
456
-
457
-
458
-
459
-
460
-
461
-
462
-
463
-
464
 |
 |