Adobe 25520388 User Guide - Page 206
Move clips to a different track, Rearrange clips in a Timeline panel
 |
UPC - 718659493202
View all Adobe 25520388 manuals
Add to My Manuals
Save this manual to your list of manuals |
Page 206 highlights
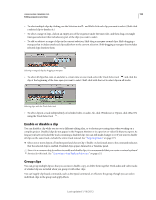
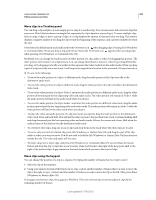
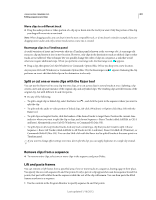
USING ADOBE PREMIERE PRO 201 Editing sequences and clips Move clips to a different track ❖ Drag the audio portion or video portion of a clip up or down into the track you want. Only the portion of the clip you drag will move into a new track. Note: When dragging audio, you can drop it into the next compatible track, or if one doesn't exist (for example, if you are dragging stereo audio and only a mono track exists), a new one is created. Rearrange clips in a Timeline panel A useful variation of insert and overwrite edits in a Timeline panel is known as the rearrange edit. A rearrange edit extracts a clip and inserts it into its new location. However, only clips in the destination track are shifted; clips in other tracks are not affected. This technique lets you quickly change the order of clips in a sequence, a task that would otherwise require additional steps. When you perform a rearrange edit, the Rearrange icon appears. ❖ Drag a clip; then press Ctrl+Alt (Windows) or Command+Option (Mac OS) as you drop it to a new location. As you press Ctrl+Alt (Windows) or Command+Option (Mac OS), the Rearrange icon appears. Releasing the clip performs an insert edit that shifts clips in the destination tracks only. Split or cut one or more clips with the Razor tool You can use the Razor tool to cut a clip into two clips, or to cut across clips in several tracks at once. Splitting a clip creates a new and separate instance of the original clip, and any linked clips. The resulting clips are full versions of the original clip, but with different In and Out points. ❖ Do any of the following: • To split a single clip or linked clip, select the Razor tool split the clip. , and click the point in the sequence where you want to • To split only the audio or video portion of linked clips, Alt-click (Windows) or Option-click (Mac OS) with the Razor tool. • To split clips on targeted tracks, click the headers of the desired tracks to target them. Position the current-time indicator where you want to split the clip or clips, and choose Sequence > Razor Tracks (called Add Edit in CS5.5 and later). Alternatively, press Ctrl+K (Windows), or Command+K (Mac OS). • To split clips on all except locked tracks, lock any track containing a clip that you don't want to split. Choose Sequence > Razor All Tracks (called Add Edit to All Tracks in CS5.5 and later). Press Ctrl+Shift+K (Windows), or Command+Shift+K (Mac OS). You can also Shift-click with the Razor tool to split all tracks at the same point in a Timeline panel. If you want to change effect settings over time, don't split the clip; you can apply keyframes to a single clip instead. Remove clips from a sequence ❖ To remove entire clips, select one or more clips in the sequence and press Delete. Lift and paste frames You can remove or lift frames from a specified area of one or more tracks in a sequence, leaving a gap in their place. You specify the area with sequence In and Out points. If only a part of a clip appears between the sequence In and Out points, that part will be lifted from the sequence while the rest of the clip will remain. You can then paste the lifted frames anywhere in a sequence. 1 Use the controls in the Program Monitor to specify sequence In and Out points. Last updated 1/16/2012
-
 1
1 -
2
-
3
-
4
-
5
-
6
-
7
-
8
-
9
-
10
-
11
-
12
-
13
-
14
-
15
-
16
-
17
-
18
-
19
-
20
-
21
-
22
-
23
-
24
-
25
-
26
-
27
-
28
-
29
-
30
-
31
-
32
-
33
-
34
-
35
-
36
-
37
-
38
-
39
-
40
-
41
-
42
-
43
-
44
-
45
-
46
-
47
-
48
-
49
-
50
-
51
-
52
-
53
-
54
-
55
-
56
-
57
-
58
-
59
-
60
-
61
-
62
-
63
-
64
-
65
-
66
-
67
-
68
-
69
-
70
-
71
-
72
-
73
-
74
-
75
-
76
-
77
-
78
-
79
-
80
-
81
-
82
-
83
-
84
-
85
-
86
-
87
-
88
-
89
-
90
-
91
-
92
-
93
-
94
-
95
-
96
-
97
-
98
-
99
-
100
-
101
-
102
-
103
-
104
-
105
-
106
-
107
-
108
-
109
-
110
-
111
-
112
-
113
-
114
-
115
-
116
-
117
-
118
-
119
-
120
-
121
-
122
-
123
-
124
-
125
-
126
-
127
-
128
-
129
-
130
-
131
-
132
-
133
-
134
-
135
-
136
-
137
-
138
-
139
-
140
-
141
-
142
-
143
-
144
-
145
-
146
-
147
-
148
-
149
-
150
-
151
-
152
-
153
-
154
-
155
-
156
-
157
-
158
-
159
-
160
-
161
-
162
-
163
-
164
-
165
-
166
-
167
-
168
-
169
-
170
-
171
-
172
-
173
-
174
-
175
-
176
-
177
-
178
-
179
-
180
-
181
-
182
-
183
-
184
-
185
-
186
-
187
-
188
-
189
-
190
-
191
-
192
-
193
-
194
-
195
-
196
-
197
-
198
-
199
-
200
-
 201
201 -
 202
202 -
 203
203 -
 204
204 -
 205
205 -
 206
206 -
 207
207 -
 208
208 -
 209
209 -
 210
210 -
 211
211 -
212
-
213
-
214
-
215
-
216
-
217
-
218
-
219
-
220
-
221
-
222
-
223
-
224
-
225
-
226
-
227
-
228
-
229
-
230
-
231
-
232
-
233
-
234
-
235
-
236
-
237
-
238
-
239
-
240
-
241
-
242
-
243
-
244
-
245
-
246
-
247
-
248
-
249
-
250
-
251
-
252
-
253
-
254
-
255
-
256
-
257
-
258
-
259
-
260
-
261
-
262
-
263
-
264
-
265
-
266
-
267
-
268
-
269
-
270
-
271
-
272
-
273
-
274
-
275
-
276
-
277
-
278
-
279
-
280
-
281
-
282
-
283
-
284
-
285
-
286
-
287
-
288
-
289
-
290
-
291
-
292
-
293
-
294
-
295
-
296
-
297
-
298
-
299
-
300
-
301
-
302
-
303
-
304
-
305
-
306
-
307
-
308
-
309
-
310
-
311
-
312
-
313
-
314
-
315
-
316
-
317
-
318
-
319
-
320
-
321
-
322
-
323
-
324
-
325
-
326
-
327
-
328
-
329
-
330
-
331
-
332
-
333
-
334
-
335
-
336
-
337
-
338
-
339
-
340
-
341
-
342
-
343
-
344
-
345
-
346
-
347
-
348
-
349
-
350
-
351
-
352
-
353
-
354
-
355
-
356
-
357
-
358
-
359
-
360
-
361
-
362
-
363
-
364
-
365
-
366
-
367
-
368
-
369
-
370
-
371
-
372
-
373
-
374
-
375
-
376
-
377
-
378
-
379
-
380
-
381
-
382
-
383
-
384
-
385
-
386
-
387
-
388
-
389
-
390
-
391
-
392
-
393
-
394
-
395
-
396
-
397
-
398
-
399
-
400
-
401
-
402
-
403
-
404
-
405
-
406
-
407
-
408
-
409
-
410
-
411
-
412
-
413
-
414
-
415
-
416
-
417
-
418
-
419
-
420
-
421
-
422
-
423
-
424
-
425
-
426
-
427
-
428
-
429
-
430
-
431
-
432
-
433
-
434
-
435
-
436
-
437
-
438
-
439
-
440
-
441
-
442
-
443
-
444
-
445
-
446
-
447
-
448
-
449
-
450
-
451
-
452
-
453
-
454
-
455
-
456
-
457
-
458
-
459
-
460
-
461
-
462
-
463
-
464
 |
 |