Adobe 25520388 User Guide - Page 184
Make a four-point edit, Add clips to a sequence automatically
 |
UPC - 718659493202
View all Adobe 25520388 manuals
Add to My Manuals
Save this manual to your list of manuals |
Page 184 highlights
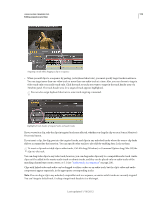
USING ADOBE PREMIERE PRO 179 Editing sequences and clips 3 In the Timeline, drag the source track indicators to the headers of the tracks into which you want the clip components to fall. 4 In the Source and Program Monitors, mark any combination of three In and Out points. 5 In the Source Monitor, do one of the following: • To perform an insert edit, click the Insert button . • To perform an overwrite edit, click the Overwrite button . Make a four-point edit 1 In a Project panel, double-click a clip to open it in the Source Monitor. 2 Click the headers of the tracks in a Timeline panel into which you want to add the clip to target them. 3 In the Timeline, drag the source track indicators to the headers of the tracks into which you want the clip components to fall. 4 Using the Source Monitor, mark an In point and an Out point for the source clip. 5 In the Program Monitor, mark an In point and an Out point in the sequence. 6 in the Source Monitor, do one of the following: • To perform an insert edit, click the Insert button • To perform an insert edit and shift clips in target tracks only, Alt-click (Windows) or Option-click (Mac OS) the Insert button . • To perform an overwrite edit, click the Overwrite button . 7 If the marked source and program durations differ, select an option when prompted: Change Clip Speed (Fit to Fill) Maintains the source clip's In and Out points, but changes the clip's speed so that its duration matches the duration determined by the sequence In and Out points. Trim Clip's Head (Left Side) Automatically changes the source clip's In point so that its duration matches the duration determined by the sequence In and Out points. Trim Clip's Tail (Right Side) Automatically changes the source clip's Out point so that its duration matches the duration determined by the sequence In and Out points. Ignore Sequence In Point Disregards the sequence In point you set, and performs a three-point edit. Ignore Sequence Out Point Disregards the sequence Out point you set, and performs a three-point edit. Add clips to a sequence automatically You can quickly assemble a rough cut or add clips to an existing sequence. The clips added can include the default video and audio transitions. For a video tutorial that demonstrates the creation of a rough cut using the Automate To Sequence command, see the Adobe website. 1 Set In and Out points to define each clip's starting and ending points. 2 Arrange clips in the Project panel. You can add the clips to the sequence in either the order you select them, or in the order that they are arranged in a bin in icon view. You can also add sequences or clips in nested bins. You can arrange clips in a bin in storyboard fashion by setting the Project panel to icon view. (See "Change Project panel views" on page 103.) Last updated 1/16/2012
-
 1
1 -
2
-
3
-
4
-
5
-
6
-
7
-
8
-
9
-
10
-
11
-
12
-
13
-
14
-
15
-
16
-
17
-
18
-
19
-
20
-
21
-
22
-
23
-
24
-
25
-
26
-
27
-
28
-
29
-
30
-
31
-
32
-
33
-
34
-
35
-
36
-
37
-
38
-
39
-
40
-
41
-
42
-
43
-
44
-
45
-
46
-
47
-
48
-
49
-
50
-
51
-
52
-
53
-
54
-
55
-
56
-
57
-
58
-
59
-
60
-
61
-
62
-
63
-
64
-
65
-
66
-
67
-
68
-
69
-
70
-
71
-
72
-
73
-
74
-
75
-
76
-
77
-
78
-
79
-
80
-
81
-
82
-
83
-
84
-
85
-
86
-
87
-
88
-
89
-
90
-
91
-
92
-
93
-
94
-
95
-
96
-
97
-
98
-
99
-
100
-
101
-
102
-
103
-
104
-
105
-
106
-
107
-
108
-
109
-
110
-
111
-
112
-
113
-
114
-
115
-
116
-
117
-
118
-
119
-
120
-
121
-
122
-
123
-
124
-
125
-
126
-
127
-
128
-
129
-
130
-
131
-
132
-
133
-
134
-
135
-
136
-
137
-
138
-
139
-
140
-
141
-
142
-
143
-
144
-
145
-
146
-
147
-
148
-
149
-
150
-
151
-
152
-
153
-
154
-
155
-
156
-
157
-
158
-
159
-
160
-
161
-
162
-
163
-
164
-
165
-
166
-
167
-
168
-
169
-
170
-
171
-
172
-
173
-
174
-
175
-
176
-
177
-
178
-
 179
179 -
 180
180 -
 181
181 -
 182
182 -
 183
183 -
 184
184 -
 185
185 -
 186
186 -
 187
187 -
 188
188 -
 189
189 -
190
-
191
-
192
-
193
-
194
-
195
-
196
-
197
-
198
-
199
-
200
-
201
-
202
-
203
-
204
-
205
-
206
-
207
-
208
-
209
-
210
-
211
-
212
-
213
-
214
-
215
-
216
-
217
-
218
-
219
-
220
-
221
-
222
-
223
-
224
-
225
-
226
-
227
-
228
-
229
-
230
-
231
-
232
-
233
-
234
-
235
-
236
-
237
-
238
-
239
-
240
-
241
-
242
-
243
-
244
-
245
-
246
-
247
-
248
-
249
-
250
-
251
-
252
-
253
-
254
-
255
-
256
-
257
-
258
-
259
-
260
-
261
-
262
-
263
-
264
-
265
-
266
-
267
-
268
-
269
-
270
-
271
-
272
-
273
-
274
-
275
-
276
-
277
-
278
-
279
-
280
-
281
-
282
-
283
-
284
-
285
-
286
-
287
-
288
-
289
-
290
-
291
-
292
-
293
-
294
-
295
-
296
-
297
-
298
-
299
-
300
-
301
-
302
-
303
-
304
-
305
-
306
-
307
-
308
-
309
-
310
-
311
-
312
-
313
-
314
-
315
-
316
-
317
-
318
-
319
-
320
-
321
-
322
-
323
-
324
-
325
-
326
-
327
-
328
-
329
-
330
-
331
-
332
-
333
-
334
-
335
-
336
-
337
-
338
-
339
-
340
-
341
-
342
-
343
-
344
-
345
-
346
-
347
-
348
-
349
-
350
-
351
-
352
-
353
-
354
-
355
-
356
-
357
-
358
-
359
-
360
-
361
-
362
-
363
-
364
-
365
-
366
-
367
-
368
-
369
-
370
-
371
-
372
-
373
-
374
-
375
-
376
-
377
-
378
-
379
-
380
-
381
-
382
-
383
-
384
-
385
-
386
-
387
-
388
-
389
-
390
-
391
-
392
-
393
-
394
-
395
-
396
-
397
-
398
-
399
-
400
-
401
-
402
-
403
-
404
-
405
-
406
-
407
-
408
-
409
-
410
-
411
-
412
-
413
-
414
-
415
-
416
-
417
-
418
-
419
-
420
-
421
-
422
-
423
-
424
-
425
-
426
-
427
-
428
-
429
-
430
-
431
-
432
-
433
-
434
-
435
-
436
-
437
-
438
-
439
-
440
-
441
-
442
-
443
-
444
-
445
-
446
-
447
-
448
-
449
-
450
-
451
-
452
-
453
-
454
-
455
-
456
-
457
-
458
-
459
-
460
-
461
-
462
-
463
-
464
 |
 |
