Epson Stylus Pro 10600 - UltraChrome Ink Printer Guide - Page 105
the color management features of your imaging software instead.
 |
View all Epson Stylus Pro 10600 - UltraChrome Ink manuals
Add to My Manuals
Save this manual to your list of manuals |
Page 105 highlights
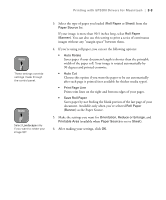
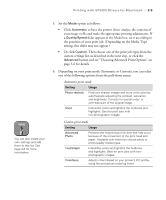
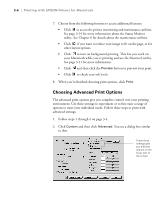
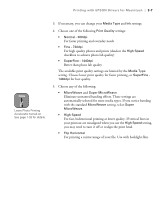
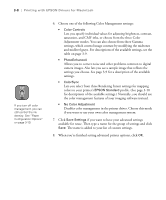
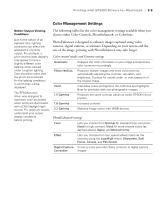
3-8 | Printing with EPSON Drivers for Macintosh TIP If you turn off color management, you can still control the ink density. See "Paper Configuration Options" on page 3-10. 6. Choose one of the following Color Management settings: • Color Controls Lets you specify individual values for adjusting brightness, contrast, saturation, and CMY inks, or choose from the three Color Adjustment modes. You can also choose from three Gamma settings, which control image contrast by modifying the midtones and midlevel grays. For descriptions of the available settings, see the table on page 3-9. • PhotoEnhance4 Allows you to correct noise and other problems common to digital camera images. Also lets you see a sample image that reflects the settings you choose. See page 3-9 for a description of the available settings. • ColorSync Lets you select from three Rendering Intent settings for mapping colors to your printer's EPSON Standard profile. (See page 3-10 for descriptions of the available settings.) Normally, you should use the color management features of your imaging software instead. • No Color Adjustment Disables color management in the printer driver. Choose this mode if you want to use your own color management system. 7. Click Save Settings if you want to have your advanced settings available for reuse. Then type a name for the group of settings and click Save. The name is added to your list of custom settings. 8. When you're finished setting advanced printer options, click OK. 3-8
-
 1
1 -
2
-
3
-
4
-
5
-
6
-
7
-
8
-
9
-
10
-
11
-
12
-
13
-
14
-
15
-
16
-
17
-
18
-
19
-
20
-
21
-
22
-
23
-
24
-
25
-
26
-
27
-
28
-
29
-
30
-
31
-
32
-
33
-
34
-
35
-
36
-
37
-
38
-
39
-
40
-
41
-
42
-
43
-
44
-
45
-
46
-
47
-
48
-
49
-
50
-
51
-
52
-
53
-
54
-
55
-
56
-
57
-
58
-
59
-
60
-
61
-
62
-
63
-
64
-
65
-
66
-
67
-
68
-
69
-
70
-
71
-
72
-
73
-
74
-
75
-
76
-
77
-
78
-
79
-
80
-
81
-
82
-
83
-
84
-
85
-
86
-
87
-
88
-
89
-
90
-
91
-
92
-
93
-
94
-
95
-
96
-
97
-
98
-
99
-
 100
100 -
 101
101 -
 102
102 -
 103
103 -
 104
104 -
 105
105 -
 106
106 -
 107
107 -
 108
108 -
 109
109 -
 110
110 -
111
-
112
-
113
-
114
-
115
-
116
-
117
-
118
-
119
-
120
-
121
-
122
-
123
-
124
-
125
-
126
-
127
-
128
-
129
-
130
-
131
-
132
-
133
-
134
-
135
-
136
-
137
-
138
-
139
-
140
-
141
-
142
-
143
-
144
-
145
-
146
-
147
-
148
-
149
-
150
-
151
-
152
-
153
-
154
-
155
-
156
-
157
-
158
-
159
-
160
-
161
-
162
-
163
-
164
-
165
-
166
-
167
-
168
-
169
-
170
-
171
-
172
-
173
-
174
-
175
-
176
-
177
-
178
-
179
-
180
-
181
-
182
-
183
 |
 |