Epson Stylus Pro 10600 - UltraChrome Ink Printer Guide - Page 45
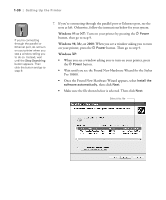
Windows 95 or NT, Windows 98, Me, or 2000, Once the Found New Hardware Wizard appears, select
 |
View all Epson Stylus Pro 10600 - UltraChrome Ink manuals
Add to My Manuals
Save this manual to your list of manuals |
Page 45 highlights
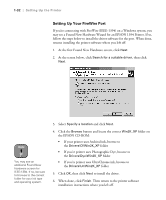
1-30 | Setting Up the Printer Note If you're connecting through the parallel or Ethernet port, do not turn on your printer when you see a window telling you to do so. Instead, wait until the Stop Searching button appears. Then click the button and go to step 9. 7. If you're connecting through the parallel port or Ethernet port, see the note at left. Otherwise, follow the instructions below for your system. Windows 95 or NT: Turn on your printer by pressing the P Power button, then go to step 9. Windows 98, Me, or 2000: When you see a window asking you to turn on your printer, press the P Power button. Then go to step 9. Windows XP: • When you see a window asking you to turn on your printer, press the P Power button. • Wait until you see the Found New Hardware Wizard for the Stylus Pro 10600. • Once the Found New Hardware Wizard appears, select Install the software automatically, then click Next. • Make sure the file shown below is selected. Then click Next. Select this file 1-30
-
 1
1 -
2
-
3
-
4
-
5
-
6
-
7
-
8
-
9
-
10
-
11
-
12
-
13
-
14
-
15
-
16
-
17
-
18
-
19
-
20
-
21
-
22
-
23
-
24
-
25
-
26
-
27
-
28
-
29
-
30
-
31
-
32
-
33
-
34
-
35
-
36
-
37
-
38
-
39
-
 40
40 -
 41
41 -
 42
42 -
 43
43 -
 44
44 -
 45
45 -
 46
46 -
 47
47 -
 48
48 -
 49
49 -
 50
50 -
51
-
52
-
53
-
54
-
55
-
56
-
57
-
58
-
59
-
60
-
61
-
62
-
63
-
64
-
65
-
66
-
67
-
68
-
69
-
70
-
71
-
72
-
73
-
74
-
75
-
76
-
77
-
78
-
79
-
80
-
81
-
82
-
83
-
84
-
85
-
86
-
87
-
88
-
89
-
90
-
91
-
92
-
93
-
94
-
95
-
96
-
97
-
98
-
99
-
100
-
101
-
102
-
103
-
104
-
105
-
106
-
107
-
108
-
109
-
110
-
111
-
112
-
113
-
114
-
115
-
116
-
117
-
118
-
119
-
120
-
121
-
122
-
123
-
124
-
125
-
126
-
127
-
128
-
129
-
130
-
131
-
132
-
133
-
134
-
135
-
136
-
137
-
138
-
139
-
140
-
141
-
142
-
143
-
144
-
145
-
146
-
147
-
148
-
149
-
150
-
151
-
152
-
153
-
154
-
155
-
156
-
157
-
158
-
159
-
160
-
161
-
162
-
163
-
164
-
165
-
166
-
167
-
168
-
169
-
170
-
171
-
172
-
173
-
174
-
175
-
176
-
177
-
178
-
179
-
180
-
181
-
182
-
183
 |
 |
