Epson Stylus Pro 10600 - UltraChrome Ink Printer Guide - Page 93
Printing Trim Lines, Controlling Roll Paper Margins, appears
 |
View all Epson Stylus Pro 10600 - UltraChrome Ink manuals
Add to My Manuals
Save this manual to your list of manuals |
Page 93 highlights
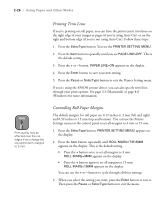
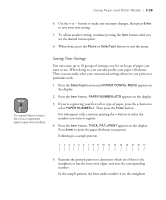
2-26 | Using Paper and Other Media Printing Trim Lines If you're printing on roll paper, you can have the printer print trim lines on the right edge of your images or pages (if you're using Auto Cut) or on the right and bottom edge (if you're not using Auto Cut). Follow these steps: 1. Press the SelecType button. You see the PRINTER SETTING MENU. 2. Press the Item button repeatedly until you see PAGE LINE=OFF. This is the default setting. 3. Press the + or - button. PAPER LINE=ON appears on the display. 4. Press the Enter button to save your new setting. 5. Press the Pause or SelecType button to exit the Printer Setting menu. If you're using the EPSON printer driver, you can also specify trim lines through your print options. See page 3-3 (Macintosh) or page 4-6 (Windows) for more information. Note Print quality may be affected near the cut edges if you change the top and bottom margins to 3 mm. Controlling Roll Paper Margins The default margins for roll paper are 0.12 inches or 3 mm (left and right) and 0.59 inches or 15 mm (top and bottom). You can use the Printer Settings menu on the control panel to set all margins to 3 mm or 15 mm. 1. Press the SelecType button. PRINTER SETTING MENU appears on the display. 2. Press the Item button repeatedly until ROLL MARG=T/B15MM appears on the display. This is the default setting. • Press the + button once to set all margins to 3 mm. ROLL MARG=3MM appears on the display. • Press the + button again to set all margins to 15 mm. ROLL MARG=15MM appears on the display. You can use the + or - button to cycle through all three settings. 3. When you select the setting you want, press the Enter button to save it. Then press the Pause or SelecType button to exit the menu. 2-26
-
 1
1 -
2
-
3
-
4
-
5
-
6
-
7
-
8
-
9
-
10
-
11
-
12
-
13
-
14
-
15
-
16
-
17
-
18
-
19
-
20
-
21
-
22
-
23
-
24
-
25
-
26
-
27
-
28
-
29
-
30
-
31
-
32
-
33
-
34
-
35
-
36
-
37
-
38
-
39
-
40
-
41
-
42
-
43
-
44
-
45
-
46
-
47
-
48
-
49
-
50
-
51
-
52
-
53
-
54
-
55
-
56
-
57
-
58
-
59
-
60
-
61
-
62
-
63
-
64
-
65
-
66
-
67
-
68
-
69
-
70
-
71
-
72
-
73
-
74
-
75
-
76
-
77
-
78
-
79
-
80
-
81
-
82
-
83
-
84
-
85
-
86
-
87
-
 88
88 -
 89
89 -
 90
90 -
 91
91 -
 92
92 -
 93
93 -
 94
94 -
 95
95 -
 96
96 -
 97
97 -
 98
98 -
99
-
100
-
101
-
102
-
103
-
104
-
105
-
106
-
107
-
108
-
109
-
110
-
111
-
112
-
113
-
114
-
115
-
116
-
117
-
118
-
119
-
120
-
121
-
122
-
123
-
124
-
125
-
126
-
127
-
128
-
129
-
130
-
131
-
132
-
133
-
134
-
135
-
136
-
137
-
138
-
139
-
140
-
141
-
142
-
143
-
144
-
145
-
146
-
147
-
148
-
149
-
150
-
151
-
152
-
153
-
154
-
155
-
156
-
157
-
158
-
159
-
160
-
161
-
162
-
163
-
164
-
165
-
166
-
167
-
168
-
169
-
170
-
171
-
172
-
173
-
174
-
175
-
176
-
177
-
178
-
179
-
180
-
181
-
182
-
183
 |
 |