Epson Stylus Pro 10600 - UltraChrome Ink Printer Guide - Page 29
using Archival or UltraChrome ink, shake the cartridge gently, - - ultrachrome ink printer
 |
View all Epson Stylus Pro 10600 - UltraChrome Ink manuals
Add to My Manuals
Save this manual to your list of manuals |
Page 29 highlights
1-14 | Setting Up the Printer 3. Attach the ink label to the inside of the ink compartment cover. 4. Push down on the top of the first cartridge clamp and pull it forward. Note If you have an UltraChrome printer, be sure to install your preferred black ink type. See page 1-12. 5. Locate the package for the black ink cartridge and open it. If you're using Archival or UltraChrome ink, shake the cartridge gently, as shown. 1-14
-
 1
1 -
2
-
3
-
4
-
5
-
6
-
7
-
8
-
9
-
10
-
11
-
12
-
13
-
14
-
15
-
16
-
17
-
18
-
19
-
20
-
21
-
22
-
23
-
 24
24 -
 25
25 -
 26
26 -
 27
27 -
 28
28 -
 29
29 -
 30
30 -
 31
31 -
 32
32 -
 33
33 -
 34
34 -
35
-
36
-
37
-
38
-
39
-
40
-
41
-
42
-
43
-
44
-
45
-
46
-
47
-
48
-
49
-
50
-
51
-
52
-
53
-
54
-
55
-
56
-
57
-
58
-
59
-
60
-
61
-
62
-
63
-
64
-
65
-
66
-
67
-
68
-
69
-
70
-
71
-
72
-
73
-
74
-
75
-
76
-
77
-
78
-
79
-
80
-
81
-
82
-
83
-
84
-
85
-
86
-
87
-
88
-
89
-
90
-
91
-
92
-
93
-
94
-
95
-
96
-
97
-
98
-
99
-
100
-
101
-
102
-
103
-
104
-
105
-
106
-
107
-
108
-
109
-
110
-
111
-
112
-
113
-
114
-
115
-
116
-
117
-
118
-
119
-
120
-
121
-
122
-
123
-
124
-
125
-
126
-
127
-
128
-
129
-
130
-
131
-
132
-
133
-
134
-
135
-
136
-
137
-
138
-
139
-
140
-
141
-
142
-
143
-
144
-
145
-
146
-
147
-
148
-
149
-
150
-
151
-
152
-
153
-
154
-
155
-
156
-
157
-
158
-
159
-
160
-
161
-
162
-
163
-
164
-
165
-
166
-
167
-
168
-
169
-
170
-
171
-
172
-
173
-
174
-
175
-
176
-
177
-
178
-
179
-
180
-
181
-
182
-
183
 |
 |
1-14
1-14
|
Setting Up the Printer
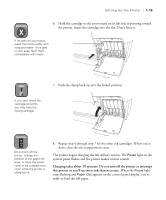
3.
Attach the ink label to the inside of the ink compartment cover.
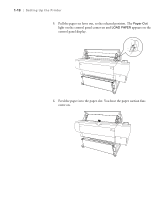
4.
Push down on the top of the first cartridge clamp and pull it forward.
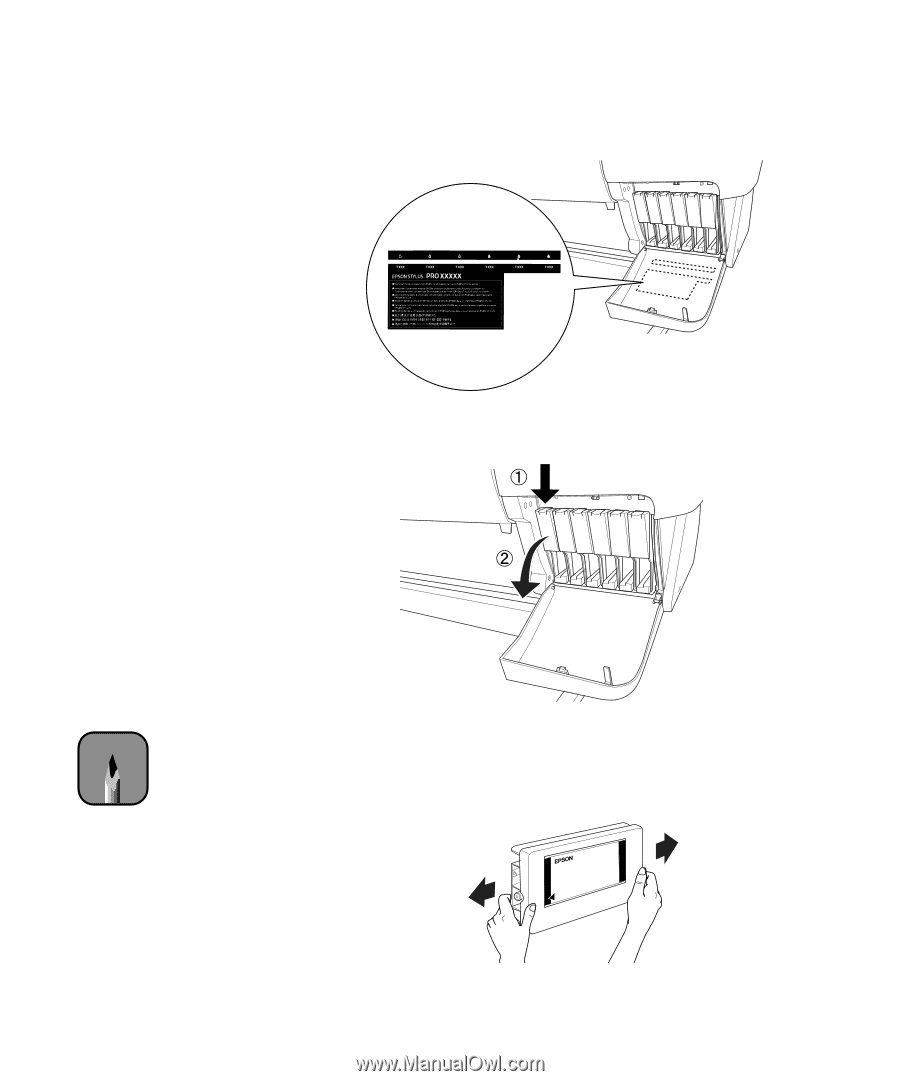
5.
Locate the package for the black ink cartridge and open it. If you
’
re
using Archival or UltraChrome ink, shake the cartridge gently, as
shown.
Note
If you have an Ultra-
Chrome printer, be sure to
install your preferred black
ink type. See page 1-12.