Epson Stylus Pro 10600 - UltraChrome Ink Printer Guide - Page 145
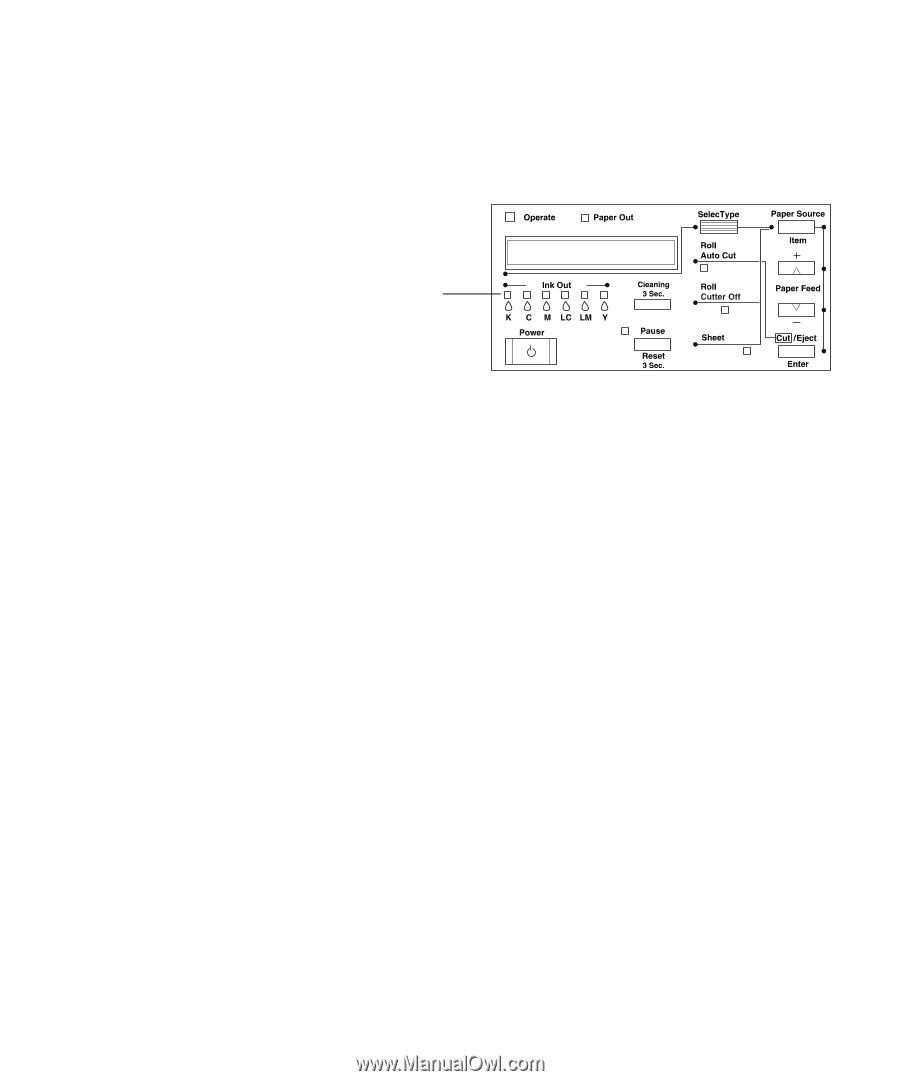
is displayed, on the control panel.
 |
View all Epson Stylus Pro 10600 - UltraChrome Ink manuals
Add to My Manuals
Save this manual to your list of manuals |
Page 145 highlights
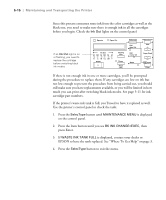
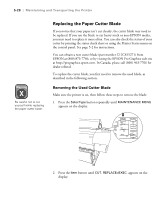
5-16 | Maintaining and Transporting the Printer Since this process consumes some ink from the color cartridges as well as the black one, you need to make sure there is enough ink in all the cartridges before you begin. Check the Ink Out lights on the control panel: If an Ink Out light is on or flashing, you need to replace the cartridge before switching black ink modes If there is not enough ink in one or more cartridges, you'll be prompted during the procedure to replace them. If any cartridges are low on ink but not low enough to prevent the procedure from being carried out, you should still make sure you have replacements available, or you will be limited in how much you can print after switching black ink modes. See page 5-11 for ink cartridge part numbers. If the printer's waste ink tank is full, you'll need to have it replaced as well. Use the printer's control panel to check the tank: 1. Press the SelecType button until MAINTENANCE MENU is displayed on the control panel. 2. Press the Item button until you see BK INK CHANGE=EXEC, then press Enter. 3. If WASTE INK TANK FULL is displayed, contact your dealer or EPSON to have the tank replaced. See "Where To Get Help" on page 3. 4. Press the SelecType button to exit the menu. 5-16
-
 1
1 -
2
-
3
-
4
-
5
-
6
-
7
-
8
-
9
-
10
-
11
-
12
-
13
-
14
-
15
-
16
-
17
-
18
-
19
-
20
-
21
-
22
-
23
-
24
-
25
-
26
-
27
-
28
-
29
-
30
-
31
-
32
-
33
-
34
-
35
-
36
-
37
-
38
-
39
-
40
-
41
-
42
-
43
-
44
-
45
-
46
-
47
-
48
-
49
-
50
-
51
-
52
-
53
-
54
-
55
-
56
-
57
-
58
-
59
-
60
-
61
-
62
-
63
-
64
-
65
-
66
-
67
-
68
-
69
-
70
-
71
-
72
-
73
-
74
-
75
-
76
-
77
-
78
-
79
-
80
-
81
-
82
-
83
-
84
-
85
-
86
-
87
-
88
-
89
-
90
-
91
-
92
-
93
-
94
-
95
-
96
-
97
-
98
-
99
-
100
-
101
-
102
-
103
-
104
-
105
-
106
-
107
-
108
-
109
-
110
-
111
-
112
-
113
-
114
-
115
-
116
-
117
-
118
-
119
-
120
-
121
-
122
-
123
-
124
-
125
-
126
-
127
-
128
-
129
-
130
-
131
-
132
-
133
-
134
-
135
-
136
-
137
-
138
-
139
-
 140
140 -
 141
141 -
 142
142 -
 143
143 -
 144
144 -
 145
145 -
 146
146 -
 147
147 -
 148
148 -
 149
149 -
 150
150 -
151
-
152
-
153
-
154
-
155
-
156
-
157
-
158
-
159
-
160
-
161
-
162
-
163
-
164
-
165
-
166
-
167
-
168
-
169
-
170
-
171
-
172
-
173
-
174
-
175
-
176
-
177
-
178
-
179
-
180
-
181
-
182
-
183
 |
 |