Epson Stylus Pro 10600 - UltraChrome Ink Printer Guide - Page 151
Push down on the cutter, s side pin while turning the latch to the left.
 |
View all Epson Stylus Pro 10600 - UltraChrome Ink manuals
Add to My Manuals
Save this manual to your list of manuals |
Page 151 highlights
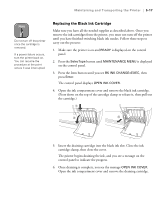
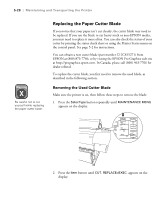
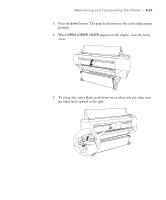
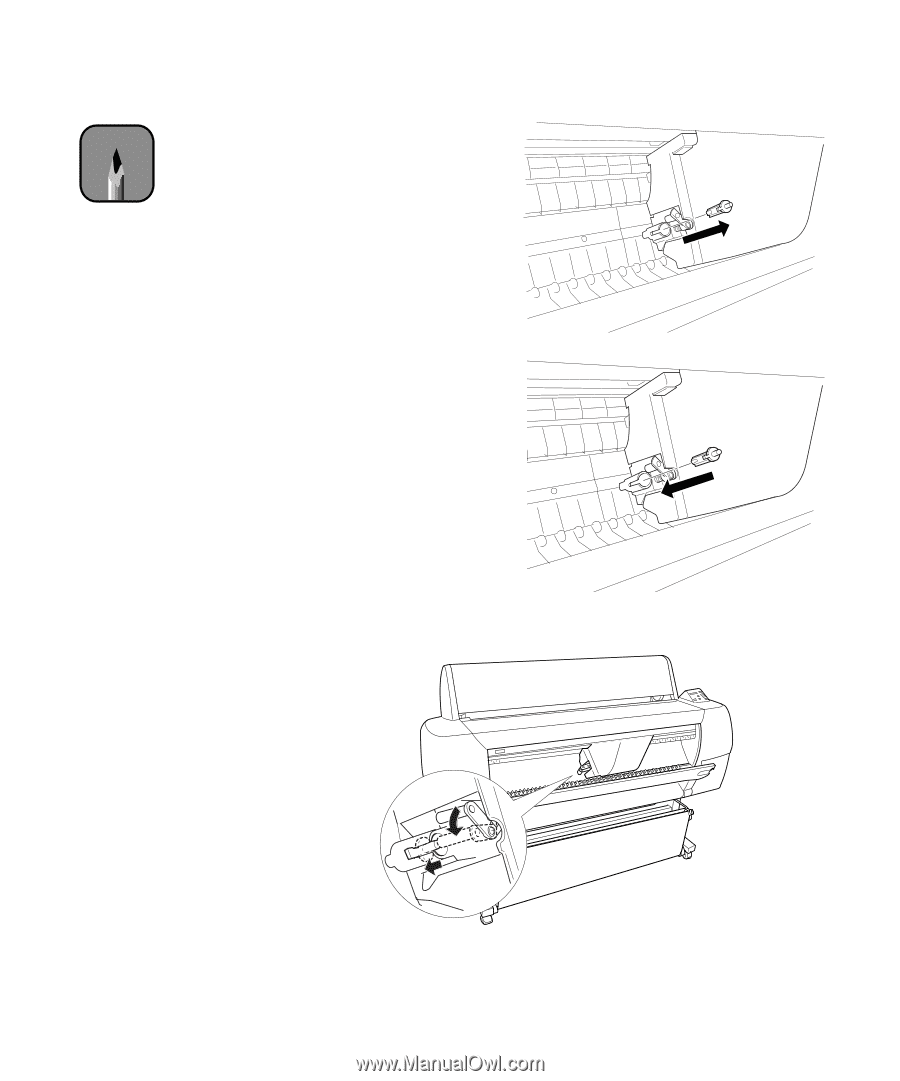
5-22 | Maintaining and Transporting the Printer Note Be careful not to let the cutter or the spring coil pop out of the casing. 6. Slowly take your finger off the side pin, then remove the cutter blade. Be careful not to lose the spring. 7. Insert the new cutter. 8. Push down on the cutter's side pin while turning the latch to the left. 9. Close the lower cover. The print head returns to the home position. 5-22
-
 1
1 -
2
-
3
-
4
-
5
-
6
-
7
-
8
-
9
-
10
-
11
-
12
-
13
-
14
-
15
-
16
-
17
-
18
-
19
-
20
-
21
-
22
-
23
-
24
-
25
-
26
-
27
-
28
-
29
-
30
-
31
-
32
-
33
-
34
-
35
-
36
-
37
-
38
-
39
-
40
-
41
-
42
-
43
-
44
-
45
-
46
-
47
-
48
-
49
-
50
-
51
-
52
-
53
-
54
-
55
-
56
-
57
-
58
-
59
-
60
-
61
-
62
-
63
-
64
-
65
-
66
-
67
-
68
-
69
-
70
-
71
-
72
-
73
-
74
-
75
-
76
-
77
-
78
-
79
-
80
-
81
-
82
-
83
-
84
-
85
-
86
-
87
-
88
-
89
-
90
-
91
-
92
-
93
-
94
-
95
-
96
-
97
-
98
-
99
-
100
-
101
-
102
-
103
-
104
-
105
-
106
-
107
-
108
-
109
-
110
-
111
-
112
-
113
-
114
-
115
-
116
-
117
-
118
-
119
-
120
-
121
-
122
-
123
-
124
-
125
-
126
-
127
-
128
-
129
-
130
-
131
-
132
-
133
-
134
-
135
-
136
-
137
-
138
-
139
-
140
-
141
-
142
-
143
-
144
-
145
-
 146
146 -
 147
147 -
 148
148 -
 149
149 -
 150
150 -
 151
151 -
 152
152 -
 153
153 -
 154
154 -
 155
155 -
 156
156 -
157
-
158
-
159
-
160
-
161
-
162
-
163
-
164
-
165
-
166
-
167
-
168
-
169
-
170
-
171
-
172
-
173
-
174
-
175
-
176
-
177
-
178
-
179
-
180
-
181
-
182
-
183
 |
 |
5-22
5-22
|
Maintaining and Transporting the Printer
6.
Slowly take your finger off
the side pin, then remove the
cutter blade. Be careful not
to lose the spring.
7.
Insert the new cutter.
8.
Push down on the cutter
’
s side pin while turning the latch to the left.
9.
Close the lower cover. The print head returns to the home position.
Note
Be careful not to let the
cutter or the spring coil
pop out of the casing.