Epson Stylus Pro 10600 - UltraChrome Ink Printer Guide - Page 135
Performing an SSCL Cleaning Cycle
 |
View all Epson Stylus Pro 10600 - UltraChrome Ink manuals
Add to My Manuals
Save this manual to your list of manuals |
Page 135 highlights
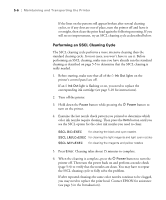
5-6 | Maintaining and Transporting the Printer If the lines on the pattern still appear broken after several cleaning cycles, or if any dots are out of place, turn the printer off and leave it overnight, then clean the print head again the following morning. If you still see no improvement, try an SSCL cleaning cycle as described below. Performing an SSCL Cleaning Cycle The SSCL cleaning cycle performs a more intensive cleaning than the standard cleaning cycle. In most cases, you won't have to use it. Before performing an SSCL cleaning, make sure you have already run the standard cleaning as described on page 5-5 to determine that the SSCL cleaning is really needed. 1. Before starting, make sure that all of the H Ink Out lights on the printer's control panel are off. If an H Ink Out light is flashing or on, you need to replace the corresponding ink cartridge (see page 5-10 for instructions). 2. Turn off the printer. 3. Hold down the Pause button while pressing the P Power button to turn on the printer. 4. Examine the last nozzle check pattern you printed to determine which color ink nozzles require cleaning. Then press the Item button until you see the SSCL option for the color ink nozzles you need to clean: SSCL B/C=EXEC for cleaning the black and cyan nozzles SSCL LM/LC=EXEC for cleaning the light magenta and light cyan nozzles SSCL M/Y=EXEC for cleaning the magenta and yellow nozzles 5. Press Enter. Cleaning takes about 15 minutes to complete. 6. When the cleaning is complete, press the P Power button to turn the printer off. Then turn the power back on and perform a nozzle check (page 5-4) to verify that the nozzles are clean. You may have to repeat the SSCL cleaning cycle to fully solve the problem. If after repeated cleanings the same color nozzles continue to be clogged, you may need to replace the print head. Contact EPSON for assistance (see page 3 in the Introduction). 5-6
-
 1
1 -
2
-
3
-
4
-
5
-
6
-
7
-
8
-
9
-
10
-
11
-
12
-
13
-
14
-
15
-
16
-
17
-
18
-
19
-
20
-
21
-
22
-
23
-
24
-
25
-
26
-
27
-
28
-
29
-
30
-
31
-
32
-
33
-
34
-
35
-
36
-
37
-
38
-
39
-
40
-
41
-
42
-
43
-
44
-
45
-
46
-
47
-
48
-
49
-
50
-
51
-
52
-
53
-
54
-
55
-
56
-
57
-
58
-
59
-
60
-
61
-
62
-
63
-
64
-
65
-
66
-
67
-
68
-
69
-
70
-
71
-
72
-
73
-
74
-
75
-
76
-
77
-
78
-
79
-
80
-
81
-
82
-
83
-
84
-
85
-
86
-
87
-
88
-
89
-
90
-
91
-
92
-
93
-
94
-
95
-
96
-
97
-
98
-
99
-
100
-
101
-
102
-
103
-
104
-
105
-
106
-
107
-
108
-
109
-
110
-
111
-
112
-
113
-
114
-
115
-
116
-
117
-
118
-
119
-
120
-
121
-
122
-
123
-
124
-
125
-
126
-
127
-
128
-
129
-
 130
130 -
 131
131 -
 132
132 -
 133
133 -
 134
134 -
 135
135 -
 136
136 -
 137
137 -
 138
138 -
 139
139 -
 140
140 -
141
-
142
-
143
-
144
-
145
-
146
-
147
-
148
-
149
-
150
-
151
-
152
-
153
-
154
-
155
-
156
-
157
-
158
-
159
-
160
-
161
-
162
-
163
-
164
-
165
-
166
-
167
-
168
-
169
-
170
-
171
-
172
-
173
-
174
-
175
-
176
-
177
-
178
-
179
-
180
-
181
-
182
-
183
 |
 |