HP 6500 User Guide - Page 134
Install the software before connecting the device (recommended)
 |
UPC - 884420425137
View all HP 6500 manuals
Add to My Manuals
Save this manual to your list of manuals |
Page 134 highlights
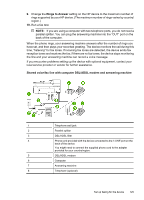
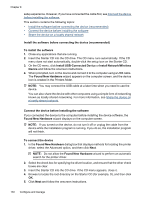
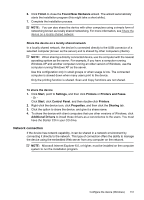
Chapter 8 setup experience. However, if you have connected the cable first, see Connect the device before installing the software. This section contains the following topics: • Install the software before connecting the device (recommended) • Connect the device before installing the software • Share the device on a locally shared network Install the software before connecting the device (recommended) To install the software 1. Close any applications that are running. 2. Insert the Starter CD into the CD drive. The CD menu runs automatically. If the CD menu does not start automatically, double-click the setup icon on the Starter CD. 3. On the CD menu, click Install USB-Connected Device or Install Network/Wireless Device and follow the onscreen instructions. 4. When prompted, turn on the device and connect it to the computer using a USB cable. The Found New Hardware wizard appears on the computer screen, and the device icon is created in the Printers folder. NOTE: You may connect the USB cable at a later time when you need to use the device. You can also share the device with other computers using a simple form of networking known as locally shared networking. For more information, see Share the device on a locally shared network. Connect the device before installing the software If you connected the device to the computer before installing the device software, the Found New Hardware wizard displays on the computer screen. NOTE: If you turned on the device, do not turn it off or unplug the cable from the device while the installation program is running. If you do so, the installation program will not finish. To connect the device 1. In the Found New Hardware dialog box that displays methods for locating the printer driver, select the Advanced option, and then click Next. NOTE: Do not allow the Found New Hardware wizard to perform an automatic search for the printer driver. 2. Select the check box for specifying the driver location, and ensure that the other check boxes are clear. 3. Insert the Starter CD into the CD drive. If the CD menu appears, close it. 4. Browse to locate the root directory on the Starter CD (for example, D), and then click OK. 5. Click Next and follow the onscreen instructions. 130 Configure and manage
-
 1
1 -
2
-
3
-
4
-
5
-
6
-
7
-
8
-
9
-
10
-
11
-
12
-
13
-
14
-
15
-
16
-
17
-
18
-
19
-
20
-
21
-
22
-
23
-
24
-
25
-
26
-
27
-
28
-
29
-
30
-
31
-
32
-
33
-
34
-
35
-
36
-
37
-
38
-
39
-
40
-
41
-
42
-
43
-
44
-
45
-
46
-
47
-
48
-
49
-
50
-
51
-
52
-
53
-
54
-
55
-
56
-
57
-
58
-
59
-
60
-
61
-
62
-
63
-
64
-
65
-
66
-
67
-
68
-
69
-
70
-
71
-
72
-
73
-
74
-
75
-
76
-
77
-
78
-
79
-
80
-
81
-
82
-
83
-
84
-
85
-
86
-
87
-
88
-
89
-
90
-
91
-
92
-
93
-
94
-
95
-
96
-
97
-
98
-
99
-
100
-
101
-
102
-
103
-
104
-
105
-
106
-
107
-
108
-
109
-
110
-
111
-
112
-
113
-
114
-
115
-
116
-
117
-
118
-
119
-
120
-
121
-
122
-
123
-
124
-
125
-
126
-
127
-
128
-
 129
129 -
 130
130 -
 131
131 -
 132
132 -
 133
133 -
 134
134 -
 135
135 -
 136
136 -
 137
137 -
 138
138 -
 139
139 -
140
-
141
-
142
-
143
-
144
-
145
-
146
-
147
-
148
-
149
-
150
-
151
-
152
-
153
-
154
-
155
-
156
-
157
-
158
-
159
-
160
-
161
-
162
-
163
-
164
-
165
-
166
-
167
-
168
-
169
-
170
-
171
-
172
-
173
-
174
-
175
-
176
-
177
-
178
-
179
-
180
-
181
-
182
-
183
-
184
-
185
-
186
-
187
-
188
-
189
-
190
-
191
-
192
-
193
-
194
-
195
-
196
-
197
-
198
-
199
-
200
-
201
-
202
-
203
-
204
-
205
-
206
-
207
-
208
-
209
-
210
-
211
-
212
-
213
-
214
-
215
-
216
-
217
-
218
-
219
-
220
-
221
-
222
-
223
-
224
-
225
-
226
-
227
-
228
-
229
-
230
-
231
-
232
-
233
-
234
-
235
-
236
-
237
-
238
-
239
-
240
-
241
-
242
-
243
-
244
-
245
-
246
-
247
-
248
-
249
-
250
-
251
-
252
-
253
-
254
-
255
-
256
-
257
-
258
-
259
-
260
-
261
-
262
-
263
-
264
-
265
-
266
-
267
-
268
-
269
-
270
-
271
-
272
-
273
-
274
-
275
-
276
-
277
-
278
-
279
-
280
-
281
-
282
-
283
-
284
-
285
-
286
-
287
-
288
-
289
-
290
-
291
-
292
-
293
-
294
 |
 |