HP CP3505 HP Color LaserJet CP3505 Series Printers - User Guide - Page 163
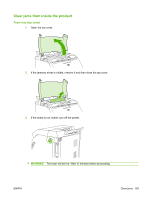
Tray 2 or tray 3, visible, remove it.
 |
View all HP CP3505 manuals
Add to My Manuals
Save this manual to your list of manuals |
Page 163 highlights
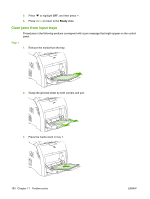
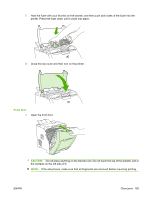
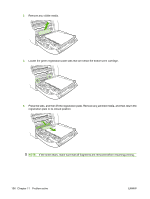
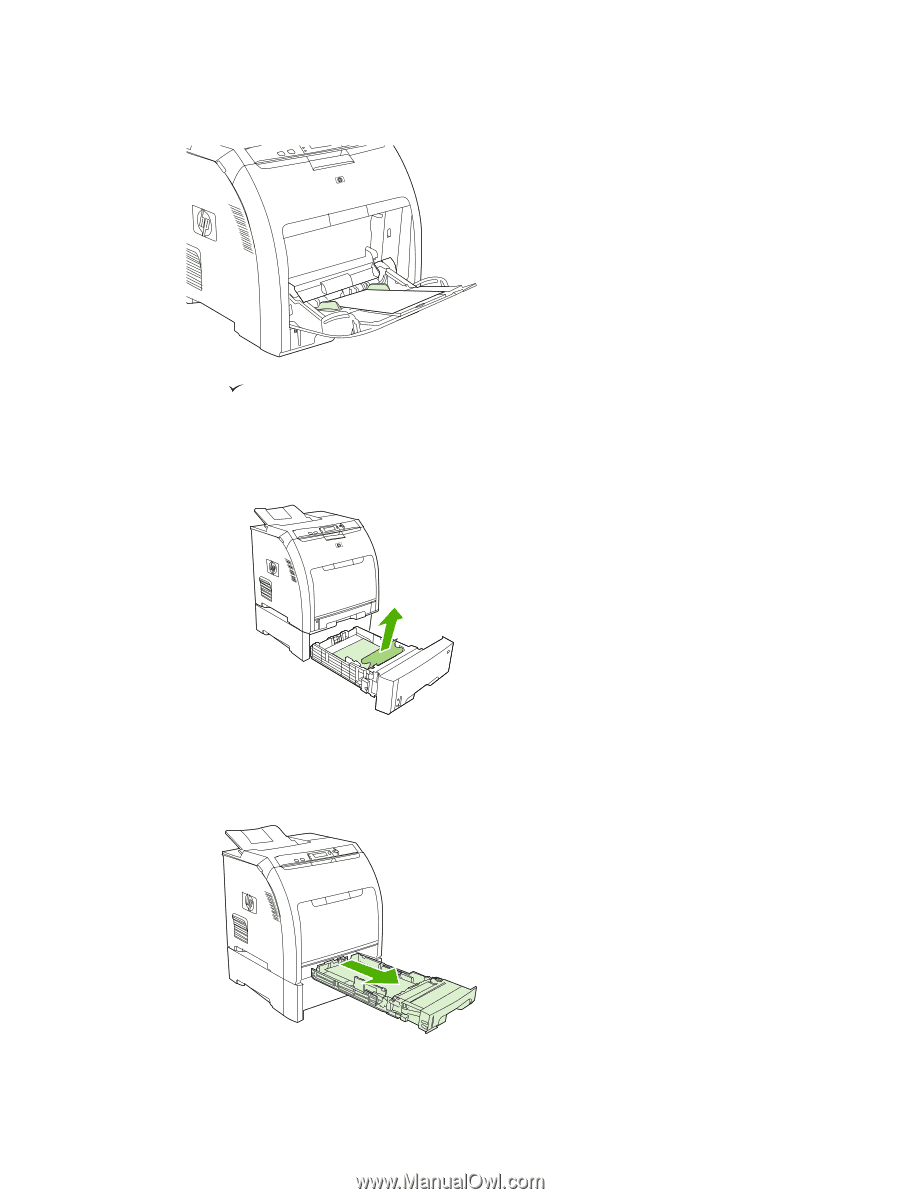
4. Confirm that the media guides are against the stack without bending it and that the stack does not extend above the fill tabs. 5. Press to resume printing. Tray 2 or tray 3 1. If the optional tray 3 is installed, pull it out and place it on a flat surface. If the jammed sheet is visible, remove it. 2. If the sheet is not visible, check inside the printer at the top of the tray opening. Remove any jammed media. 3. Pull out tray 2 and place it on a flat surface. ENWW Clear jams 151
-
 1
1 -
2
-
3
-
4
-
5
-
6
-
7
-
8
-
9
-
10
-
11
-
12
-
13
-
14
-
15
-
16
-
17
-
18
-
19
-
20
-
21
-
22
-
23
-
24
-
25
-
26
-
27
-
28
-
29
-
30
-
31
-
32
-
33
-
34
-
35
-
36
-
37
-
38
-
39
-
40
-
41
-
42
-
43
-
44
-
45
-
46
-
47
-
48
-
49
-
50
-
51
-
52
-
53
-
54
-
55
-
56
-
57
-
58
-
59
-
60
-
61
-
62
-
63
-
64
-
65
-
66
-
67
-
68
-
69
-
70
-
71
-
72
-
73
-
74
-
75
-
76
-
77
-
78
-
79
-
80
-
81
-
82
-
83
-
84
-
85
-
86
-
87
-
88
-
89
-
90
-
91
-
92
-
93
-
94
-
95
-
96
-
97
-
98
-
99
-
100
-
101
-
102
-
103
-
104
-
105
-
106
-
107
-
108
-
109
-
110
-
111
-
112
-
113
-
114
-
115
-
116
-
117
-
118
-
119
-
120
-
121
-
122
-
123
-
124
-
125
-
126
-
127
-
128
-
129
-
130
-
131
-
132
-
133
-
134
-
135
-
136
-
137
-
138
-
139
-
140
-
141
-
142
-
143
-
144
-
145
-
146
-
147
-
148
-
149
-
150
-
151
-
152
-
153
-
154
-
155
-
156
-
157
-
 158
158 -
 159
159 -
 160
160 -
 161
161 -
 162
162 -
 163
163 -
 164
164 -
 165
165 -
 166
166 -
 167
167 -
 168
168 -
169
-
170
-
171
-
172
-
173
-
174
-
175
-
176
-
177
-
178
-
179
-
180
-
181
-
182
-
183
-
184
-
185
-
186
-
187
-
188
-
189
-
190
-
191
-
192
-
193
-
194
-
195
-
196
-
197
-
198
-
199
-
200
-
201
-
202
-
203
-
204
-
205
-
206
-
207
-
208
-
209
-
210
-
211
-
212
-
213
-
214
-
215
-
216
-
217
-
218
-
219
-
220
-
221
-
222
-
223
-
224
-
225
-
226
 |
 |
4.
Confirm that the media guides are against the stack without bending it and that the stack does not
extend above the fill tabs.
5.
Press
to resume printing.
Tray 2 or tray 3
1.
If the optional tray 3 is installed, pull it out and place it on a flat surface. If the jammed sheet is
visible, remove it.
2.
If the sheet is not visible, check inside the printer at the top of the tray opening. Remove any jammed
media.
3.
Pull out tray 2 and place it on a flat surface.
ENWW
Clear jams
151