HP CP3505 HP Color LaserJet CP3505 Series Printers - User Guide - Page 78
Load envelopes in tray 1, CON DEVICE, PRINT QUALITY, PRINT MODES, EXTRA, HEAVY
 |
View all HP CP3505 manuals
Add to My Manuals
Save this manual to your list of manuals |
Page 78 highlights
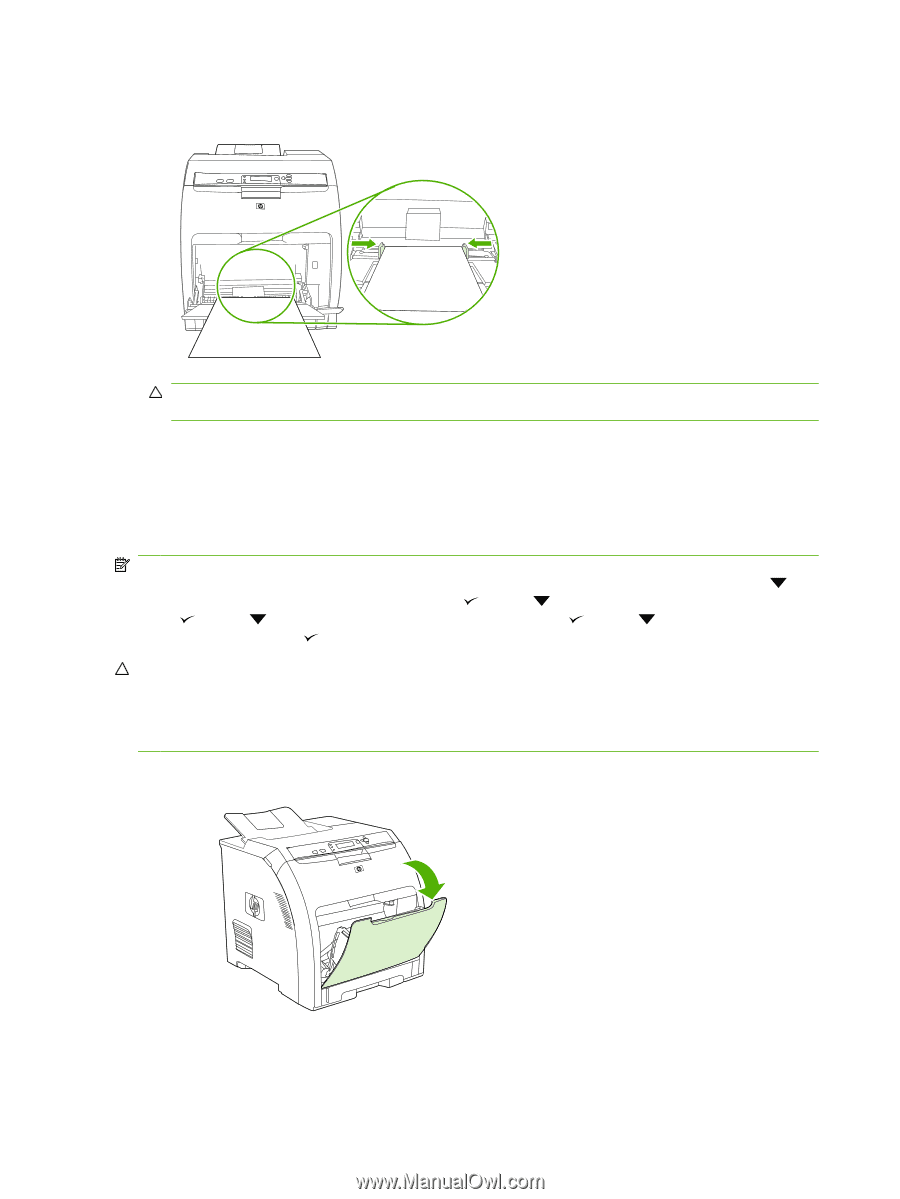
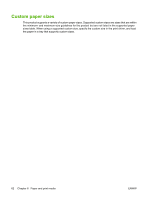
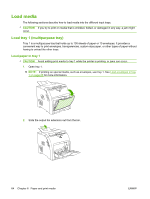
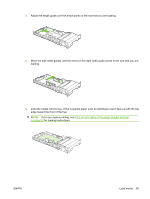
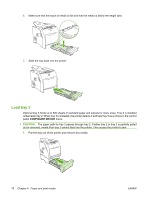
6. Slide the paper width guides inward until they lightly touch the print media stack on both sides without bending it. Make sure that the media fits under the tabs on the width guides. CAUTION: Wait for the printer to finish printing before closing tray 1 (optional). Closing the tray before the printer finishes can cause jams. Load envelopes in tray 1 Many types of envelopes can be printed from tray 1. Up to 10 envelopes can be stacked in the tray. Printing performance depends on the construction of the envelope. In the software, set margins at least 15 mm (0.6 in) from the edge of the envelope. NOTE: Testing has shown that fusing performance is improved when the Extra Heavy fuser mode is used when printing on C5 and B5 envelopes. To change this setting, press Menu. Then press to highlight CONFIGURE DEVICE, and then press . Press to highlight PRINT QUALITY, and then press . Press to highlight PRINT MODES, and then press . Press to highlight EXTRA HEAVY, and then press . CAUTION: Envelopes that contain clasps, snaps, windows, coated linings, exposed self-stick adhesives, or other synthetic materials can severely damage the printer. To avoid jams and possible printer damage, never try to print on both sides of an envelope. Before you load envelopes, make sure that they are flat, undamaged, and not stuck together. Do not use envelopes that contain pressuresensitive adhesive. To avoid jams, do not remove or insert envelopes during printing. 1. Open tray 1. 66 Chapter 6 Paper and print media ENWW
-
 1
1 -
2
-
3
-
4
-
5
-
6
-
7
-
8
-
9
-
10
-
11
-
12
-
13
-
14
-
15
-
16
-
17
-
18
-
19
-
20
-
21
-
22
-
23
-
24
-
25
-
26
-
27
-
28
-
29
-
30
-
31
-
32
-
33
-
34
-
35
-
36
-
37
-
38
-
39
-
40
-
41
-
42
-
43
-
44
-
45
-
46
-
47
-
48
-
49
-
50
-
51
-
52
-
53
-
54
-
55
-
56
-
57
-
58
-
59
-
60
-
61
-
62
-
63
-
64
-
65
-
66
-
67
-
68
-
69
-
70
-
71
-
72
-
 73
73 -
 74
74 -
 75
75 -
 76
76 -
 77
77 -
 78
78 -
 79
79 -
 80
80 -
 81
81 -
 82
82 -
 83
83 -
84
-
85
-
86
-
87
-
88
-
89
-
90
-
91
-
92
-
93
-
94
-
95
-
96
-
97
-
98
-
99
-
100
-
101
-
102
-
103
-
104
-
105
-
106
-
107
-
108
-
109
-
110
-
111
-
112
-
113
-
114
-
115
-
116
-
117
-
118
-
119
-
120
-
121
-
122
-
123
-
124
-
125
-
126
-
127
-
128
-
129
-
130
-
131
-
132
-
133
-
134
-
135
-
136
-
137
-
138
-
139
-
140
-
141
-
142
-
143
-
144
-
145
-
146
-
147
-
148
-
149
-
150
-
151
-
152
-
153
-
154
-
155
-
156
-
157
-
158
-
159
-
160
-
161
-
162
-
163
-
164
-
165
-
166
-
167
-
168
-
169
-
170
-
171
-
172
-
173
-
174
-
175
-
176
-
177
-
178
-
179
-
180
-
181
-
182
-
183
-
184
-
185
-
186
-
187
-
188
-
189
-
190
-
191
-
192
-
193
-
194
-
195
-
196
-
197
-
198
-
199
-
200
-
201
-
202
-
203
-
204
-
205
-
206
-
207
-
208
-
209
-
210
-
211
-
212
-
213
-
214
-
215
-
216
-
217
-
218
-
219
-
220
-
221
-
222
-
223
-
224
-
225
-
226
 |
 |