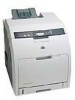
HP CP3505 HP Color LaserJet CP3505 Series Printers - User Guide - Page 68
Set the subnet mask, Set the default gateway
 |
View all HP CP3505 manuals
Add to My Manuals
Save this manual to your list of manuals |
Page 68 highlights
8. Press to highlight MANUAL, and then press . 9. Press to highlight MANUAL SETTINGS, and then press . 10. Press to highlight IP Address:, and then press . 11. Press the or arrow to increase or decrease the number for the first byte of the IP address. 12. Press to move to the next set of numbers. (Press to move to the previous set of numbers.) NOTE: To cycle through the numbers faster, hold down the arrow button. 13. Repeat steps 10 and 11 until the correct IP address is entered, and then press setting. 14. Press Menu to return to the Ready state. to save the Set the subnet mask 1. Press Menu. 2. Press to highlight CONFIGURE DEVICE, and then press . 3. Press to highlight I/O, and then press . 4. Press to highlight EMBEDDED JETDIRECT, and then press . 5. Press to highlight TCP/IP, and then press . 6. Press to select IPV4 SETTINGS. 7. Press to select CONFIG METHOD. 8. Press to highlight MANUAL, and then press . 9. Press to highlight MANUAL SETTINGS, and then press . 10. Press to highlight SUBNET MASK, and then press . 11. Press the or arrow to increase or decrease the number for the first byte of the subnet mask. 12. Press to move to the next set of numbers. (Press to move to the previous set of numbers.) 13. Repeat steps 10 and 11 until the correct subnet mask is entered, and then press to save the subnet mask. 14. Press Menu to return to the Ready state. Set the default gateway 1. Press Menu. 2. Press to highlight CONFIGURE DEVICE, and then press . 3. Press to highlight I/O, and then press . 4. Press to highlight EMBEDDED JETDIRECT, and then press . 5. Press to highlight TCP/IP, and then press . 6. Press to select IPV4 SETTINGS. 56 Chapter 5 Connectivity ENWW
-
 1
1 -
2
-
3
-
4
-
5
-
6
-
7
-
8
-
9
-
10
-
11
-
12
-
13
-
14
-
15
-
16
-
17
-
18
-
19
-
20
-
21
-
22
-
23
-
24
-
25
-
26
-
27
-
28
-
29
-
30
-
31
-
32
-
33
-
34
-
35
-
36
-
37
-
38
-
39
-
40
-
41
-
42
-
43
-
44
-
45
-
46
-
47
-
48
-
49
-
50
-
51
-
52
-
53
-
54
-
55
-
56
-
57
-
58
-
59
-
60
-
61
-
62
-
 63
63 -
 64
64 -
 65
65 -
 66
66 -
 67
67 -
 68
68 -
 69
69 -
 70
70 -
 71
71 -
 72
72 -
 73
73 -
74
-
75
-
76
-
77
-
78
-
79
-
80
-
81
-
82
-
83
-
84
-
85
-
86
-
87
-
88
-
89
-
90
-
91
-
92
-
93
-
94
-
95
-
96
-
97
-
98
-
99
-
100
-
101
-
102
-
103
-
104
-
105
-
106
-
107
-
108
-
109
-
110
-
111
-
112
-
113
-
114
-
115
-
116
-
117
-
118
-
119
-
120
-
121
-
122
-
123
-
124
-
125
-
126
-
127
-
128
-
129
-
130
-
131
-
132
-
133
-
134
-
135
-
136
-
137
-
138
-
139
-
140
-
141
-
142
-
143
-
144
-
145
-
146
-
147
-
148
-
149
-
150
-
151
-
152
-
153
-
154
-
155
-
156
-
157
-
158
-
159
-
160
-
161
-
162
-
163
-
164
-
165
-
166
-
167
-
168
-
169
-
170
-
171
-
172
-
173
-
174
-
175
-
176
-
177
-
178
-
179
-
180
-
181
-
182
-
183
-
184
-
185
-
186
-
187
-
188
-
189
-
190
-
191
-
192
-
193
-
194
-
195
-
196
-
197
-
198
-
199
-
200
-
201
-
202
-
203
-
204
-
205
-
206
-
207
-
208
-
209
-
210
-
211
-
212
-
213
-
214
-
215
-
216
-
217
-
218
-
219
-
220
-
221
-
222
-
223
-
224
-
225
-
226
 |
 |