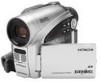
Hitachi DZ GX5020A Owners Guide - Page 10
Read This First - software
 |
UPC - 050585223875
View all Hitachi DZ GX5020A manuals
Add to My Manuals
Save this manual to your list of manuals |
Page 10 highlights
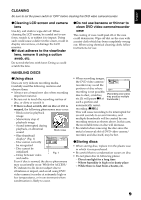
English DISC CLEANING Use the disc cleaning cloth provided to lightly wipe off any dirt adhering to the disc as shown in the figure. Do not wipe the disc with force: Doing so could cause scratches. Never use solvent (thinner, water, antistat or detergent) for cleaning. Lightly wash the dirty cleaning cloth with detergent: The dirt removal capacity of the cloth will improve (rinse the cloth well with water so that no detergent remains). Use the disc cleaning cloth to clean from inner to outer edges in axial direction. Read This First To guide you, we have included following five chapters. • The section on "Setups" explains how to set up the DVD video camera/recorder, battery, and set the date/time. • The section on "Basic Techniques" explains the basic operation of this DVD video camera/ recorder - recording of movies, still images and playback of recorded images. • The section on "Disc Navigation" explains editing with Disc Navigation: Refer to this section when finalizing DVD-RW/DVD-R/ +RW disc and initializing DVD-RAM/DVDRW/+RW disc. • The section on "Connecting to PC" explains the contents of provided CD-ROM (DZGX5080A) and how to install the software included. • "Subsidiary Information" includes an introduction to products sold separately, and troubleshooting. We want this manual to be as helpful as possible, so it includes two easy ways to find the information you need: • A quick index for the information you use most often. • A detailed table of contents directing you to specific information quickly (see pages 12 - 14). Get to know your DVD video camera/recorder by using this manual, and get to know Hitachi. We appreciate your business. Quick Index Available Discs 22 Recording Movie 39 Playing Back 67 Functions Available with Disc Navigation......... 74 Connecting to a TV 104 Connecting to PC 108 With this DVD video camera/recorder you can view the picture being recorded or the playback picture whether on the LCD monitor or in the viewfinder. Opening or closing the LCD monitor switches the picture to appear on the LCD monitor or in the viewfinder. It is possible to switch the language in the on-screen display of this DVD video camera/recorder (see page 32). 10
-
 1
1 -
2
-
3
-
4
-
 5
5 -
 6
6 -
 7
7 -
 8
8 -
 9
9 -
 10
10 -
 11
11 -
 12
12 -
 13
13 -
 14
14 -
 15
15 -
16
-
17
-
18
-
19
-
20
-
21
-
22
-
23
-
24
-
25
-
26
-
27
-
28
-
29
-
30
-
31
-
32
-
33
-
34
-
35
-
36
-
37
-
38
-
39
-
40
-
41
-
42
-
43
-
44
-
45
-
46
-
47
-
48
-
49
-
50
-
51
-
52
-
53
-
54
-
55
-
56
-
57
-
58
-
59
-
60
-
61
-
62
-
63
-
64
-
65
-
66
-
67
-
68
-
69
-
70
-
71
-
72
-
73
-
74
-
75
-
76
-
77
-
78
-
79
-
80
-
81
-
82
-
83
-
84
-
85
-
86
-
87
-
88
-
89
-
90
-
91
-
92
-
93
-
94
-
95
-
96
-
97
-
98
-
99
-
100
-
101
-
102
-
103
-
104
-
105
-
106
-
107
-
108
-
109
-
110
-
111
-
112
-
113
-
114
-
115
-
116
-
117
-
118
-
119
-
120
-
121
-
122
-
123
-
124
-
125
-
126
-
127
-
128
-
129
-
130
-
131
-
132
-
133
-
134
-
135
-
136
-
137
-
138
-
139
-
140
-
141
-
142
-
143
-
144
-
145
-
146
-
147
-
148
-
149
-
150
-
151
-
152
-
153
-
154
-
155
-
156
-
157
-
158
 |
 |
