Kyocera TASKalfa 3501i Kyocera Command Center RX User Guide Rev-2013.02 - Page 20
Job Box / Quick Copy, Deletion of Job Retention
 |
View all Kyocera TASKalfa 3501i manuals
Add to My Manuals
Save this manual to your list of manuals |
Page 20 highlights
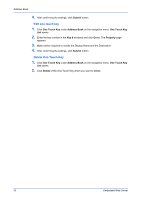
Document Box 3. Click Print button. The Basic submenu will open. 4. You can immediately start to print the documents in the order shown in Selected Files by clicking Print. If you want to change the order of printing, highlight a document and press Top, Up, etc. If you want to omit a document from the list, click Delete icon. 5. Click Print button. Job Box / Quick Copy The section below explains how to change the number of Quick Copy jobs and set automatic delete times for temporary jobs in Job Box. Also, you can determine whether documents are automatically deleted or retained after printing. 1. Click Job Box Settings under Document Box on the navigation menu. The Job Box Settings page opens. 2. Enter the value in Quick Copy Job Retention. You can select Quick Copy jobs from 0 to 300. 3. Enter the value in Repeat Copy Job Retention. You can select Quick Copy jobs from 0 to 50. 4. To delete automatically the temporary retained jobs after printing, select 1 hour, 4 hours, 1 day, or 1 week on the Deletion of Job Retention drop-down list. If you do not want to delete the jobs after printing, select Off on the Deletion of Job Retention dropdown list. 5. After confirming the settings, click Submit button. 16 Embedded Web Server
-
 1
1 -
2
-
3
-
4
-
5
-
6
-
7
-
8
-
9
-
10
-
11
-
12
-
13
-
14
-
 15
15 -
 16
16 -
 17
17 -
 18
18 -
 19
19 -
 20
20 -
 21
21 -
 22
22 -
 23
23 -
 24
24 -
 25
25 -
26
-
27
-
28
-
29
-
30
-
31
-
32
-
33
-
34
-
35
-
36
-
37
-
38
-
39
-
40
-
41
-
42
-
43
-
44
-
45
-
46
-
47
-
48
-
49
-
50
-
51
-
52
-
53
-
54
-
55
-
56
-
57
-
58
-
59
-
60
-
61
-
62
-
63
-
64
-
65
-
66
-
67
-
68
-
69
-
70
-
71
-
72
-
73
-
74
-
75
-
76
-
77
-
78
-
79
-
80
-
81
-
82
-
83
-
84
-
85
-
86
-
87
-
88
-
89
-
90
-
91
-
92
-
93
-
94
-
95
-
96
 |
 |
