Kyocera TASKalfa 3501i Kyocera Command Center RX User Guide Rev-2013.02 - Page 77
Obtain Network User Property, Acquisition of User Information
 |
View all Kyocera TASKalfa 3501i manuals
Add to My Manuals
Save this manual to your list of manuals |
Page 77 highlights
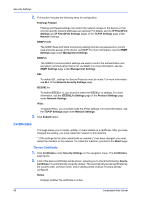
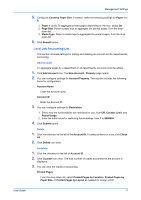
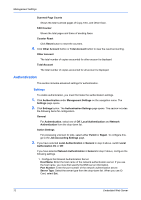
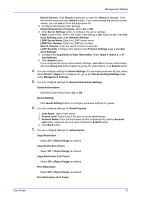
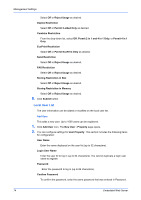
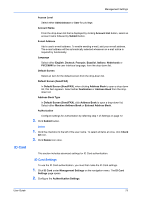
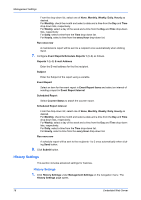
Management Settings Default Domain: Click Domain List button to open the Domain List page. Enter the domain name and click Submit button. If you have entered the several domain names, you can select it from the drop-down list. 2. Configure the Network User Settings. Obtain Network User Property: Select On or Off. 3. Click Server Settings button to configure the server settings. LDAP: Confirm that LDAP is set to On. If the setting is Off, switch to On in the Protocol Settings page under Network Settings. LDAP Server Name: Enter the LDAP server name. LDAP Port Number: Enter the LDAP port number. Search Timeout: Enter the search timeout in seconds. LDAP Security: Configure this setting in the Protocol Settings page under Network Settings. 4. Configure the Acquisition of User Information. Enter Name 1, Name 2, or E- mail Address. 5. Click Submit button. If you configure the Group Authorization Settings, select On in Group Authorization, and click Group List button.Select the group for authorization, click Submit button. 4. You can configure settings for Action Settings. For processing unknown ID jobs, select either Permit or Reject. To configure this, go to the Job Accounting Settings page under Management Settings. 5. You can configure settings for Guest Authorization Settings. Guest Authorization Switches Guest Authorization On or Off. Guest Settings Click Guest Settings button to configure advanced settings for guests. 6. You can configure settings for Guest Property. 1. User Name: Type a User name. 2. Access Level: Select User if the user is not an administrator. 3. Account Name: From the drop-down list that is displayed by clicking Account List button, select an account name followed by Submit button. 4. Click Back button. 7. You can configure settings for Authorization. Copy Restriction Select Off or Reject Usage as desired. Copy Restriction (Color) Select Off or Reject Usage as desired. Copy Restriction (Full Color) Select Off or Reject Usage as desired. Print Restriction Select Off or Reject Usage as desired. Print Restriction (Full Color) User Guide 73
-
 1
1 -
2
-
3
-
4
-
5
-
6
-
7
-
8
-
9
-
10
-
11
-
12
-
13
-
14
-
15
-
16
-
17
-
18
-
19
-
20
-
21
-
22
-
23
-
24
-
25
-
26
-
27
-
28
-
29
-
30
-
31
-
32
-
33
-
34
-
35
-
36
-
37
-
38
-
39
-
40
-
41
-
42
-
43
-
44
-
45
-
46
-
47
-
48
-
49
-
50
-
51
-
52
-
53
-
54
-
55
-
56
-
57
-
58
-
59
-
60
-
61
-
62
-
63
-
64
-
65
-
66
-
67
-
68
-
69
-
70
-
71
-
 72
72 -
 73
73 -
 74
74 -
 75
75 -
 76
76 -
 77
77 -
 78
78 -
 79
79 -
 80
80 -
 81
81 -
 82
82 -
83
-
84
-
85
-
86
-
87
-
88
-
89
-
90
-
91
-
92
-
93
-
94
-
95
-
96
 |
 |
