Kyocera TASKalfa 3501i Kyocera Command Center RX User Guide Rev-2013.02 - Page 70
Network Security, Send Security, Network Security Settings
 |
View all Kyocera TASKalfa 3501i manuals
Add to My Manuals
Save this manual to your list of manuals |
Page 70 highlights
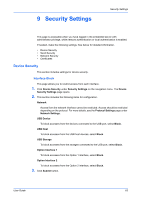
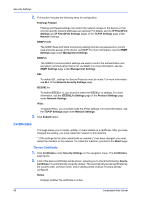
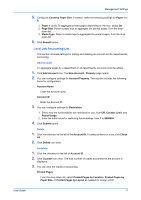
Security Settings This setting appears when an optional Data Security kit is activated. Click Settings button to open the Password page. Enter the password and click OK button to enable the data security function. Document Guard Settings This setting appears when an optional Printed Document Guard Kit(B) is activated. Select On to use the Document Guard. 3. Click Submit button. Send Security This section includes settings for security for Sending. 1. Click Send Security under Security Settings on the navigation menu. The Send Security Settings page opens. 2. This section includes the following items for configuration. Dest. Check before Send This enables the front panel message which prompts you to confirm the destination to forward the scan data. To enable, select On. The message is displayed when the machine's Start key is pressed to start scanning. Entry Check for New Dest. When enabled, this determines whether re-entry of a password for confirmation is required when adding a new destination. To enable, select On. New Destination Entry Determines whether an entry of a new destination is allowed. Permit activates the entry of a new destination. Prohibit deactivates the entry of a new destination. New Destination Entry (FAX) This entry becomes active when New Destination Entry has been set to Permit. Permit activates the entry of a new fax destination. Prohibit deactivates the entry of a new fax destination. Recall Destination Enables or disables recalling the destination. Permit activates the entry of a destination to recall. Prohibit deactivates the entry of a destination to recall. 3. Click Submit button. Network Security This section includes settings for network security. *: If the settings for the item marked with an asterisk (*) has been changed, you must restart the machine or the network. To restart the machine, proceed to the Reset page. Network Security Settings 1. Click Network Security under Security Settings on the navigation menu. The Network Security Settings page opens. 66 Embedded Web Server
-
 1
1 -
2
-
3
-
4
-
5
-
6
-
7
-
8
-
9
-
10
-
11
-
12
-
13
-
14
-
15
-
16
-
17
-
18
-
19
-
20
-
21
-
22
-
23
-
24
-
25
-
26
-
27
-
28
-
29
-
30
-
31
-
32
-
33
-
34
-
35
-
36
-
37
-
38
-
39
-
40
-
41
-
42
-
43
-
44
-
45
-
46
-
47
-
48
-
49
-
50
-
51
-
52
-
53
-
54
-
55
-
56
-
57
-
58
-
59
-
60
-
61
-
62
-
63
-
64
-
 65
65 -
 66
66 -
 67
67 -
 68
68 -
 69
69 -
 70
70 -
 71
71 -
 72
72 -
 73
73 -
 74
74 -
 75
75 -
76
-
77
-
78
-
79
-
80
-
81
-
82
-
83
-
84
-
85
-
86
-
87
-
88
-
89
-
90
-
91
-
92
-
93
-
94
-
95
-
96
 |
 |
