Kyocera TASKalfa 3501i Kyocera Command Center RX User Guide Rev-2013.02 - Page 74
Management Settings, Job Accounting, Copier/Printer Count
 |
View all Kyocera TASKalfa 3501i manuals
Add to My Manuals
Save this manual to your list of manuals |
Page 74 highlights
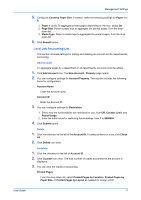
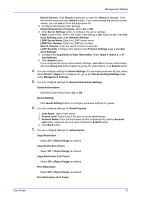
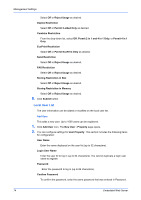
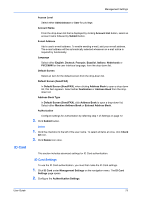
Management Settings 10 Management Settings This page is accessible when you have logged in the embedded server with administrator privilege, while network authentication or local authentication is enabled. If needed, make the following settings: See below for detailed information. • Job Accounting • Authentication • ID Card • Notification/Report • History Settings • SNMP • System Stamp • Message Board • Reset Job Accounting This section includes advanced settings for Job Accounting. Settings To enable Job Accounting, you must first make the Job Accounting settings. 1. Click Job Accounting under Management Settings on the navigation menu. The Settings page opens. 2. Click Settings button. The Job Accounting Settings page opens. This section includes the following items for configuration. Job Accounting Turn to On to activate Job Accounting. Job Accounting Access To execute Job Accounting using network authentication, select Network. Action Settings This section includes the following items for configuration: 1. Apply Limit: Select the behavior of processing a job when the maximum print pages have been reached, from Immediately, Subsequently, and Alert Only. 2. Copier/Printer Count: You can select how the copying and printing page counts are shown - either the total of both or each of copying and printing individually. 3. Unknown ID Job: Select the behavior of processing a job that has an unknown account ID or has no account ID, from Permit and Reject. 3. If you have set Job Accounting to On in step 2 above, Default Counter Limit and Count by Paper Size are displayed. 4. You can configure settings for Default Counter Limit. Enter the initial value for the counter limit, from 1 to 9999999. 70 Embedded Web Server
-
 1
1 -
2
-
3
-
4
-
5
-
6
-
7
-
8
-
9
-
10
-
11
-
12
-
13
-
14
-
15
-
16
-
17
-
18
-
19
-
20
-
21
-
22
-
23
-
24
-
25
-
26
-
27
-
28
-
29
-
30
-
31
-
32
-
33
-
34
-
35
-
36
-
37
-
38
-
39
-
40
-
41
-
42
-
43
-
44
-
45
-
46
-
47
-
48
-
49
-
50
-
51
-
52
-
53
-
54
-
55
-
56
-
57
-
58
-
59
-
60
-
61
-
62
-
63
-
64
-
65
-
66
-
67
-
68
-
 69
69 -
 70
70 -
 71
71 -
 72
72 -
 73
73 -
 74
74 -
 75
75 -
 76
76 -
 77
77 -
 78
78 -
 79
79 -
80
-
81
-
82
-
83
-
84
-
85
-
86
-
87
-
88
-
89
-
90
-
91
-
92
-
93
-
94
-
95
-
96
 |
 |
