Kyocera TASKalfa 3501i Kyocera Command Center RX User Guide Rev-2013.02 - Page 21
Address Book, Machine Address Book, Contacts, Adding a New Contact, Editing a Contact
 |
View all Kyocera TASKalfa 3501i manuals
Add to My Manuals
Save this manual to your list of manuals |
Page 21 highlights
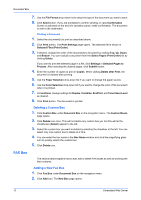
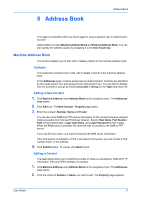
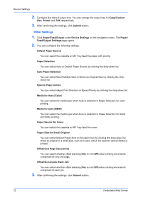
5 Address Book Address Book This page is accessible when you have logged in using a general user or administrator account. Address Book contains Machine Address Book and External Address Book. You can also specify the address quickly by assigning it to the One-Touch key. Machine Address Book This section explains you to add, edit or delete contacts in the machine address book. Contacts This subsection explains how to add, edit or delete contacts in the machine address book. In the Addresses page, contacts and groups are listed together. Contacts are identified by the single person icon and groups by the triple person icon. You can filter to display only the contacts or groups by choosing Contact or Group on the Type drop-down list. Adding a New Contact 1. Click Machine Address under Address Book on the navigation menu. The Addresses page opens. 2. Click Add icon. The New Contact - Property page opens. 3. Enter the contact's Number, Name and E-mail. You can also enter SMB and FTP access information for the contact including a shared folder accessible from Microsoft Windows Network. Specify Host Name, Port Number, Path to the shared folder, Login User Name, and Login Password for the contact. When the Test button is pressed, this machine tries to connect to the SMB or FTP server. If you use the host name, you must first specify the DNS server information. If the FAX system is installed or i-FAX is activated in the system, you can include a FAX number and/or i-FAX address. 4. Click Submit button. To cancel, click Back button. Editing a Contact The steps below allow you to modify the number or name, e-mail address, SMB and FTP information, FAX and i-FAX settings of a contact. 1. Click Machine Address under Address Book on the navigation menu. The Addresses page opens. 2. Click the contact's Number or Name you want to edit. The Property page appears. User Guide 17
-
 1
1 -
2
-
3
-
4
-
5
-
6
-
7
-
8
-
9
-
10
-
11
-
12
-
13
-
14
-
15
-
 16
16 -
 17
17 -
 18
18 -
 19
19 -
 20
20 -
 21
21 -
 22
22 -
 23
23 -
 24
24 -
 25
25 -
 26
26 -
27
-
28
-
29
-
30
-
31
-
32
-
33
-
34
-
35
-
36
-
37
-
38
-
39
-
40
-
41
-
42
-
43
-
44
-
45
-
46
-
47
-
48
-
49
-
50
-
51
-
52
-
53
-
54
-
55
-
56
-
57
-
58
-
59
-
60
-
61
-
62
-
63
-
64
-
65
-
66
-
67
-
68
-
69
-
70
-
71
-
72
-
73
-
74
-
75
-
76
-
77
-
78
-
79
-
80
-
81
-
82
-
83
-
84
-
85
-
86
-
87
-
88
-
89
-
90
-
91
-
92
-
93
-
94
-
95
-
96
 |
 |
