Kyocera TASKalfa 3501i Kyocera Command Center RX User Guide Rev-2013.02 - Page 46
POP before SMTP Timeout
 |
View all Kyocera TASKalfa 3501i manuals
Add to My Manuals
Save this manual to your list of manuals |
Page 46 highlights
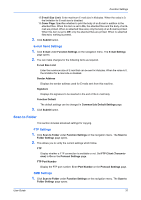
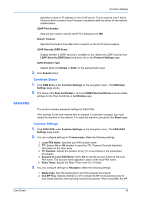
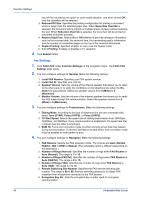
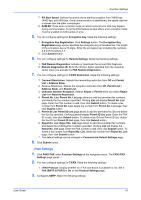
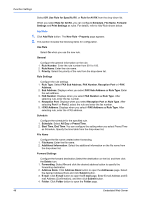
Function Settings 1. SMTP Server Name: Enter the SMTP server name or its IP address. If entering the name, rather than the IP address, a DNS server address must also be configured. The DNS server address may be entered on the TCP/IP Settings page. 2. SMTP Port Number: Set the SMTP Port Number or use the SMTP default port 25. The default port number for SMTP connections over SSL is 465. 3. SMTP Server Timeout: Sets the timeout in seconds during which this device tries to connect to the SMTP server. 4. Authentication Protocol: Enables or disables the SMTP authentication protocol or sets POP before SMTP as the authentication type. 5. POP before SMTP Timeout: Sets the timeout in seconds during which this device tries to connect to the POP3 server. You can configure this item when you selected POP before SMTP as Authentication Protocol. 6. Connection Test: Tests to confirm that the settings on this page are correct. When Test button is clicked, this machine tries to connect to the SMTP server. 7. Domain Restriction: Activate or deactivate to restrict domains. Click Domain List button to configure. Enter a domain name that is permitted or rejected. You can also specify the E-mail addresses. 4. Configure POP3 Settings. Make the following settings: 1. Check Interval: Displays the interval, in minutes, for connecting to the POP3 server to check for incoming e-mails at specific interval. Specify the interval of performing checks in the range from 3 minutes to 60 minutes. The default is 15 minutes. 2. Run once now: Click Receive button to immediately receive E-mail from the POP3 server. When Remote Printing is set to Permit, the machine prints the received E-mail. 3. Domain Restriction: Activate or deactivate to restrict domains. Click Domain List button to configure. Enter a domain name that is permitted or rejected. You can also specify the E-mail addresses. 4. POP3 User Settings: Click Settings button and configure the following user settings. a) E-mail Address: Enter the E-mail address. b) POP3 Server Name: Enter the POP3 server host name or IP address. If you use the host name, you must first specify the DNS server information. c) POP3 Port Number: Enter the POP3 Port Number, or use the POP3 default port number 110. The default port number for POP3 connections over SSL is 995. d) POP3 Server Timeout: Enter the timeout in seconds during which this machine tries to connect to the POP3 server. e) Login User Name: Enter the login name of the user for the POP3 account. f) Login Password: Enter the password to log in the POP3 account. g) Use APOP: Enables or disables APOP. APOP is an encryption mechanism used for encrypting the Login Password during communication with the POP3 server. When Use APOP is Off, the Login Password is sent using plain ASCII text. When Use APOP is On, the Login Password is encrypted, therefore cannot be read. APOP requires that the POP3 server supports APOP, and has APOP enabled. h) Connection Test: This will test one transmission for each press, attempting to establish communication with the POP3 server. i) E-mail Size Limit: Enter maximum E-mail size in kilobytes. When the value is 0, the limitation for E-mail size is disabled. j) Cover Page: Specifies whether to print the body of an E-mail in addition to the attached files. When this item is set to On, the attached files and the body of an Email are printed. When no attached files exist, only the body of an E-mail is printed. When this item is set to Off, only the attached files are printed. When no attached files exist, nothing is printed. 5. You can configure settings for Transmission. Make the following settings: 42 Embedded Web Server
-
 1
1 -
2
-
3
-
4
-
5
-
6
-
7
-
8
-
9
-
10
-
11
-
12
-
13
-
14
-
15
-
16
-
17
-
18
-
19
-
20
-
21
-
22
-
23
-
24
-
25
-
26
-
27
-
28
-
29
-
30
-
31
-
32
-
33
-
34
-
35
-
36
-
37
-
38
-
39
-
40
-
 41
41 -
 42
42 -
 43
43 -
 44
44 -
 45
45 -
 46
46 -
 47
47 -
 48
48 -
 49
49 -
 50
50 -
 51
51 -
52
-
53
-
54
-
55
-
56
-
57
-
58
-
59
-
60
-
61
-
62
-
63
-
64
-
65
-
66
-
67
-
68
-
69
-
70
-
71
-
72
-
73
-
74
-
75
-
76
-
77
-
78
-
79
-
80
-
81
-
82
-
83
-
84
-
85
-
86
-
87
-
88
-
89
-
90
-
91
-
92
-
93
-
94
-
95
-
96
 |
 |
