Lexmark Optra C710 User's Guide - Page 95
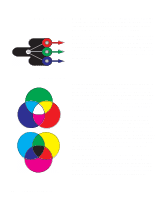
A quick overview of the Color settings and their applications are, described in the table below
 |
View all Lexmark Optra C710 manuals
Add to My Manuals
Save this manual to your list of manuals |
Page 95 highlights
A quick overview of the Color settings and their applications are described in the table below: Color setting Auto* Vivid Off CMYK Black and White Display 2-Color Draft Image Enhancement Print Resolution Screening method Applications These settings allows you to adjust the printed color to better match the colors of other output devices or standard color systems. The default setting, Auto, uses different color profiles on each object on the page (text, graphics or images). To adjust the brightness and saturation of your text and business graphics. Use 2-Color Draft or Black and White to save toner when printing drafts of your document. Use Black and White for documents that will be reproduced on a copier. The default setting, On, produces high quality color output by allowing the printer to decide which images to enhance based on the material being printed. Any time you prefer the printer to decide which images to enhance using the Image Enhancement screening methods. These two resolution settings are used to produce high quality or high resolution. The default setting, 600, uses halftoning to produce high quality output. The 1200 setting provides the highest resolution output. Use the 1200 dpi setting anytime you have a need for greater text, line, and image detail. The 1200 dpi setting greatly reduces the print speed but provides four times the resolution as the 600 dpi setting. Note: Regardless of the screening method used, the printer applies a unique screening algorithm to small text (less than 24 points in size). This ensures the text characters have smooth, crisp edges. Chapter 4: Controlling your printer 81
-
 1
1 -
2
-
3
-
4
-
5
-
6
-
7
-
8
-
9
-
10
-
11
-
12
-
13
-
14
-
15
-
16
-
17
-
18
-
19
-
20
-
21
-
22
-
23
-
24
-
25
-
26
-
27
-
28
-
29
-
30
-
31
-
32
-
33
-
34
-
35
-
36
-
37
-
38
-
39
-
40
-
41
-
42
-
43
-
44
-
45
-
46
-
47
-
48
-
49
-
50
-
51
-
52
-
53
-
54
-
55
-
56
-
57
-
58
-
59
-
60
-
61
-
62
-
63
-
64
-
65
-
66
-
67
-
68
-
69
-
70
-
71
-
72
-
73
-
74
-
75
-
76
-
77
-
78
-
79
-
80
-
81
-
82
-
83
-
84
-
85
-
86
-
87
-
88
-
89
-
 90
90 -
 91
91 -
 92
92 -
 93
93 -
 94
94 -
 95
95 -
 96
96 -
 97
97 -
 98
98 -
 99
99 -
 100
100 -
101
-
102
-
103
-
104
-
105
-
106
-
107
-
108
-
109
-
110
-
111
-
112
-
113
-
114
-
115
-
116
-
117
-
118
-
119
-
120
-
121
-
122
-
123
-
124
-
125
-
126
-
127
-
128
-
129
-
130
-
131
-
132
-
133
-
134
-
135
-
136
-
137
-
138
-
139
-
140
-
141
-
142
-
143
-
144
-
145
-
146
-
147
-
148
-
149
-
150
-
151
-
152
-
153
-
154
-
155
-
156
-
157
-
158
-
159
-
160
-
161
-
162
-
163
-
164
-
165
-
166
-
167
-
168
-
169
-
170
-
171
-
172
-
173
-
174
-
175
-
176
-
177
-
178
-
179
-
180
-
181
-
182
-
183
-
184
-
185
-
186
-
187
-
188
-
189
-
190
-
191
-
192
-
193
-
194
-
195
-
196
-
197
-
198
-
199
-
200
-
201
-
202
-
203
-
204
-
205
-
206
-
207
-
208
-
209
-
210
-
211
-
212
-
213
-
214
-
215
-
216
-
217
-
218
-
219
-
220
-
221
-
222
-
223
-
224
-
225
-
226
-
227
-
228
-
229
-
230
-
231
-
232
-
233
-
234
-
235
-
236
-
237
-
238
-
239
-
240
-
241
-
242
-
243
-
244
-
245
-
246
-
247
-
248
-
249
-
250
-
251
-
252
-
253
-
254
-
255
-
256
-
257
-
258
-
259
-
260
-
261
-
262
-
263
-
264
-
265
-
266
-
267
-
268
-
269
-
270
-
271
-
272
-
273
-
274
-
275
-
276
-
277
-
278
-
279
-
280
-
281
-
282
-
283
 |
 |
