Lexmark X6570 User's Guide - Page 104
Enlarging or reducing an image, Modifying the Copy settings, Start Color, Start Black, Copy Mode
 |
UPC - 836367002285
View all Lexmark X6570 manuals
Add to My Manuals
Save this manual to your list of manuals |
Page 104 highlights
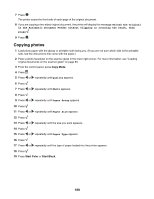
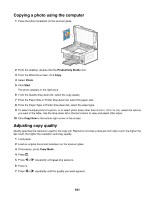
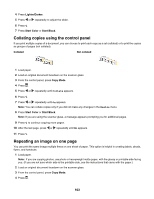
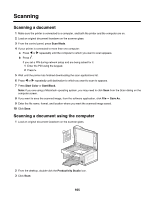
5 Press or repeatedly until Repeat Image appears. 6 Press . 7 Press or repeatedly until the number of images you want to print on one page appears. 8 Press Start Color or Start Black. Enlarging or reducing an image 1 Load paper. Note: If you are copying photos, use photo or heavyweight matte paper, with the glossy or printable side facing you. (If you are not sure which side is the printable side, see the instructions that came with the paper.) 2 Load an original document or photo facedown on the scanner glass. 3 From the control panel, press Copy Mode. 4 Press . 5 Press or repeatedly until Resize appears. 6 Press . 7 Press or Notes: repeatedly until the setting you want appears. • If you select Custom Resize, press and hold or until the size you want appears and press . • If you select Borderless, the printer will reduce or enlarge the document or photo as necessary to print a borderless copy on the paper size you have selected. For best results with this resize setting, use photo paper and set the paper type selection to Automatic or Photo. 8 Press Start Color or Start Black. Modifying the Copy settings 1 With your scanned image open on the Copy screen, click the Settings tab. 2 From the Copies box, select the number of copies you want. 3 From the Quality drop-down list, select a copy quality. 4 From the Paper Size in Printer drop-down list, select the paper size. 5 Select the print size by clicking the appropriate thumbnail in the Print Size area of the screen, or use the drop-down list. 6 When you have finished making changes to the copy settings, click Copy Now from the right pane of the screen. The photo will be copied. 104
-
 1
1 -
2
-
3
-
4
-
5
-
6
-
7
-
8
-
9
-
10
-
11
-
12
-
13
-
14
-
15
-
16
-
17
-
18
-
19
-
20
-
21
-
22
-
23
-
24
-
25
-
26
-
27
-
28
-
29
-
30
-
31
-
32
-
33
-
34
-
35
-
36
-
37
-
38
-
39
-
40
-
41
-
42
-
43
-
44
-
45
-
46
-
47
-
48
-
49
-
50
-
51
-
52
-
53
-
54
-
55
-
56
-
57
-
58
-
59
-
60
-
61
-
62
-
63
-
64
-
65
-
66
-
67
-
68
-
69
-
70
-
71
-
72
-
73
-
74
-
75
-
76
-
77
-
78
-
79
-
80
-
81
-
82
-
83
-
84
-
85
-
86
-
87
-
88
-
89
-
90
-
91
-
92
-
93
-
94
-
95
-
96
-
97
-
98
-
 99
99 -
 100
100 -
 101
101 -
 102
102 -
 103
103 -
 104
104 -
 105
105 -
 106
106 -
 107
107 -
 108
108 -
 109
109 -
110
-
111
-
112
-
113
-
114
-
115
-
116
-
117
-
118
-
119
-
120
-
121
-
122
-
123
-
124
-
125
-
126
-
127
-
128
-
129
-
130
-
131
-
132
-
133
-
134
-
135
-
136
-
137
-
138
-
139
-
140
-
141
-
142
-
143
-
144
-
145
-
146
-
147
-
148
-
149
-
150
-
151
-
152
-
153
-
154
-
155
-
156
-
157
-
158
-
159
-
160
-
161
-
162
-
163
-
164
-
165
-
166
-
167
-
168
-
169
-
170
-
171
-
172
-
173
-
174
-
175
-
176
-
177
-
178
-
179
-
180
-
181
-
182
-
183
-
184
-
185
-
186
-
187
-
188
-
189
-
190
-
191
-
192
-
193
-
194
-
195
-
196
-
197
-
198
-
199
-
200
-
201
-
202
-
203
-
204
-
205
-
206
-
207
-
208
-
209
-
210
-
211
-
212
-
213
-
214
-
215
-
216
-
217
-
218
-
219
-
220
-
221
-
222
-
223
 |
 |