Oki ML591 MICROLINE Reference Manual - Page 85
Custom Character Commands: 24-Pin Printers, Designing a Custom Character for 24-Pin Printers
 |
View all Oki ML591 manuals
Add to My Manuals
Save this manual to your list of manuals |
Page 85 highlights
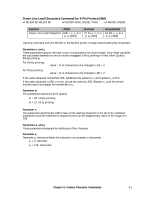
memory: • you reset the printer with the ESC CAN command • you overwrite them with new custom characters • you use the ESC $ command to overwrite them with the Standard Character Set. Custom Character Commands: 24-Pin Printers Designing a Custom Character for 24-Pin Printers The technique for designing your own custom characters is much like that of designing a graphic image, but on a much smaller scale. You can design characters in either Utility or LQ mode: simply activate the desired mode before you download the characters. Begin by designing your character on a grid. The height of the grid is 24 dots, each corresponding to a pin on the printhead. The width of the grid, as well as the width of the character itself, depends on the print mode. Table 35: Custom Character Commands - Character/Grid Width for Print Modes (24-Pin Printers) d0 = space to the left of the character d1 = width of the character itself d2 = space to the right of the character Print Mode Utility LQ Proportional Max. Character Width (d1) 15 dots 37 dots 37 dots Max. Total Grid Width (d0 + d1 + d2) 18 dots 42 dost 42 dots Note: If the printer is in superscript or subscript mode, only the first two or last two bytes are needed for each column. Characters are designed on a grid made up of columns of 24 dots. Each column, in turn, is divided into three 8-dot groups, and each 8-dot group is represented by a byte of data. When designing a character, keep the intended use for the character in mind. If the character is to be included with text, leave the top and bottom two rows of the grid blank, in keeping with general font design standards. The character's baseline occurs at the sixth dot from the bottom. The columns of the grid to the left and right of your character affect where it will appear in relation to the characters on either side. If you don't leave blank columns, adjacent characters may appear to run right into your custom character. 46 Chapter 5: Custom Character Commands
-
 1
1 -
2
-
3
-
4
-
5
-
6
-
7
-
8
-
9
-
10
-
11
-
12
-
13
-
14
-
15
-
16
-
17
-
18
-
19
-
20
-
21
-
22
-
23
-
24
-
25
-
26
-
27
-
28
-
29
-
30
-
31
-
32
-
33
-
34
-
35
-
36
-
37
-
38
-
39
-
40
-
41
-
42
-
43
-
44
-
45
-
46
-
47
-
48
-
49
-
50
-
51
-
52
-
53
-
54
-
55
-
56
-
57
-
58
-
59
-
60
-
61
-
62
-
63
-
64
-
65
-
66
-
67
-
68
-
69
-
70
-
71
-
72
-
73
-
74
-
75
-
76
-
77
-
78
-
79
-
 80
80 -
 81
81 -
 82
82 -
 83
83 -
 84
84 -
 85
85 -
 86
86 -
 87
87 -
 88
88 -
 89
89 -
 90
90 -
91
-
92
-
93
-
94
-
95
-
96
-
97
-
98
-
99
-
100
-
101
-
102
-
103
-
104
-
105
-
106
-
107
-
108
-
109
-
110
-
111
-
112
-
113
-
114
-
115
-
116
-
117
-
118
-
119
-
120
-
121
-
122
-
123
-
124
-
125
-
126
-
127
-
128
-
129
-
130
-
131
-
132
-
133
-
134
-
135
-
136
-
137
-
138
-
139
-
140
-
141
-
142
-
143
-
144
-
145
-
146
-
147
-
148
-
149
-
150
-
151
-
152
-
153
-
154
-
155
-
156
-
157
-
158
-
159
-
160
-
161
-
162
-
163
-
164
-
165
-
166
-
167
-
168
-
169
-
170
-
171
-
172
-
173
-
174
-
175
-
176
-
177
-
178
-
179
-
180
 |
 |
