Yamaha PSR-9000 Owner's Manual
Yamaha PSR-9000 Manual
 |
View all Yamaha PSR-9000 manuals
Add to My Manuals
Save this manual to your list of manuals |
Yamaha PSR-9000 manual content summary:
- Yamaha PSR-9000 | Owner's Manual - Page 1
may be provided on the rear panel of the PSR-9000 near the power cord. Make sure that the voltage selector is set for the voltage in your area. The voltage selector is set at 240V when the unit is initially shipped. To change the setting use - Yamaha PSR-9000 | Owner's Manual - Page 2
indicated in the safety instruction section. CAUTION RISK OF ELECTRIC SHOCK DO NOT OPEN CAUTION: TO REDUCE THE RISK OF ELECTRIC SHOCK. DO NOT REMOVE COVER (OR BACK). NO USER-SERVICEABLE PARTS INSIDE. REFER SERVICING TO QUALIFIED SERVICE PERSONNEL. See bottom of Keyboard enclosure for graphic symbol - Yamaha PSR-9000 | Owner's Manual - Page 3
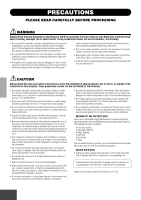
following: 1. Read all Safety Instructions, Installation Instructions, Spe- cial Message Section items, and any Assembly Instructions found in this manual BEFORE making any connections, including connection to the main supply. 2. Main Power Supply Verification: Yamaha products are manufactured speci - Yamaha PSR-9000 | Owner's Manual - Page 4
to the Flash ROM (at the corresponding number locations). The following data types are affected: • One Touch Setting • Registration Memory • Music Database • Multi Pad • Flash Style • Setup If you've deleted the factory-set data, you can use the Restore function (page 98) to load a copy of it from - Yamaha PSR-9000 | Owner's Manual - Page 5
pops out. • When the PSR-9000 is turned on, the LED below the floppy disk slot will be lit indicating that the Disk Drive is ready to use. q To eject a floppy disk: • Before ejecting the disk, be sure to confirm that the FDD is stopped (check if the DISK IN USE lamp is off). Press - Yamaha PSR-9000 | Owner's Manual - Page 6
keyboard. The Yamaha PSR-9000 factory-set data: One Touch Setting, Registration Memory, Music Database, Multi Pad, Flash Style and Setup.) • Owner's Manual Unauthorized copying of copyrighted software for purposes other than the purchaser's personal use is prohibited. This product (PSR-9000 - Yamaha PSR-9000 | Owner's Manual - Page 7
Style List, Effect List, MIDI Data Format, and MIDI Implementation Chart. Troubleshooting ...page 156 If the PSR-9000 does not function as expected or you have some problem with the sound or operation, consult this section before calling your Yamaha dealer or service center. Most common problems - Yamaha PSR-9000 | Owner's Manual - Page 8
6 New Functions in PSR-9000 Version 2 .......7 How to use the manual 7 Contents 8 Top Panel & Connections 10 Rear Panel & Connections 12 Starting Up 14 Music stand 15 Panel logos 15 Basic Operation Display-based Controls 42 Display Messages 43 Name Entry 44 Computer Keyboard Functions 44 - Yamaha PSR-9000 | Owner's Manual - Page 9
& Copying Floppy Disks ...........130 Backing Up/Restoring the Data in Flash ROM ..130 Converting files 131 * Editing Disk Files 131 Editing Directories 132 Formatting a Disk 132 Checking a Disk 133 The PSR-9000 "Functions 134 Master Tuning/Scale Tuning 134 Split Point/Chord Fingering 135 - Yamaha PSR-9000 | Owner's Manual - Page 10
MENU FUNCTION MIDI DISKDIRECT FLASH STYLE KEYBOARD TRANSPOSE oRESET ENDING/rit. FADEIN/OUT SYNC STOP SYNC START FILL IN & BREAK START/STOP !0 DIGITAL STUDIO SOUND CREATOR SAMPLING CUSTOM VOICE DIGITAL RECORDING SONG STYLE MULTI PAD MIXING CONSOLE EFFECTS FILTER/EQ TUNING PART MULTIPAD - Yamaha PSR-9000 | Owner's Manual - Page 11
disk drive that lets you save all your important original data to floppy disk for future recall. The PSR-9000 is compatible with a wide variety of disk formats, allowing you to playback song data on commercially available XG, GM , DOC, and Disklavier Piano Soft disks. !2 Data dial 42 !3 DEMO button - Yamaha PSR-9000 | Owner's Manual - Page 12
data on a larger screen. Refer to page 141. You can connect a computer keyboard to the PSR-9000 for inputting song and file names or Voice/Style/Song/Registration Memory numbers. This function is also very convenient in Step recording. Please note that Macintosh computer keyboards cannot be used - Yamaha PSR-9000 | Owner's Manual - Page 13
PSR-9000's stereo sound. Refer to page 126. This SCSI-2 50-pin connector (D-sub, half-pitch) can be used to connect to an external SCSI data setup, the sound of the PSR-9000 itself as well as the external sources is reproduced via the PSR-9000's built-in amplifier and speakers, allowing the PSR-9000 - Yamaha PSR-9000 | Owner's Manual - Page 14
the AC power cord supplied with the PSR-9000 into the rear-panel AC cord socket. AC INLET WARNING • Use only the AC power cord supplied with the PSR-9000. If the supplied cord is lost or damaged and needs to be replaced, contact your Yamaha dealer. The use of an inappropriate replacement can pose - Yamaha PSR-9000 | Owner's Manual - Page 15
instruments and MIDI devices, including the Clavinova series. Style File Format The Style File Format - SFF - is Yamaha's original style file format which uses a unique conversion system to provide high-quality automatic accompaniment based on a wide range of chord types. The PSR-9000 uses the SFF - Yamaha PSR-9000 | Owner's Manual - Page 16
Quick Guide q q q q q q q q q q q q q q q q q Playing Voices Voice related buttons Playing a Voice 1 Press the [R1] LCD button to turn the RIGHT1 part on. • The voice selected here is F called voice RIGHT 1. See page 53 for more informa- tion on voice RIGHT1. G H PART SELECT I LEFT HOLD - Yamaha PSR-9000 | Owner's Manual - Page 17
way described above, by using the [RIGHT3] button hand. Beautiful synth pad Expressive synth lead. Play long notes. Stereo sampled drums with velocity switch up to 4 layers. Also check out Live! Funk Kit. q q q q q q q q q q q q q q q q q q q q q q q q q q q q q q q q q q q q q q q q q q Quick Guide - Yamaha PSR-9000 | Owner's Manual - Page 18
played with the left hand. • The point on the keyboard that separates voice LEFT and voice RIGHT1~3 is called the "split point." Refer to page 135 for instructions on setting the split point. Adjusting the Octave setting The [UPPER OCTAVE] button allows the RIGHT1, RIGHT2, and RIGHT3 parts to be - Yamaha PSR-9000 | Owner's Manual - Page 19
SYNTHESIZER XG CUSTOM VOICE Playing Voices 2 Use the LCD [1] - [8] buttons to sound is produced by pipes of different lengths (in feet). Use button [1] to adjust the 16' or 8' footage. You . Try out the preset Organ Flutes voices The PSR-9000 provides 10 pre-programmed Organ Flutes voices. F - Yamaha PSR-9000 | Owner's Manual - Page 20
. 2 Select a style. • The PSR-9000 styles are divided into two groups : Preset styles and Flash styles. For details about Flash styles, see page 51. F G H I For this example, J Jive is selected. 3 Turn Auto Accompaniment on. The specified left-hand section of the keyboard becomes the "Auto - Yamaha PSR-9000 | Owner's Manual - Page 21
q Metronome This style plays back only a metronome click, without any other rhythm parts. Use this as you would a normal metronome, practicing in time with the click. You can adjust the tempo with the data dial. Playing chords in the Auto Accompaniment section of the keyboard produces corresponding - Yamaha PSR-9000 | Owner's Manual - Page 22
arrangement in your performance. INTRO MAIN VARIATION FILL IN & BREAK ENDING This is used used for playing the main part Use the same operations as in "Using Auto Accompaniment." 5 Press any of the [INTRO] buttons. INTRO 6 As soon as you play a chord with your left hand Guide q q q q q q q q q q - Yamaha PSR-9000 | Owner's Manual - Page 23
ending is playing back. • You can use one of the intro sections even in . • You can begin the accompaniment by using any of the other sections, as well as IN/OUT] button can be used to produce smooth fade-ins and auto-accompaniment section of the keyboard are released. Accompaniment playback will - Yamaha PSR-9000 | Owner's Manual - Page 24
hand, the auto accompaniment starts. Split Point 4 Play melodies with your right hand and play various chords with your left hand. Auto Accompaniment section 5 Try out other One Touch Setting setups accompaniment parts are mode is active. 24 Quick Guide q q q q q q q q q q q q q q q q q q q - Yamaha PSR-9000 | Owner's Manual - Page 25
disk drive. 2 Press the [DISK DIRECT] button. DISKDIRECT 3 Select a style. For example, select "16Balad3." 4 Play the auto accompaniment (page 22). • It may be necessary to wait for a while in step #3 until the PSR-9000 can play the accompaniment, since it takes some time to read the style data - Yamaha PSR-9000 | Owner's Manual - Page 26
PSR-9000 automatically makes all appropriate panel settings to let you play in that music style! For a list of Music Database setup parameters, refer to page 178. Using cursor to the desired location by using button [6] or [7] to call up use the Data dial to select the desired Music Database - Yamaha PSR-9000 | Owner's Manual - Page 27
(see step #2 on page 26) and play along with the accompaniment playback. Split Point Auto Accompaniment section You can also create your own Music Database setups. For details, refer to page 64. q q q q q q q q q q q q q q q q q q q q q q q q q q q q q q q q q q q q q q q q q q Quick Guide 27 25 - Yamaha PSR-9000 | Owner's Manual - Page 28
style, voice, and effect settings that will suit a particular type of music. You can instantly change panel settings with the touch of a single button. The Registration Memory provides up to 512 complete control-panel setups (64 banks, 8 setups setup parameters, refer to page 178. Using Quick Guide q - Yamaha PSR-9000 | Owner's Manual - Page 29
've deleted the factory-set data, you can use the Restore function (page 130) to load a copy of it from the included disks (page 6). Registration Memory banks 64 banks in Flash ROM All banks can be edited. BANK 01 1 2 3 4 5 6 7 8 04~64 These banks do not contain preset setups. 01~03 These - Yamaha PSR-9000 | Owner's Manual - Page 30
page 5. Floppy disk drive The following disks are compatible for playback on the PSR-9000. Refer to page 15 for more details on the logos. Disks bearing this logo contain song data for voices defined in the GM standard. Disks bearing this logo contain song data using the XG format, an extension of - Yamaha PSR-9000 | Owner's Manual - Page 31
corresponding to the part you wish to turn on or off. PART ON/OFF PART Disk Song Playback • With song data software (Standard MIDI format 0) that includes lyrics, you can view the lyrics in the display during playback. See page 67 for details. For appropriate song data, the PSR-9000 can display the - Yamaha PSR-9000 | Owner's Manual - Page 32
uses advanced voice-processing technology to automatically produce vocal harmony based on a single lead vocal. In addition to straightforward harmony, the PSR-9000 turn the Vocal Harmony effect on. VOCAL HARMONY TALK DSP(8) V.H. (9) SELECT MIC SETUP 32 Quick Guide q q q q q q q q q q q q q q q q - Yamaha PSR-9000 | Owner's Manual - Page 33
Harmony with Song Playback The PSR-9000 can properly play back disk songs that contain Vocal Harmony data. 1-4 Use the same operation as in "Playback of Song Disks" on page 30. 5 Turn the Vocal Harmony effect on and select a Vocal Harmony type (see above). 6 Press the [MIC SETUP] button and set the - Yamaha PSR-9000 | Owner's Manual - Page 34
The Multi Pads Multi Pads The PSR-9000 Multi Pads can be used to play a number of short pre-recorded rhythmic and melodic sequences that can be used to add impact and variety to your keyboard performances. Playing the Multi Pads 1 Use the M.PAD BANK [-]/[+] buttons to select a Multi Pad Bank. - Yamaha PSR-9000 | Owner's Manual - Page 35
right-hand range of the keyboard. Split Point VOICE EFFECT TOUCH SUSTAIN DSP(4~7) SLOW/ FAST HARMONY/ECHO POLY/ MONO These buttons turn the corresponding effects on or off for the part currently selected via the PART SELECT buttons. AUTO ACCOMPANIMENT Auto Accompaniment section The PSR-9000 - Yamaha PSR-9000 | Owner's Manual - Page 36
lets you record your own keyboard performances to disk. With multiple tracks for recording, comprehensive editing features, plus the use of the auto accompaniment and the Multi Pads, you can record complex, fully orchestrated pieces of music in any music style or arrangement - from solo piano and - Yamaha PSR-9000 | Owner's Manual - Page 37
data to the disk. Insert a blank recordable disk into the disk drive, and follow the instructions in the illustrations below. • If ACMP is set to "REC" in step #5, you can start recording your keyboard the Auto Accompaniment with your keyboard performance. • Using Registration Memory (page 28), - Yamaha PSR-9000 | Owner's Manual - Page 38
RECORD." 2 A B C D E 3 A B C D E 4 [NEXT] DIGITAL STUDIO SOUND CREATOR SAMPLING CUSTOM VOICE DIGITAL RECORDING SONG STYLE MULTI PAD MIXING CONSOLE EFFECTS FILTER/EQ TUNING PART A B C D E 5 Set the track modes. • When set to "REC," your keyboard performance and Multi Pad playback can be - Yamaha PSR-9000 | Owner's Manual - Page 39
style part to be recorded. This is particularly convenient for mastering parts the rhythm parts of the data to the disk. Insert a blank recordable disk into the disk drive, and follow the instructions keyboard performance. • Using data will be lost if exiting from the Record mode without saving the data - Yamaha PSR-9000 | Owner's Manual - Page 40
from a keyboard. Recording a Sample 1-4 Use the same operation as in "Setting up" (page 32). 5 Press the [SOUND CREATOR] button. 6 Select "SAMPLING." 7 Select "RECORDING." A A B B C C D D E E DIGITAL STUDIO SOUND CREATOR SAMPLING CUSTOM VOICE DIGITAL RECORDING SONG STYLE MULTI PAD - Yamaha PSR-9000 | Owner's Manual - Page 41
later). 13 Store voice parameters for the recorded sample as a Custom voice. 1) Follow the instructions in the chart below. A B C D to exit from the Sampling mode. 15 Select the Custom voice number above and play the voice from the keyboard. 16 Save the recorded sample (wave data) to disk. 1) - Yamaha PSR-9000 | Owner's Manual - Page 42
over the PSR-9000's functions. A B LCD buttons C D E LCD CONTRAST F G LCD buttons H I J PAGE CONTROL DIRECT ACCESS MAIN MIXER EXIT TEMPO BACK NEXT PART 1 2 3 4 5 6 7 8 ON/OFF PART LCD buttons BEAT DATA ENTRY Data dial q LCD buttons The LCD (A~J) buttons are used to select - Yamaha PSR-9000 | Owner's Manual - Page 43
By using the PSR-9000 display panel facilitates operation by making it possible to display comprehensive message and prompts that will guide you through certain operations. These messages can be displayed in one of five different languages. When such messages appear, simply follow the instructions - Yamaha PSR-9000 | Owner's Manual - Page 44
be entered. You can also use the E data dial to select the character. keyboard (PC-compatible only) to the PSR-9000 for the following functions. For details about use with the PSR-9000, see page 143. PC KEYBOARD • Name Entry (see above) • Step Recording (see page 103) • Selecting voices, styles - Yamaha PSR-9000 | Owner's Manual - Page 45
CONTROL [NEXT] PRESET STYLE [8 BEAT] - [BALLROOM] FLASH STYLE [I] - [VIII] [DISK DIRECT] SONG DIRECTORY [I] - [V] [SONG SETUP] [SONG PLAYER] MULTI PAD [1], [2], [3], [4] MULTI PAD BANK [+], [-] [DISK/SCSI] [MIDI] VOCAL HARMONY [V.H.(9)] VOCAL HARMONY [SELECT] [MUSIC DATABASE] Data dial ONE TOUCH - Yamaha PSR-9000 | Owner's Manual - Page 46
vibrato effect to notes played on the keyboard 54 5 SONG [SONG PLAYER] [I] ... [V] [SONG SETUP] Turning Song Player on or off Selecting a song Setting the way in which the PSR-9000 reads the song data 30 30, 66 67 6 STYLE & STYLE MANAGER [AUTO ACCOMPANIMENT] [8BEAT] ... [BALLROOM] Turning Auto - Yamaha PSR-9000 | Owner's Manual - Page 47
TUNE MASTER TUNE Setting the overall pitch of the PSR-9000 134 SCALE TUNE Tuning each individual note of the octave 134 SPLIT POINT/FINGERING SPLIT POINT FINGERING Setting the point on the keyboard that separates the left-hand and 135 right-hand section Selecting the way in which chords are - Yamaha PSR-9000 | Owner's Manual - Page 48
and so on Editing Setup data (voice, etc.) 112 * Editing various parameters (Quantize, etc.) 112 * Storing the created style data to Flash ROM or clearing the created 106 * style data Editing various parameters related to the Style File Format 112 * Recording a style with the Step Recording - Yamaha PSR-9000 | Owner's Manual - Page 49
settings that match the selected style 24, 61 Recalling various panel settings 28 Turning the Freeze function on or off 28 Selecting a Registration Bank 28 Memorizing various panel settings to Registration Memory/One 28, 61 Touch Setting Selecting the PSR-9000 original preset voices 16 - Yamaha PSR-9000 | Owner's Manual - Page 50
. qDisk The PSR-9000 also allows you to store your data to floppy disk, an optional hard disk drive, or an external (optional) SCSI device (such as a hard disk drive, or removable storage). RAM Panel settings - page 178 Multi Pad Creator - page 119 Style Creator - page 104 Setup (MIDI settings, etc - Yamaha PSR-9000 | Owner's Manual - Page 51
to the Flash ROM (at the corresponding number locations). The following data types are affected: • One Touch Setting • Registration Memory • Music Database • Multi Pad • Flash Style • Setup If you've deleted the factory-set data, you can use the Restore function (page 130) to load a copy of it from - Yamaha PSR-9000 | Owner's Manual - Page 52
q q q q q q q Demonstration The PSR-9000 has been programmed with a variety of demonstration songs that showcase the sophisticated capabilities of the instrument. The songs can be played individually or all together, in their normal sequence or random order. DEMO Select a song category. Turn Repeat - Yamaha PSR-9000 | Owner's Manual - Page 53
, Right3 and Left Quick Guide on page 16 The PSR-9000 allows you to individually select and play up to four parts at the same time in a number of ways. A range of voices can be assigned to each part. s Keyboard Functions As explained above, the keyboard of the PSR-9000 can sound three different - Yamaha PSR-9000 | Owner's Manual - Page 54
Kit assignments. q XG Voices Yamaha's XG format is a major new enhancement to the GM (General MIDI) System Level 1 format. It provides a larger number of Use the PSR-9000 PITCH BEND wheel to bend notes up (roll the wheel away from you) or down (roll the wheel toward you) while playing the keyboard - Yamaha PSR-9000 | Owner's Manual - Page 55
strength - just as on an acoustic instrument. Two types of keyboard touch affect this function: Initial Touch and After Touch. • Initial Touch ..... With this function, the PSR-9000 senses how strongly or softly you play the keys, and uses that playing strength to affect the sound in various ways - Yamaha PSR-9000 | Owner's Manual - Page 56
Organ Flutes Quick Guide on page 19 In addition to the many organ voices in the [ORGAN] voice category, the PSR-9000 has an ORGAN FLUTES voice which can be assigned to the currenty selected part and edited by pressing the VOICE [ORGAN FLUTES] button. Basic Procedure CHOIR & PAD PERCUSSION ORGAN - Yamaha PSR-9000 | Owner's Manual - Page 57
Organ Flutes Vibrato Depth Footage Volume Mode Attack Length Response Reverb Depth Chorus Depth DSP on/off DSP Depth Vibrato Speed DSP Type Slow/Fast EQ Low EQ High Can be set to any of three levels via the Vibrato Depth LCD button. The button sequentially selects a depth of "1", "2", or "3". The - Yamaha PSR-9000 | Owner's Manual - Page 58
the PSR-9000 will automatically create appropriate accompaniment while you play just about anything, anywhere on the keyboard using both hands.You don't have to worry about specifying the accompaniment chords. Although the Full Keyboard mode is designed to work with many songs, some arrangements may - Yamaha PSR-9000 | Owner's Manual - Page 59
with both major and minor chords. • The chord fingerings listed are all in "root" position, but other inversions can be used - with the following exceptions: m7, m7b5, 6, m6, sus4, aug, dim7, 7b5, 6(9), m7_11, 1+2+5. • Inversion of the 7sus4 chord is not recognized if the 5th is omitted. • - Yamaha PSR-9000 | Owner's Manual - Page 60
stop when the fade-out is complete. FADEIN/OUT Tempo Control Each style of the PSR-9000 has been programmed with a default or standard tempo; however, this can be changed to any value between 32 and 280 beats per minute by using the data dial (see page 42) when the TEMPO lamp is engaged. This - Yamaha PSR-9000 | Owner's Manual - Page 61
in the auto-accompaniment section of the keyboard are released. Accompaniment playback will start using the One Touch Setting feature, refer to page 24 in the "Quick Guide." This section covers how to create your own One Touch Setting setups (4 setups per style). For a list of One Touch Setting setup - Yamaha PSR-9000 | Owner's Manual - Page 62
PSR-9000 styles are divided into two groups : Preset styles and Flash styles. Flash styles pre-recorded to Flash styles I through VIII can be replaced by the desired data with the Style Manager function. Flash Styles in Flash ROM Save Load Disk Styles Style Manager Since all Flash style data - Yamaha PSR-9000 | Owner's Manual - Page 63
in Flash ROM This allows you to rename the style file name. Follow the on-screen instructions. Name entry is described on page 44. s Defragment Flash ROM • The PSR-9000 can load files containing Registration Memory data created on the PSR-8000, without having to convert them. However, please note - Yamaha PSR-9000 | Owner's Manual - Page 64
on-screen instructions. Since all Music Database data is stored to Flash ROM, any data in the selected Music Database location will be erased and replaced by your new settings. This includes all of the factory programmed preset setups. If you've deleted the factory-set data, you can use the Restore - Yamaha PSR-9000 | Owner's Manual - Page 65
new created pad data. • Bank #59 (factory preset) of the Multi Pads can be used to send various MIDI messages. This convenient feature lets you control the following MIDI functions of an external device by simply pressing the appropriate Multi Pad. Pad 1 All Note Off Pad 2 Reset All Controllers Pad - Yamaha PSR-9000 | Owner's Manual - Page 66
Disk Song Playback Quick Guide on page 30 The PSR-9000 Song mode allows song data to be played back from a floppy disk, an optional hard disk or an optional SCSI device. This section explains some important functions of song playback that are not covered in the "Quick Guide." For basic information - Yamaha PSR-9000 | Owner's Manual - Page 67
OFF, the PSR9000 reads the lyric data after playback is started. This may result in a slight delay before the lyrics are displayed. • When set to NEVER DISPLAY, the lyrics will not be shown in the LCD display during playback. When the Ultra Quick Start function here is set to ON, the PSR-9000 reads - Yamaha PSR-9000 | Owner's Manual - Page 68
Quick Guide on page 32 Please note the following points : • A standard dynamic microphone with an impedance of about 250 ohms is recommended. (The PSR-9000 does not support phantom-powered condenser microphones.) • The Yamaha MZ106s microphone is recommended for use with the PSR-9000. • The - Yamaha PSR-9000 | Owner's Manual - Page 69
effect Basic Procedure VOCAL HARMONY TALK DSP(8) V.H. (9) SELECT MIC SETUP 1 Press the VOCAL HARMONY [SELECT] button. 2 Select second harmony note by the specified number of cents. Detunes the third harmony note by the specified number of cents. When "ON" the lead vocal sound "plays" the PSR-9000 - Yamaha PSR-9000 | Owner's Manual - Page 70
song playback. Keyboard • OFF • UPPER • LOWER Keyboard control over harmony is turned off. Notes played to the right of the split point control the harmony. Notes played to the left of the split point control the harmony. Song (from disk or external MIDI sequencer) • OFF Song data control over - Yamaha PSR-9000 | Owner's Manual - Page 71
hear only the Vocal Harmony from the PSR9000's speakers; if it is set to on the keyboard (VOICE R1, R2, R3, L) and/or song data which data which will be used for chord detection. • OFF • XF • TR1-TR16 Chords are not detected. Chords of XF format are detected. Chords are detected from note data - Yamaha PSR-9000 | Owner's Manual - Page 72
keyboard. During use, sampled sounds are kept in the internal wave RAM memory. The PSR-9000 comes with a 1megabyte wave memory which can be expanded up to a maximum of 65 megabytes by installing optional SIMM memory modules - see page 160 for details. Sampled wave data can be saved to floppy or hard - Yamaha PSR-9000 | Owner's Manual - Page 73
PSR-9000 sampling terminology, as follows: q Wave A "wave" is the raw audio data created whenever you sample a new sound or import a WAV or AIFF format wave file. The PSR-9000 the keyboard, but they cannot be layered (i.e. they will not sound simultaneously when a single key is played). The PSR-9000 - Yamaha PSR-9000 | Owner's Manual - Page 74
[SOUND CREATOR] button. DIGITAL STUDIO SOUND CREATOR SAMPLING CUSTOM VOICE DIGITAL RECORDING SONG STYLE MULTI PAD MIXING CONSOLE EFFECTS FILTER/EQ TUNING PART 2 Select "SAMPLING." 3 Select the desired menu. 4 Follow the on-screen instructions. Refer to "Quick Guide" on page 40 for details. The - Yamaha PSR-9000 | Owner's Manual - Page 75
depending on the selected DSP type. Importing Wave Files from Disk To import previously saved waveform files via the PSR-8000 or standard WAV or AIFF format files from disk, insert the appropriate disk into the PSR-9000 floppy disk drive, then press the [FILE IMPORT] LCD button in step #3 in "Basic - Yamaha PSR-9000 | Owner's Manual - Page 76
Sampling Editing Wave data The illustration below applies to step #4 of the Basic can be loaded and used by other instruments or computers which can handle the WAV format. 4 Store your settings as a Custom Voice to Flash ROM. s Wave Edit q Resampling The PSR-9000 originally records waves at - Yamaha PSR-9000 | Owner's Manual - Page 77
the Start, Press this to automatically Loop Start or Loop End address of the wave. remove all data prior to the specified Start point and after the End or Loop End point of your sample. See the illustration below. When this is turned ON, the LOOP ADDRESS LCD buttons will automatically - Yamaha PSR-9000 | Owner's Manual - Page 78
keyboard pitch. When ON, the playback pitch will remain the same (corresponding to the pitch of the C3 key) regardless of which key is pressed. This can be used specified time signature and tempo. This capability is particularly useful when the sample is a phrase rather than a simple sound. The wave - Yamaha PSR-9000 | Owner's Manual - Page 79
Sampling s Waveform Edit q Add Wave This function can be used to add a wave from a different waveform to the currently selected waveform. When a waveform contains two or more waves, the individual waves must be assigned to different areas of the keyboard (the waves cannot be "layered"). • The same - Yamaha PSR-9000 | Owner's Manual - Page 80
Quick Guide on page 40 The PSR-9000 has a Custom Voice Creator feature that allows you to create your own voices. Once you've created a voice, you can store it to a Custom voice location for future recall. Basic Procedure 1 Press the [SOUND CREATOR] button. DIGITAL STUDIO SOUND CREATOR SAMPLING - Yamaha PSR-9000 | Owner's Manual - Page 81
sound by boosting or cutting a certain frequency range. In addition to making the sound either brighter or more mellow, Filter can be used to produce electronic, synthesizer-like effects. • FREQ Determines the cutoff frequency or effective frequency range of the filter. (See diagram below.) Higher - Yamaha PSR-9000 | Owner's Manual - Page 82
volume of the current edited voice. Selects the desired scale (pitch) curve to be used by the current edited voice for the PSR-9000 keyboard. The CURVE LCD button provides a choice of four keyboard initial touch sensitivity curves, and the SENS LCD buttons adjust initial touch sensitivity. 82 - Yamaha PSR-9000 | Owner's Manual - Page 83
1cent steps (a cent is 1/100th of a semitone). Use the CATEGORY, VOICE, and WAVEFORM LCD buttons to select by the SAMPLING feature (page 72) are also available for selection in the "SAMPLING" CATEGORY. some notes may not sound. If this happens check the R1 OCTAVE setting in the MIXING CONSOLE TUNE - Yamaha PSR-9000 | Owner's Manual - Page 84
volume level, the Pitch EG controls the pitch, and the Filter EG controls the filter cutoff frequency. Indicates the EG settings as a diagram. Resets the currently selected EG parameters to their most basic settings. Amplitude (volume), pitch or filter cutoff frequency LEVEL ATTACK RATE DECAY1 RATE - Yamaha PSR-9000 | Owner's Manual - Page 85
at the RELEASE rate) after the key is released. q E3: FILTER The PSR-9000 features two independent filters. (For basic information about the filters, see filters to touch control. Higher values produce higher sensitivity. Resets the currently selected EG parameters to their most basic settings. Sets - Yamaha PSR-9000 | Owner's Manual - Page 86
Custom Voice Creating q E4: LFO An acronym for Low Frequency Oscillator, a block that produces a low frequency signal. The LFO can be used to modulate pitch, filter cutoff frequency, or amplitude to create a wide range of modulation effects. Vibrato effect based on LFO modulation, with a variable - Yamaha PSR-9000 | Owner's Manual - Page 87
q VOICE SET See page 139 for details about the Voice Set function. You can specify the Voice Set data to the Custom Voice. Custom Voice Creating q q q q q q q q q q q q q q q q q q q q q q q q q q q q q q q q q q q q q q q q q q q Reference 87 85 - Yamaha PSR-9000 | Owner's Manual - Page 88
(Main) Accompaniment Style BASS Accompaniment Style CHORD1 Accompaniment Style CHORD2 Accompaniment Style PAD Accompaniment Style PHRASE1 Accompaniment Style PHRASE2 Parts that can be set VOICE R1, R2, R3, L, Accompaniment Style track, Multi Pad 1~4, Vocal Harmony, MIDI q Multi Track Recording - Yamaha PSR-9000 | Owner's Manual - Page 89
SONG STYLE MULTI PAD MIXING CONSOLE EFFECTS FILTER/EQ TUNING PART 2 Select "SONG CREATOR." 3 Select the desired menu. Song Creator 4 Select the Record method. • If an optional hard disk has been installed or an optional SCSI device has been connected, you can also save the recorded song data to - Yamaha PSR-9000 | Owner's Manual - Page 90
Part Selecting/ Record Selecting" on page 91. Select the part for the corresponding track. Select this to return to the TRACK main display. Select the desired menu. No data begin from the measure specified at the MEASURE SET, and all data from that point to the end of the song will be replaced by the - Yamaha PSR-9000 | Owner's Manual - Page 91
when the first key is played on the keyboard. • Footswitch 1/2 ... When FOOT SW 1 PART SEL. LCD button will have changed to the [REC SEL.] LCD button) again to return to the normal track setup display. s Delete When the [DEL.] LCD button is pressed DELETE will appear for tracks which contain data - Yamaha PSR-9000 | Owner's Manual - Page 92
absolutely accurate to the specified note value. Press this to quantize the data. This determines how "strongly" the notes will be quantized. If a value are working with. For example, if the data was recorded with both quarter notes and eighth notes, use 1/8 for the quantize value. If the quantize - Yamaha PSR-9000 | Owner's Manual - Page 93
contain data). Press this to execute the Note Shift operation. After execution this button changes to an UNDO button which can be used to undo the Note Shift operation if the results are not satisfactory (the "UNDO" button will only remain active until the next operation is performed). Song Setup - Yamaha PSR-9000 | Owner's Manual - Page 94
timing. The explanations here apply to step #5 on page 89. s Entering the Note Event This section explains how to step-record notes, using three specific examples. • Example 1 1 Call up the Step Recording display by pressing the [STEP REC] button. 2 Play the keys C, D, E, F, G, A, B and C in order - Yamaha PSR-9000 | Owner's Manual - Page 95
• Example 2 1 w Song Creator e Press this while holding F. q Select this resolution. w 2 e r q Select this resolution. q Press this button, repeatedly if 3 necessary, to enable the dot- ted note selectors at the bot- tom of the display. (Pressing the button alternately switches the note - Yamaha PSR-9000 | Owner's Manual - Page 96
Song Creator • Example 3 1 2 3 4 5 w Press and hold C3. q Select this resolution. e Press this again while holding C3. q Press and hold C3 and E3. w Press this while holding C3 and E3. q Press and hold C3, E3 and G3. w Press this while holding C3, E3 and G3. q Press and hold C3, E3, G3 and C4. w - Yamaha PSR-9000 | Owner's Manual - Page 97
available. • Kbd. Vel When this is selected, the strength at which you play the keyboard determines the recorded velocity values. • fff The velocity of the entered note is set 80% 100% 40% • Staccatissimo.. 20% • Manual When this is selected, you can specify the Gate time as a percentage - Yamaha PSR-9000 | Owner's Manual - Page 98
Messages which are generated when the keyboard is played. Each message includes velocity value based on how hard the key is played. to copy all the selected events to the clipboard. Press this to paste all the event data that is currently contained in the clipboard. 98 Reference q q q q q q q q q - Yamaha PSR-9000 | Owner's Manual - Page 99
event selection. y Set the destination (the top of measure 3, in this case) by using the [MEAS], [BEAT] and [CLK] buttons. u Press the [PASTE] button. The diagram below illustrates how the PSR-9000 handles the copy/paste operation. Event data Copy Clipboard Event data at the new location Copy - Yamaha PSR-9000 | Owner's Manual - Page 100
the desired event. Enters checkmarks into all boxes. Selects only note data; checkmarks for all other boxes are removed. Reverses the checkmark settings for words, this enters checkmarks to all boxes that were previously un-checked, and vice versa. Enters/removes the checkmark in the selected box - Yamaha PSR-9000 | Owner's Manual - Page 101
move the cursor to the beginning of the song and press the [START/STOP] button to hear the Auto Accompaniment performance of your newly recorded data. q q q q q q q q q q q q q q q q q q q q q q q q q q q q q q q q q q q q q q q q q q q Reference 101 99 - Yamaha PSR-9000 | Owner's Manual - Page 102
data (however many measures it is from the position of the last input to the end of the Intro data are the same as in Step Recording (page 98). • Tempo • Accompaniment Volume • Accompaniment Part Volume • Accompaniment Part on/off • Style number • Section • Chord 102 Reference q q q q q q q q q q - Yamaha PSR-9000 | Owner's Manual - Page 103
a computer, you'll find many of the editing conventions that you're used to (such as moving the cursor and copying/pasting) apply to editing the PSR-9000 data as well. For details on using a computer keyboard with the PSR-9000, see page 143. For a list of the parameters you can control/operate - Yamaha PSR-9000 | Owner's Manual - Page 104
Creator The PSR-9000 lets you create original styles which can be used for auto accompaniment in the same way as the preset styles. Guidelines for Style Creating When creating a song (page 88), you record your keyboard performance to the PSR9000 as MIDI data. Creating of styles, however, is done - Yamaha PSR-9000 | Owner's Manual - Page 105
each track. • Setup This can be used to change the voices assigned to any of the current selected section/part. • Edit The six editing features that contain "Quantize" allow you to edit already recorded style data. • Parameter Edit Determines various parameters of the Style File Format. See below - Yamaha PSR-9000 | Owner's Manual - Page 106
Basic Procedure 2 Select "STYLE CREATOR." 3 Select these to create a style by using the preset style data as a starting point. DIGITAL STUDIO SOUND CREATOR SAMPLING CUSTOM VOICE DIGITAL RECORDING SONG STYLE MULTI PAD MIXING CONSOLE EFFECTS FILTER/EQ TUNING PART 1 Press the [DIGITAL RECORDING - Yamaha PSR-9000 | Owner's Manual - Page 107
and redo the settings . Select a style, section and part to be assembled. [BACK] [ data for which the Play Type is set to "MUTE" is not stored to Flash ROM. BASS Phrase2 [NEXT] [NEXT] [BACK] [BACK] [BACK] [NEXT] q Store as a Flash style to Flash ROM by following the on-screen instructions - Yamaha PSR-9000 | Owner's Manual - Page 108
Volume, Tempo • Voice number • Part Volume • Part on/off [BACK] [NEXT] [NEXT] [BACK] • Keep in mind that any track data which is set to off is not stored to Flash ROM. [NEXT] [BACK] [BACK] [NEXT] q Store as a Flash style to Flash ROM by following the on-screen instructions. 108 Reference - Yamaha PSR-9000 | Owner's Manual - Page 109
PAGE CONTROL BACK NEXT q Store as a Flash style to Flash ROM by following the on-screen instructions. Groove parameters Beat Specifies the beats to which type of accent template to be applied to the selected section/part. Strength Determines how "strongly" the selected Accent Type will - Yamaha PSR-9000 | Owner's Manual - Page 110
if all sections of the current style have been cleared. If any data remains in any section, the alert keyboard corresponding to the instrument you want to cancel 1 Set one of Rhythm parts to "REC." When this button is pressed, DELETE will appear for parts which contain data. Set the desired part - Yamaha PSR-9000 | Owner's Manual - Page 111
progression can be used for the INTRO and ENDING sections. The basic chord for the accompaniment is called the source chord. The default source chord is set as CM7, but you can change it to whatever chord is easy for you to play. For details, see "Style File (Auto Accompaniment) Format" (page 105 - Yamaha PSR-9000 | Owner's Manual - Page 112
Setup Select the desired menu. q Voice This function can be used to change the voices assigned to any of the current style's parts. While the SETUP • Measure Clear This function clears all data from the specified range of measures within the specified part. Use the TOP and LAST LCD buttons to - Yamaha PSR-9000 | Owner's Manual - Page 113
used when recording the pattern). The default, CM7 (the source root is "C" and the source chord type is "M7"), is automatically selected whenever the preset data is deleted prior to recording a new style to change chords and hear how the results sound for all parts. CM [Maj] CM 6 [Maj6] CM 7 [Maj7 - Yamaha PSR-9000 | Owner's Manual - Page 114
is maintained. For example, the notes C3, E3, and G3 in the key of C will become F3, A3, and C4 when transposed to F. Use this setting for parts that contain melodic lines. • ROOT FIXED The note is kept as close as possible to the previous note range. For example, the notes C3 - Yamaha PSR-9000 | Owner's Manual - Page 115
CM E3-G3-C4 C#M F3-G#3-C#4 FM F3-A3-C4 High Limit Low Limit Style Creator q RTR This sets how notes held through chord changes will be handled. : • Stop The note is stopped, and resumes sounding from the next note data. • Pitch Shift The pitch of the note will bend without attack to match - Yamaha PSR-9000 | Owner's Manual - Page 116
Setup s Creating the Data • Record all sections and parts using a CM7 (C major seventh) chord. • Record the parts on the MIDI channels listed below, using the PSR-9000's internal tone generator. Optimum compatibility with other instruments which are both XG and SFF (Style File Format) compatible - Yamaha PSR-9000 | Owner's Manual - Page 117
style data is included on the supplied floppy disk (TEMPLATE.MID). • The Initial Setup area from 1|2|000 through 1|4|479 is used for voice and effect settings. Do not include note event data. • The Main A data the valid MIDI events for both the Initial Setup data and the Pattern data. Make sure - Yamaha PSR-9000 | Owner's Manual - Page 118
The procedure is essentially the same as that for Song Recording, with the exception of the points listed below: • Recording resolution for the Style Creator is 96 ppq (parts per quarter-note); for Song Recording it is 384 ppq. • In Song Recording, the End Mark position can be changed freely; in the - Yamaha PSR-9000 | Owner's Manual - Page 119
. Multi Pad data can also be saved to and loaded from disk. Basic Procedure 1 Press the [DIGITAL RECORDING] button. DIGITAL STUDIO SOUND CREATOR SAMPLING CUSTOM VOICE DIGITAL RECORDING SONG STYLE MULTI PAD MIXING CONSOLE EFFECTS FILTER/EQ TUNING PART 2 Select "MULTI PAD CREATOR." Use the [NEXT - Yamaha PSR-9000 | Owner's Manual - Page 120
automatically as soon as you play on the keyboard. If Chord Match is set to on for the Multi Pad to be recorded, you should record using the notes of the C major seventh scale being played back. • The rhythm part of the currently selected style is used as a rhythmic guide (in place of a metronome), - Yamaha PSR-9000 | Owner's Manual - Page 121
the points listed below: • Recording resolution for the Multi Pad Creator is 96 ppq (parts per quarter-note); for Song Recording it is 384 ppq. • Just as with Song Pad (set to Repeat On) with the keyboard and auto accompaniment playback. • Since the Multi Pads have only one track, the track - Yamaha PSR-9000 | Owner's Manual - Page 122
, press any of the LCD [1]~[8] buttons or rotate the data dial while holding the corresponding LCD button ([A]~[J]). Part Settings In addition to the keyboard-played voices, the PSR-9000 features many different instrumental "parts," including those contained in the auto accompaniment, song playback - Yamaha PSR-9000 | Owner's Manual - Page 123
(Style) RHYTHM used to match both the song and your keyboard performance to a certain key. For example, let's say you wish to both play and sing along with a certain recorded song. The song data is in F, but you feel most comfortable singing in D, and you are accustomed to playing the keyboard part - Yamaha PSR-9000 | Owner's Manual - Page 124
PSR9000 has special DSP effects, that include additional effects usually used for a specific part used for the Vocal Harmony effect. See page 69. Select this to store your settings by following the on-screen instructions. • You may find that, when changing a drum sound of an auto accompaniment style - Yamaha PSR-9000 | Owner's Manual - Page 125
is relatively "dead" and free of echoes. The PSR-9000 possesses a high grade five-band digital equalizer function. controls. The Q and FREQ controls can then be used to adjust the Q (bandwidth) and the FREQ ( Signal Flow Chart DRY LINE R1 R2 R3 LEFT MIC STYLE DSP (4) DSP (5) DSP (6) 3 Band EQ - Yamaha PSR-9000 | Owner's Manual - Page 126
-in effects and other Part controls of the PSR-9000 provide all you need for processing and mixing complex multi-Part songs. However, there Part in mono to the corresponding jack. Parts output through the SUB LINE OUT jacks cannot be heard through the PHONES jack and the speaker system. • When using - Yamaha PSR-9000 | Owner's Manual - Page 127
130 • BACK UP/RESTORE Backing up/restoring the data in Flash ROM 130 • CONVERTER Converting PSR-8000 format files to PSR-9000 format files..131 • EDIT FILE Editing disk files 131 • EDIT DIRECTORY Editing directories 132 • FORMAT Formatting a disk 132 • CHECK DISK Checking a disk 133 - Yamaha PSR-9000 | Owner's Manual - Page 128
loaded from a floppy disk to the PSR-9000, the data already in the memory of the instrument will be replaced by the data on the disk. Save important data to a disk file before doing the Load operation. • Loading style data can be executed via the Style Manager function (page 62). PAGE CONTROL BACK - Yamaha PSR-9000 | Owner's Manual - Page 129
hard disk has been installed or an optional SCSI device has been connected, the appropriate device must be selected here. PAGE CONTROL BACK NEXT • Saving style data can be executed via the Style Manager function (page 62). q Execute the Save operation by following the on-screen instructions - Yamaha PSR-9000 | Owner's Manual - Page 130
COPY FD operation by following the on-screen instructions. • The COPY FD function cannot be used to copy hard disk data. • Copies can only be made to Data in Flash ROM Any data that was pre-recorded in Flash ROM will be erased and replaced by the new settings. This means that preset setups (factory - Yamaha PSR-9000 | Owner's Manual - Page 131
This function is useful for when you want to use PSR-8000 data contained on a floppy disk with the PSR-9000, or for when you wish to install a hard disk previously installed to a PSR-8000, to the PSR-9000. The following data created via the PSR-8000 is available: • Custom Style • Song • Chord Step - Yamaha PSR-9000 | Owner's Manual - Page 132
and lowercase letters can be used. Execute the Format operation by following the on-screen instructions. CAUTION • Formatting a disk completely erases all data on the disk, so be sure that the disk you're formatting does not contain important data! • Hard disk drives of a maximum 8 GB capacity can - Yamaha PSR-9000 | Owner's Manual - Page 133
This function can be used to check an entire disk for damaged files and recover the files so that they can be properly here apply to step #3 of the Basic Procedure on page 127. q Select the device to be checked. PAGE CONTROL BACK NEXT Execute the Check operation by following the on-screen - Yamaha PSR-9000 | Owner's Manual - Page 134
of parameters related to overall PSR-9000 operation. Basic Procedure DISK/ SCSI MENU FUNCTION MIDI 1 Press the [FUNCTION] assignment (Foot controller/Keyboard/Mod- ulation Wheel simply by pressing the appropriate Multi Pad. Preset (factory set) data is listed in the chart below. Fine-tune the - Yamaha PSR-9000 | Owner's Manual - Page 135
PSR-9000 "Functions" Split Point/Chord Fingering The explanations here apply to step #3 of the Basic Procedure on page 101. You can set the Split Point by pressing the desired key while holding this button. The way in which chords are played or indicated with your left hand an optional YAMAHA FC7 - Yamaha PSR-9000 | Owner's Manual - Page 136
2 jacks, and to which of the PSR-9000 voices the footswitches will apply. FOOT PEDAL SWITCH SOSTENUTO If you play a note or chord on the keyboard and press the footswitch while the note(s) are held Portamento is produced when notes are played legato style (i.e. a note is played while the preceding - Yamaha PSR-9000 | Owner's Manual - Page 137
. Allows maximum loudness to be produced with very light playing strength. q AFTER TOUCH With this function, the PSR-9000 senses how much pressure you apply to the keys while playing, and uses that pressure to affect the sound in various ways, depending on the selected voice. This allows you to - Yamaha PSR-9000 | Owner's Manual - Page 138
the [KEYBOARD TRANSPOSE] buttons. KEYBOARD TRANSPOSE RESET When set to "KEYBOARD" (default), the buttons transpose only the keyboard sound. When set to "SONG," the buttons transpose only the song playback. When set to "MASTER," the buttons transpose the overall pitch of the PSR-9000. 138 Reference - Yamaha PSR-9000 | Owner's Manual - Page 139
PSR-9000 "Functions" Registration/Freeze Group/Voice Set Settings The explanations here apply to step #3 of the Basic Procedure on page 134. s Registration You can enter descriptive names for each registration bank/number via the Name function. Quick Guide this function. Quick Guide on page 28 - Yamaha PSR-9000 | Owner's Manual - Page 140
Assign automatically assigns notes played simultaneously on the right-hand section of the keyboard to separate parts (voices). The number of parts which can be assigned depends on the number of parts turned ON via the [PART ON/OFF] buttons. If three parts are turned on, then up to three voices can - Yamaha PSR-9000 | Owner's Manual - Page 141
The PSR-9000 "Functions" Video Monitor Settings The functions on this page let you set or video monitor is not PAL (for example, NTSC is generally used in North America), change the setting to "NTSC." This setting is retained in memory as part of the System Backup parameters. (See pages 50 and 178) - Yamaha PSR-9000 | Owner's Manual - Page 142
can be useful in checking whether the maximum polyphony has been exceeded in songs or styles. The maximum value is 126 (the PSR-9000's maximum polyphony). This sets the metronome on or off during song playback. This sets the metronome on or off during song recording. q 4, 5 Press this to reset the - Yamaha PSR-9000 | Owner's Manual - Page 143
is set to "NEVER," the Voice List or Style List displays remain indefinitely. (You can manually return to the previous display by pressing the panel button. • Keep in mind that some keys of the computer keyboard are not used for the PSR-9000 and have no effect or function. Press this button to enter - Yamaha PSR-9000 | Owner's Manual - Page 144
Using these numbers as a basis, the tone generator plays the stored sampling note. q Example of Keyboard MIDI data, or messages. The PSR-9000 can control a MIDI device by transmitting note related data and various types of controller data. The PSR-9000 can be controlled by the incoming MIDI - Yamaha PSR-9000 | Owner's Manual - Page 145
. Clock setting, Start/stop operation • The performance data of all songs, styles and Multi Pads is MIDI data. The messages transmitted/received by the PSR-9000 are shown in the MIDI Data Format and MIDI Implementation Chart on pages 192 and 208. s MIDI and TO HOST Terminals In order to exchange - Yamaha PSR-9000 | Owner's Manual - Page 146
) using the PSR-9000 Auto Accompaniment features on a external sequencer (such as a personal computer). After recording, you can then edit the data with the sequencer, then play it again on the PSR-9000 (playback). MIDI transmit MIDI OUT MIDI IN PSR-9000 MIDI IN MIDI receive (playback) MIDI OUT - Yamaha PSR-9000 | Owner's Manual - Page 147
Yamaha software. • The PSR-9000 is compatible with ESEQ. XF The Yamaha XF format enhances the SMF (Standard MIDI File) strandard with greater functionality and open-ended expandability for the future. • The 9000 is capable of displaying lyrics when an XF file containing lyric data is played. Style - Yamaha PSR-9000 | Owner's Manual - Page 148
of the MIDI interface you are using. For details, carefully read the owner's manual for the software you are using. q When the computer has a USB interface, use the Yamaha UX256. Computer (sequencer software) MIDI A IN OUT PC-2 PC-1 MIDI Mac USB cable UX256 MIDI IN MIDI OUT PSR-9000 148 - Yamaha PSR-9000 | Owner's Manual - Page 149
). Set the PSR9000 HOST SELECT switch to the "Mac" position. PC-2 PC-1 MIDI Mac mini DIN 8-pin mini DIN 8-pin PSR-9000 Set the MIDI interface clock in the sequencer software you are using to 1 MHz. For details, carefully read the owner's manual for the software you are using. For details about - Yamaha PSR-9000 | Owner's Manual - Page 150
data. Clock Ext.A MIDI IN A port receives MIDI clock data, allowing you to synchronize the PSR-9000 with an external MIDI device. MIDI Accord1 An ideal setup for controlling the keyboard and accompaniment by a MIDI accordion. MIDI Accord2 The chord and bass buttons on a MIDI accordion are used - Yamaha PSR-9000 | Owner's Manual - Page 151
-9000 keyboard. s Clock, Receive Transpose and Thru Port q Clock Determines whether the PSR-9000 is controlled by its own internal clock or a MIDI clock signal received from an external device. INTERNAL is the normal Clock setting when the PSR-9000 is being used alone. If you are using the PSR-9000 - Yamaha PSR-9000 | Owner's Manual - Page 152
by the MIDI data received on the corresponding channel. The LEFT part is controlled by the MIDI data received on the corresponding channel. MIDI note data received by the PSR-9000 plays the corresponding notes in the same way as if they are played on the keyboard. The received notes are used as the - Yamaha PSR-9000 | Owner's Manual - Page 153
is detected from merged MIDI data received over the channels. Chord Detect Settings The note on/off messages received at the channel(s) set to "ON" are recognized as the fingerings in the accompaniment section. The chords to be detected depend on the fingering mode on the PSR-9000. The chords will - Yamaha PSR-9000 | Owner's Manual - Page 154
instructions. The PSR-9000 provides two ways to set: Easy Setup and Full Setup. MFC10 MIDI OUT MIDI cable MIDI IN MIDI IN MIDI OUT PSR-9000 • When the MIDI B terminals are connected to the MFC10, the functions of the MIDI B port are limited. For details, refer to the MIDI Data Format (page - Yamaha PSR-9000 | Owner's Manual - Page 155
instructions. Press the [NEXT] button to enable the selected Easy Setup template. Disconnect the MIDI cable from the MIDI OUT B terminal and connect it to the MFC10 Foot Controller. • When setting up the MFC10 from the PSR9000, a MIDI cable must be connected from the MIDI OUT of the PSR-9000 - Yamaha PSR-9000 | Owner's Manual - Page 156
q q q q q q Troubleshooting PROBLEM • The speakers produce a "pop" sound whenever the power is turned ON or OFF. • When using a mobile phone, noise is produced. • No sound results. • Not all simultaneously-played notes sound. • Auto Accompaniment seems to "skip" when the keyboard is played. • The - Yamaha PSR-9000 | Owner's Manual - Page 157
is normal and is a result of the PSR-9000's sampling system. Some voices have a pitch limit which, when reached, causes this type of pitch shift. This is normal. • Are you sure you're playing on the left-hand section of the keyboard? • You may be using single-finger type fingering in the fingered - Yamaha PSR-9000 | Owner's Manual - Page 158
style 51 Floppy Disk 5, 127 Foot controller 12, 135 FOOT PEDAL SWITCH jacks ........12 FOOT PEDAL VOLUME jack ........12 Footswitch 12, 136 Format 132 Freeze 28, 139 Frequency 70, 81, 123, 125 Full Edit 82, 110, 112, 118 Full keyboard 58 Functions 134 G GM 15, 147 Groove 109 H Hard - Yamaha PSR-9000 | Owner's Manual - Page 159
142, 178 Part on/off 16, 17, 18, 24, 31 Parts 53 Password 132 Paste 99 PC keyboard 12, 143 style 51 Property 62, 128 PSR-8000 131 Punch-in 90 Q Quantize 92, 112 Quick record 36, 88 R RAM Sampling 40, 72 Save 50, 51, 63, 91, 129 Scale Tune 134 SCSI 13, 50, 127 Search 27, 67 Setup - Yamaha PSR-9000 | Owner's Manual - Page 160
. Yamaha will not be held responsible for any damage or injury resulting from improper installation. z Set up for installing. • Before installing the SIMMs or the hard disk unit, be sure to save any important data to disk by using the Save function described on page 129. • Turn the PSR-9000 power - Yamaha PSR-9000 | Owner's Manual - Page 161
Black screws • Schwarze Schrauben • Vis noires 3 -1 • Use this as a handle to remove the cover. • Verwenden qu'ils fonctionneront correctement avec le PSR-9000. Avant d'acheter des modules SIMM pour le PSR-9000, veuillez consulter votre représentant Yamaha le plus proche ou un des distributeurs - Yamaha PSR-9000 | Owner's Manual - Page 162
to the PSR-9000 keyboard), and raise it to the vertical position in the same way as the first SIMM. v Replace the SIMM cover and attach it with the six screws. Set the PSR-9000 right-side up, and connect the power cord to the rear-panel AC INLET jack and an AC outlet. b Check that - Yamaha PSR-9000 | Owner's Manual - Page 163
lorsque la mémoire d'ondes ne contient aucune donnée) • Bien que la mémoire d'ondes du PSR-9000 peut être étendue à 65 Mo, la taille maximale de l'enregistrement d'un simple échantillon est de 32 mégaoctets (380 secondes). • After this step the lugs on the slot should appear in the holes in the - Yamaha PSR-9000 | Owner's Manual - Page 164
For example, an 8 GB hard disk drive would have to be formatted into four separate 2 GB partitions. • Hard disk drives of a capacity greater than 8 GB can be installed; however, the PSR-9000 is capable of formatting only up to a maximum 8 GB on the drive. • Hard disk drives wider than 12.7 mm cannot - Yamaha PSR-9000 | Owner's Manual - Page 165
. • Vergewissern Sie sich, daß die Stifte verbogen sind. • Assurez-vous que ces broches ne plient pas. • Slide the hard disk cover under these tabs of the PSR-9000. If you have trouble fitting the cover under the tabs, it's possible that the screws in step c-3 above need to be tightened. • Schieben - Yamaha PSR-9000 | Owner's Manual - Page 166
Piano 2 BrightPiano 3 Harpsichord 4 GrandHarpsi 5 Honky Tonk 6 Rock Piano 7 Midi Grand 8 CP 80 9 Oct Piano 1 10 Oct Piano 2 1 0 35 FeedbackGtr 0 36 Mandolin 0 37 CleanGuitar 0 LSB# 114 114 112 112 MIDI Program Change# 16 17 19 20 112 21 113 21 115 21 116 21 112 - Yamaha PSR-9000 | Owner's Manual - Page 167
112 113 116 115 113 112 112 112 114 113 114 113 112 114 115 MIDI Program Change# 28 26 29 33 32 34 35 36 39 37 39 39 0 29 Synth Brass 0 Saxophone 1 Sweet Tenor 0 2 Sweet Alto 0 LSB# 112 112 112 MIDI Program Change# 107 106 55 115 56 117 57 114 56 116 56 112 59 112 56 117 - Yamaha PSR-9000 | Owner's Manual - Page 168
Ensbl 0 LSB# 113 114 118 114 113 112 113 116 113 112 112 112 113 112 112 112 112 MIDI Program Change# 64 71 66 66 65 64 71 66 66 65 66 67 67 68 69 70 71 112 112 114 112 114 112 112 113 114 112 113 115 115 114 116 117 113 114 MIDI Program Change# 94 99 53 54 52 95 89 99 91 101 97 95 94 93 88 92 - Yamaha PSR-9000 | Owner's Manual - Page 169
El.P1 21 60sEl.P 22 E.Piano2 23 El.Pno2K 24 Chor.EP2 25 DX Hard 26 DXLegend 27 DX Phase 28 DX+Analg 29 DXKotoEP 30 VX El.P2 27 64 65 0 0 0 64 0 1 45 0 1 64 97 98 0 0 96 97 0 35 96 97 0 32 33 34 35 36 37 38 40 64 MIDI Program Change# 4 4 4 4 4 4 5 5 5 5 5 5 5 5 5 6 6 6 6 7 7 7 7 7 8 9 10 10 11 11 11 - Yamaha PSR-9000 | Owner's Manual - Page 170
96 0 16 35 40 41 96 0 18 32 0 32 0 40 41 43 45 0 43 0 40 41 0 65 MIDI Program Change# 16 16 16 17 17 17 17 17 18 18 18 18 19 19 19 19 19 19 20 20 21 40 64 65 66 96 0 6 12 18 19 32 40 41 64 0 8 0 0 0 0 8 40 0 0 40 MIDI Program Change# 31 32 32 32 33 33 33 33 33 33 33 34 34 35 35 35 35 35 35 36 36 36 - Yamaha PSR-9000 | Owner's Manual - Page 171
0 35 64 0 16 17 32 0 18 0 16 0 0 6 32 37 0 35 40 41 42 0 MIDI Program Change# 47 48 48 48 48 48 48 48 48 48 49 49 49 49 49 49 49 50 50 50 0 0 0 0 0 0 0 0 0 6 8 18 19 64 65 66 0 6 8 18 19 20 24 25 40 41 45 96 MIDI Program Change# 62 62 62 62 62 62 62 63 63 63 63 63 63 64 65 65 65 66 66 66 66 67 68 - Yamaha PSR-9000 | Owner's Manual - Page 172
64 66 67 0 64 65 0 64 65 0 0 20 27 64 66 0 45 64 65 66 0 27 64 0 MIDI Program Change# 82 82 83 83 84 84 84 85 85 85 86 86 87 87 87 87 88 88 89 89 89 89 67 68 70 71 96 0 8 14 64 65 66 67 68 69 0 64 0 32 35 96 97 0 28 MIDI Program Change# 98 98 98 98 98 98 98 98 98 98 98 98 98 98 98 98 99 99 99 99 99 - Yamaha PSR-9000 | Owner's Manual - Page 173
64 65 66 0 64 65 0 0 0 0 0 0 0 0 0 0 0 0 0 0 0 0 0 0 MIDI Program Change# 105 105 105 106 107 107 107 108 109 110 111 111 111 111 112 112 112 112 112 112 112 113 0 0 0 0 0 0 0 0 0 0 0 0 0 0 0 0 0 0 0 0 0 0 0 0 0 MIDI Program Change# 37 48 49 50 54 55 64 65 66 67 68 69 70 80 81 82 83 84 85 86 87 88 - Yamaha PSR-9000 | Owner's Manual - Page 174
/Klaviatur-Drum-Belegung/ Bank Select MSB (0-127) Bank Select LSB (0-127) Program Change (1-128) MIDI Keyboard Key Note# Note Note Off 13 C# -1 (C# 0) 14 D -1 (D 0) 15 D# Stick Ambient Snare Snare Short Snare Ambient Snare Snappy Hand Clap Snare Tight Snare Tight H Snare Tight 2 - Yamaha PSR-9000 | Owner's Manual - Page 175
percussions de clavier Bank Select MSB (0-127) Bank Select LSB (0-127) Program Change (1-128) MIDI Keyboard Key Note# Note Note Off 13 C# -1 (C# 0) 14 D -1 (D 0) 15 D# Snare Snare M Stereo Snare Funk M Stereo Snare Soft Arabic Hand Clap Brush Tap 2 Band Snare 2 Snare H Stereo Snare - Yamaha PSR-9000 | Owner's Manual - Page 176
1 16 Acoustic Ballad 17 Modern 6/8 18 Root Rock 1 19 Soft Rock 20 Hard Rock 16 BEAT 1 16 Beat 1 2 16 Beat 2 3 16 Beat 3 Chord Hold 4 20 Bass Chord Hold 5 q Flash Style/Stil Blitz/Style Flash Category Order Style Name Category Order Style Name 8 BEAT 1 60's Rock 1 2 60's - Yamaha PSR-9000 | Owner's Manual - Page 177
56 57 58 59 60 Bank Name DJ Set 2 OrchestraHit Water SE Horror SE Night SE Day SE Car SE Big Bells Whistle MagicBell SE MIDI Control Scale Tune q q q q q q q q q q q q q q q q q q q q q q q q q q q q q q q q q q q Appendix/Anhang/Annexe 177 Appendix/Anhang/Annexe 487 - Yamaha PSR-9000 | Owner's Manual - Page 178
VoiceSet Group Freeze Group Parameter Lock One Touch Setting Music Database Registration Memory Setup (Disk) System Backup VoiceSet Group Freeze Group Parameter Lock Auto Accompaniment Style # x o o oo x Auto Acmpaniment ON/OFF ON o o o o x Fingering x x o oo x Split Point x x o oo x Main - Yamaha PSR-9000 | Owner's Manual - Page 179
Music Database Registration Memory Setup (Disk) System Backup VoiceSet Group Freeze Group Parameter Lock Acmp. Phrase 2 Part Voice Change Voice # x o o xx x Acmp. x Acmp. Rhythm 1 Part Harmonic Content x o o x x x Acmp. x Acmp. Rhythm 2 Part Harmonic Content x o o x x x Acmp. x Acmp - Yamaha PSR-9000 | Owner's Manual - Page 180
Group Parameter Lock One Touch Setting Music Database Registration Memory Setup (Disk) System Backup VoiceSet Group Freeze Group Parameter Lock Right1 EQ High Right 2 Part On/Off Right 2 Voice # Right 2 Release Time (Bn 48h) Right 2 Voice Octave Right 2 Part Volume Right 2 Part Panpot Right 2 Reverb - Yamaha PSR-9000 | Owner's Manual - Page 181
Setup (Disk) System Backup VoiceSet Group Freeze Group Parameter Lock Ins1. (DSP4) Dry/Wet o o o x x Effects Voice x Sampling x x (Harmony Pitch To Note) x x Vocal Harmony Effect Parameter (Harmony Pitch To Note Part) x x Vocal Harmony Gender Type x x x x x xx x x x x xx - Yamaha PSR-9000 | Owner's Manual - Page 182
Registration Memory Setup (Disk) xx x x Master EQ Vocal Harmony Harmony Part x x x xx x x Mic x x o oo x Voice Master EQ Scale Tuning User Data (Multi Pad Bank #60) x x x oo x Scale EQ Mid (EQ3) Gain x x x xx x x Master EQ Keyboard Transpose x x o xx x Tune Trans x EQ Mid High ( - Yamaha PSR-9000 | Owner's Manual - Page 183
Setup MIDI Root x x x oo x MIDI Chord Detect x x x oo x MIDI MFC10 User Ch x x x xx x MIDI MFC10 Template No. x x x oo x MIDI MFC10 Foot Control x x x oo x MIDI MFC10 SW Control x x x oo x MIDI Template UserData x x x ox x MIDI MFC10 On/Off x x x xx x MIDI MFC10 Template User Data - Yamaha PSR-9000 | Owner's Manual - Page 184
) EP Tremolo EP AutoPan StAmp1 (Stereo Amp Simulator1) StAmp2 (Stereo Amp Simulator2) VDstH+TDly (V Distortion Hard + Tempo Delay) VDstS+TDly (V Distortion Soft + Tempo Delay) V_DstH+Dly (V Distortion Hard + Delay) V_DstS+Dly (V Distortion Soft + Delay) Dst+TDly (Distortion + Tempo Delay) Dst+2RotSP - Yamaha PSR-9000 | Owner's Manual - Page 185
(Stereo Overdrive) StAmp3 (Stereo Amp Simulator3) Comp+Dist1 (Compressor + Distortion1) Comp+Dist2 (Compressor + Distortion2) DistHard (Distortion Hard) DistSoft (Distortion Soft) DistHvy (Distortion Heavy) OverDrive AmpSim (Amp Simulator) CmpDstTDly (Compressor + Distortion + Tempo Delay) CmpOD - Yamaha PSR-9000 | Owner's Manual - Page 186
Effect Parameter List/Liste der Effektparameter/Liste XG Effect Name HALL1,HALL2 ROOM1,ROOM2,ROOM3 STAGE1,STAGE2 PLATE (reverb, variation, insertion block) No. Parameter Display 1 Reverb Time 0.3~30.0s 2 Diffusion 0~10 3 Initial Delay 0.1mS~99.3mS 4 HPF Cutoff Thru~8.0kHz 5 LPF - Yamaha PSR-9000 | Owner's Manual - Page 187
12 ~ +12dB 10 Dry/Wet D63>W ~ D=W ~ DW ~ D=W ~ D - Yamaha PSR-9000 | Owner's Manual - Page 188
500Hz~16.0kHz 9 EQ High Gain -12~+12dB 10 Dry/Wet D63>W ~ D=W ~ DW ~ D=W ~ D - Yamaha PSR-9000 | Owner's Manual - Page 189
12 ~ +12dB 10 11 Crossover Frequency 12 Mic L-R Angle 13 AMP Type 14 Drive 15 LPF Cuttoff 16 Output Level 100 ~ 10.0kHz 0 ~ 180deg Off,Stack, 15 16 LO-FI (variation, Insertion1-4 block) No. Parameter Display 1 Sampling Freq Control 44.1kHz-345Hz 2 Word Length 1~127 3 Output Gain -6~+12dB - Yamaha PSR-9000 | Owner's Manual - Page 190
15 16 0~127 0~127 1.0~12.0 10~680ms V DISTORTION HARD (variation, Insertion1-4 block) V DISTORTION SOFT (variation, Insertion1 7Hz 5 Slow-Fast Time of R 0~127 6 Slow-Fast Time of H 0~127 7 Drive Low 0~127 8 Drive High 0~127 9 Low/High Balance L63>H ~ L=H ~ L - Yamaha PSR-9000 | Owner's Manual - Page 191
64 170.0 65 230.0 66 340.0 67 680.0 Table #13 Sampling Freq Control Data Value Data Value Data 0 44.1K 32 1.34K 64 1 22.1K 33 1.30K .0 368.0 364.0 361.0 359.0 356.0 353.0 350.0 347.0 345.0 Table #14 Tempo Delay Data Value Data 0 64th/3 32 1 64th. 33 2 32th 34 3 32th/3 35 4 32th. 36 5 16th - Yamaha PSR-9000 | Owner's Manual - Page 192
Data Format/MIDI-Datenformat/Format de données Many MIDI messages listed in the MIDI Data Format are expressed in decimal numbers, binary numbers and hexadecimal numbers. Hexadecimal numbers may include the letter "H" as a suffix. Also, "n" can freely be defined as any whole number. To enter data - Yamaha PSR-9000 | Owner's Manual - Page 193
mode/temps réel Status byte MIDI Events Status 1st Data byte Data (HEX) Parameter Data 2nd Data byte (HEX) Parameter XG/ 7FH) 0~127 (...7FH) o o Mode BnH Message 120 (78H) All sound off 0 121 (79H) Reset all controller 0 o o o x 122 (7AH) Local control dd dd=00H: Off 7FH: On x - Yamaha PSR-9000 | Owner's Manual - Page 194
MIDI Data Format/MIDI-Datenformat/Format de données MIDI NRPN o : available NRPN DATA ENTRY MSB LSB MSB LSB Parameter Recognized XG/GM Keyboard R1 R2 R3 Left Acmp 01H 08H mmH -- Vibrato Rate o x ooo o o 01H 09H mmH -- Vibrato Depth o x ooo o o 01H 0AH mmH -- Vibrato - Yamaha PSR-9000 | Owner's Manual - Page 195
/ Messages exclusifs au système System Exclusive Messages Accompaniment Control Data Format Section Control F0H 43H 7EH 00H ss dd F7H 11110000 01000011 01111110 00000000 0sssssss 0ddddddd 11111110 F0 = Exclusive status 43 = YAMAHA ID 7E = Style 00 = ss = Switch No. 00H-01H: INTRO II 02H - Yamaha PSR-9000 | Owner's Manual - Page 196
0ddddddd : 0ddddddd 11111110 F0 = Exclusive status 43 = YAMAHA ID 7E = 03 = type 2(tt) dd = note1 dd = note2 dd = note3 : : dd = ...note10 F7 = End of Exclusive System Exclusive Messages (Universal System Exclusive) MIDI Event Data Format MIDI Master Volume F0H 7FH 7FH 04H 01H l l mm - Yamaha PSR-9000 | Owner's Manual - Page 197
Manual Part (Melody Part) 15 Rhythm 16 Control (Including the System Exclusive messages,) F0H 43H 73H 01H 61H F7H 01100001 61 = MIDI FA Cancel Substatus F0H 43H 73H 01H 62H F7H 01100010 62 = MIDI FA Cancel Off Substatus System Exclusive Messages Special Operators MIDI Event Data Format - Yamaha PSR-9000 | Owner's Manual - Page 198
Control No. 10 = Vocoder Part Parameter No. ss = Harmony Part No. 00H: Off 01H: Upper Data Format MIDI Master Tuning F0H 43H 1nH 27H 30H 00H 00H mm l l cc F7H 11110000 01000011 0001nnnn 00100111 00110000 00000000 00000000 0mmmmmmm 0lllllll 0ccccccc 11110111 F0 = Exclusive status 43 = YAMAHA - Yamaha PSR-9000 | Owner's Manual - Page 199
(MASTER ATTENUATOR) x 6 1 28 - 58 TRANSPOSE o 7D n DRUM SETUP RESET o 7E 0 XG SYSTEM ON o 7F 0 ALL PARAMETER RESET o TOTAL SIZE 7 MIDI PARAMETER CHANGE TABLE (System information) Address (H) Size Data Parameter (H) (H) Recognized 1 0 0 E 20 - 7F Model Name x : 0D - Yamaha PSR-9000 | Owner's Manual - Page 200
MIDI Data Format/MIDI-Datenformat/Format de données MIDI 00-01 VARIATION CONNECTION o 5B 1 00-7F VARIATION PART o 5C 1 MW VARIATION CONTROL DEPTH o 5D 1 01-78 EQ Q2 o 81 not used x 9 1 34 -4C EQ gain3 o 0A 1 0E-36 EQ frequency3 o 0B 1 01-78 EQ Q3 o 0C 1 not used x 0D 1 34 -4C EQ - Yamaha PSR-9000 | Owner's Manual - Page 201
MIDI Data Format/MIDI-Datenformat/Format de données MIDI 61 PART 0D 1 0E 1 0F 1 10 1 11 1 TOTAL SIZE 12 00-7F 00-7F 00-7F 00-7F 00-7F MW INSERTION CONTROL DEPTH BEND INSERTION CONTROL DEPTH CAT INSERTION CONTROL DEPTH AC1 INSERTION CONTROL DEPTH AC2 INSERTION CONTROL DEPTH o Refer to the MIDI - Yamaha PSR-9000 | Owner's Manual - Page 202
MIDI Data Format/MIDI-Datenformat/Format de données MIDI MIDI PARAMETER CHANGE TABLE (SPECIAL EFFECT) Address (H) Size Data MIDI PARAMETER CHANGE TABLE (MULTI PART) Address (H) Size Data Parameter (H) (H) Recognized Description Default value(H) XG/GM Keyboard R1 R2 - Yamaha PSR-9000 | Owner's Manual - Page 203
MIDI Data Format/MIDI-Datenformat/Format de données MIDI nn 6 nn 7 1 00 - 02 SAME NOTE NUMBER KEY ON ASSIGN 1 00 - 05 PART Data Parameter (H) (H) o x o o o o o 0:SINGLE 1:MULTI 2:INST (for DRUM) o x x x x x x 0:NORMAL 1:DRUM(ROM) 2 - 3:DRUMS1~ (RAM 203 513 XG/GM Keyboard R1 R2 R3 Left Acmp - Yamaha PSR-9000 | Owner's Manual - Page 204
MIDI Data Format/MIDI-Datenformat/Format de données MIDI nn 4D 1 nn 4E 1 nn 4F 1 nn 50 1 (MULTI PART) Address (H) Size Data Parameter (H) (H) Recognized Description 3E 40 40 40 Default value(H) XG/GM Keyboard R1 R2 R3 Left Acmp 08 nn 74 1 NOT USED xxxxxxx - 40 75 1 NOT USED xxxxxxx - Yamaha PSR-9000 | Owner's Manual - Page 205
MIDI Data Format/MIDI-Datenformat/Format de données MIDI MIDI PARAMETER CHANGE TABLE (A/D PART) Address (H) Size Data Parameter (H) (H) Recognized 10 nn 0 1 00 - 01 INPUT GAIN x 1 1 00 - 7F BANK SELECT MSB x 2 1 00 - 7F BANK SELECT LSB x 3 1 00 - 7F PROGRAM NUMBER x 4 1 00 - Yamaha PSR-9000 | Owner's Manual - Page 206
MIDI Data Format/MIDI-Datenformat/Format de données MIDI 11 00 nn 64 00-01 A/D SETUP TOTAL SIZE 64 x - 12 nn 10 1 00,08, OUTPUT SELECT 28-2D TOTAL SIZE 1 nn:A/D Part number( 0 - 63 ) x 0:stereo out,8:indiv1+2 40:indiv1,41:indiv2, MIDI PARAMETER CHANGE TABLE (DRUM SETUP) Address - Yamaha PSR-9000 | Owner's Manual - Page 207
B Ports bei Verbindung mit dem MFC10/ Fonctions du port MIDI B lors de la connexion au MFC10 The MIDI B port can also be used for operation with the MFC10 MIDI Foot Controller. MIDI B IN MIDI Events Status byte Status Data 1st Data byte (HEX) Parameter Key Off 8nH (n:channel no - Yamaha PSR-9000 | Owner's Manual - Page 208
MIDI Implementation Chart/MIDI-Implementierungstabelle/ YAMAHA [ Portable Keyboard ] Model PSR-9000 MIDI Implementation Chart Date:9-SEP-1999 Version : 1.0 Function... Transmitted Recognized Remarks Basic Default 1 - 16 *1 1 - 16 *2 Channel Changed 1 - 16 *1 1 - 16 *2 Mode Default - Yamaha PSR-9000 | Owner's Manual - Page 209
panel (see page 152). • RIGHT1, RIGHT2, RIGHT3, LEFT, KEYBOARD, ACMP RHYTHM1, ACMP RHYTHM2, ACMP BASS, ACMP CHORD1, ACMP CHORD2, ACMP PAD, ACMP PHRASE1, ACMP PHRASE2 • CHORD • ROOT • OFF *3 These Control Change Messages are not transmitted by PSR-9000 panel operation, but may be transmitted by the - Yamaha PSR-9000 | Owner's Manual - Page 210
/Spezifikationen/Spécifications KEYBOARD 61Keys (C1~C6) with Touch Response (Initial/After) Polyphony 126 notes max. VOICES Preset 827 Custom 32 Organ Flutes 20 ORCHESTRATION Right Left 3 PART 1 PART SAMPLING Resolution File Import File Export RAM Capacity Expanded Capacity Record Time - Yamaha PSR-9000 | Owner's Manual - Page 211
out capability DISK STORAGE Floppy Disk Drive Built-in Hard Disk SCSI 3.5" 2HD/2DD Optional Optional IDE 2.5 inch, 8GByte max. Hard Disk, ZIP, MO 8GByte max./each device DEMO SONGS 15 songs CONNECTORS MIDI Foot Pedal SCSI VIDEO OUT PC KEYBOARD Analog MIDI A (IN/OUT) Switchable to TO HOST - Yamaha PSR-9000 | Owner's Manual - Page 212
instructions contained in this manual, meets FCC requirements. Modifications not expressly approved by Yamaha may void your authority, granted by the FCC, to use ON", please try to eliminate the problem by using one of the following measures: Relocate Yamaha Corporation of America, Electronic Service - Yamaha PSR-9000 | Owner's Manual - Page 213
5311 EUROPE THE UNITED KINGDOM Yamaha-Kemble Music (U.K.) Ltd. Sherbourne Drive, Tilbrook, Milton Keynes, Yamaha Corporation, Pro Audio & Digital Musical Instrument Division Nakazawa-cho 10-1, Hamamatsu, Japan 430-8650 Tel: 053-460-3273 Yamaha PK CLUB (Portable Keyboard Home Page) http://www.yamaha - Yamaha PSR-9000 | Owner's Manual - Page 214
M.D.G., Pro Audio & Digital Musical Instrument Division, Yamaha Corporation © 2000 Yamaha Corporation V638850 006POCP25.2-01B0 Printed in Japan
-
 1
1 -
 2
2 -
 3
3 -
 4
4 -
 5
5 -
 6
6 -
 7
7 -
8
-
9
-
10
-
11
-
12
-
13
-
14
-
15
-
16
-
17
-
18
-
19
-
20
-
21
-
22
-
23
-
24
-
25
-
26
-
27
-
28
-
29
-
30
-
31
-
32
-
33
-
34
-
35
-
36
-
37
-
38
-
39
-
40
-
41
-
42
-
43
-
44
-
45
-
46
-
47
-
48
-
49
-
50
-
51
-
52
-
53
-
54
-
55
-
56
-
57
-
58
-
59
-
60
-
61
-
62
-
63
-
64
-
65
-
66
-
67
-
68
-
69
-
70
-
71
-
72
-
73
-
74
-
75
-
76
-
77
-
78
-
79
-
80
-
81
-
82
-
83
-
84
-
85
-
86
-
87
-
88
-
89
-
90
-
91
-
92
-
93
-
94
-
95
-
96
-
97
-
98
-
99
-
100
-
101
-
102
-
103
-
104
-
105
-
106
-
107
-
108
-
109
-
110
-
111
-
112
-
113
-
114
-
115
-
116
-
117
-
118
-
119
-
120
-
121
-
122
-
123
-
124
-
125
-
126
-
127
-
128
-
129
-
130
-
131
-
132
-
133
-
134
-
135
-
136
-
137
-
138
-
139
-
140
-
141
-
142
-
143
-
144
-
145
-
146
-
147
-
148
-
149
-
150
-
151
-
152
-
153
-
154
-
155
-
156
-
157
-
158
-
159
-
160
-
161
-
162
-
163
-
164
-
165
-
166
-
167
-
168
-
169
-
170
-
171
-
172
-
173
-
174
-
175
-
176
-
177
-
178
-
179
-
180
-
181
-
182
-
183
-
184
-
185
-
186
-
187
-
188
-
189
-
190
-
191
-
192
-
193
-
194
-
195
-
196
-
197
-
198
-
199
-
200
-
201
-
202
-
203
-
204
-
205
-
206
-
207
-
208
-
209
-
210
-
211
-
212
-
213
-
214
 |
 |

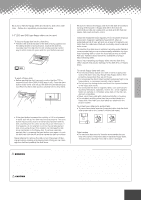
Make sure that your local AC mains
voltage matches the voltage specified
on the name plate on the bottom panel.
In some areas a voltage selector may
be provided on the rear panel of the
PSR-9000 near the power cord. Make
sure that the voltage selector is set for
the voltage in your area. The voltage
selector is set at 240V when the unit is
initially shipped.
To change the setting use a slotted
("minus") screwdriver to rotate the
selector dial so that the correct voltage
appears next to the pointer on the
panel.
Stellen Sie sicher, daß Ihre
Netzstromversorgung mit der auf dem
Etikett auf der Unterseite
übereinstimmt. In manchen
Fällen ist
ein Spannungswähler an der Rückseite
des PSR-9000 in der Nähe des
Netzkabels installiert. Beachten Sie,
daß der Spannungswähler auf die
Spannung für Ihren Wohnort eingestellt
ist. Der Spannungswähler wird vom
Hersteller auf 240V eingestellt.
Verwenden Sie zum Ändern der
Einstellung einen
Schlitzschraubendreher, um die
Wählscheibe so zu drehen, daß die
korrekte Spannung
unter der
Markierung auf der Abdeckung
angezeigt wird.
Vérifiez que la tension de votre
alimentation secteur correspond à celle
qui est spécifiée sur la plaque du
fabricant, située sur le panneau du bas.
Dans certaines régions, l'instrument
peut disposer d'un sélecteur de tension
installé sur son panneau arrière, près
du cordon d'alimentation. Assurez-vous
que le sélecteur de tension est réglé
sur la valeur en vigueur dans votre
région. Au départ de l'usine, le
sélecteur de tension de l'unité est
initialement spécifié sur 240V.
Pour modifier ce réglage, utilisez un
tournevis pour écrous à fente et faites
tourner le cadran du sélecteur jusqu'à
ce que la valeur correcte s'affiche en
marge de l'indicateur sur le panneau.