Yamaha PSR-9000 Owner's Manual - Page 142
Utility Settings
 |
View all Yamaha PSR-9000 manuals
Add to My Manuals
Save this manual to your list of manuals |
Page 142 highlights
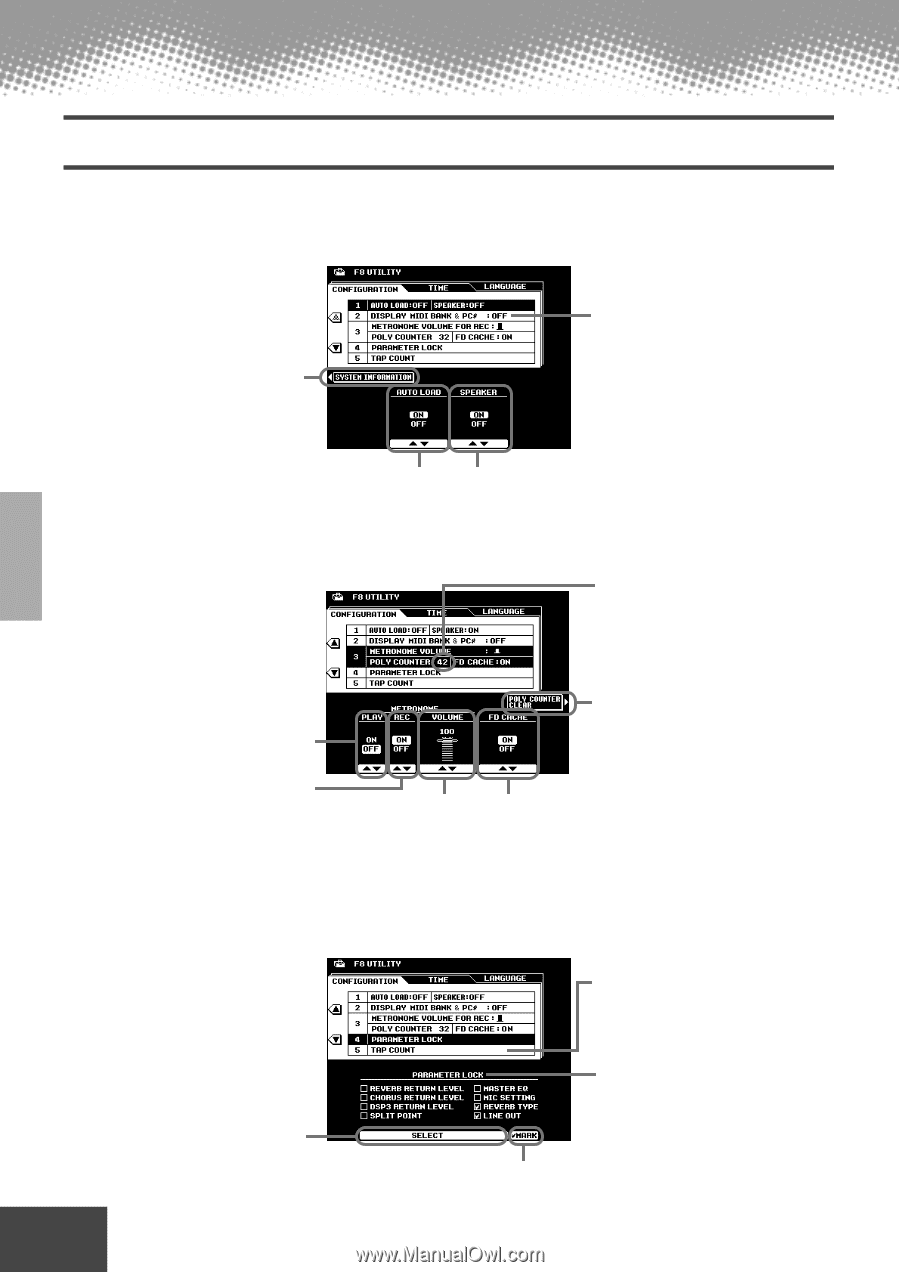
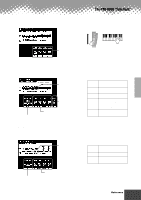
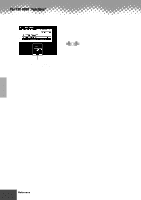
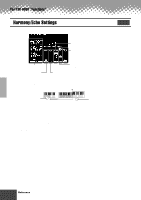
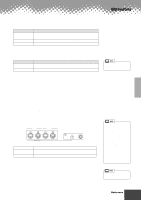
The PSR-9000 "Functions" Utility Settings The explanations here apply to step #3 of the Basic Procedure on page 134. s Configuration q 1, 2 Select this to display the system information of the PSR-9000. This determines whether the MIDI bank select and program change numbers for each voice will be shown along with the voice number and name on the voice list display. This determines whether all wave data that was in the wave RAM memory when the power was previously turned off will be automatically reloaded from disk when the PSR-9000 power is turned on. When set to OFF, the PSR-9000's built-in speaker system is turned off. q 3 This indicates the maximum number of notes currently being played. This can be useful in checking whether the maximum polyphony has been exceeded in songs or styles. The maximum value is 126 (the PSR-9000's maximum polyphony). This sets the metronome on or off during song playback. This sets the metronome on or off during song recording. q 4, 5 Press this to reset the Poly Counter to "0". This sets the volume of the PSR-9000 metronome sound for recording. Setting this to ON enables the PSR-9000 to read data much faster from the floppy disk. This is done by use of built-in cache memory. When a floppy disk is inserted and this is set to ON, the PSR-9000 automatically loads data to the cache memory (even when you play the keyboard, accompaniment, Multi Pads, etc.). All data is then read directly from the cache memory rather than the disk, vastly speeding up the reading of floppy disk data. This allows you to set the drum voice and the velocity which will sound when the Tap function (page 60) is used. Select a parameter you want to lock or unlock. This function can be used to "lock" the specified parameters so that they can only be changed via the direct panel controls (i.e., not via the Registration Memory, One Touch Setting, Music Database, MIDI, sequence data, etc.). Lock (mark) or unlock (un-mark) the selected parameter. 142 Reference q q q q q q q q q q q q q q q q q q q q q q q q q q q q q q q q q q q q q q q q q q q 140
-
 1
1 -
2
-
3
-
4
-
5
-
6
-
7
-
8
-
9
-
10
-
11
-
12
-
13
-
14
-
15
-
16
-
17
-
18
-
19
-
20
-
21
-
22
-
23
-
24
-
25
-
26
-
27
-
28
-
29
-
30
-
31
-
32
-
33
-
34
-
35
-
36
-
37
-
38
-
39
-
40
-
41
-
42
-
43
-
44
-
45
-
46
-
47
-
48
-
49
-
50
-
51
-
52
-
53
-
54
-
55
-
56
-
57
-
58
-
59
-
60
-
61
-
62
-
63
-
64
-
65
-
66
-
67
-
68
-
69
-
70
-
71
-
72
-
73
-
74
-
75
-
76
-
77
-
78
-
79
-
80
-
81
-
82
-
83
-
84
-
85
-
86
-
87
-
88
-
89
-
90
-
91
-
92
-
93
-
94
-
95
-
96
-
97
-
98
-
99
-
100
-
101
-
102
-
103
-
104
-
105
-
106
-
107
-
108
-
109
-
110
-
111
-
112
-
113
-
114
-
115
-
116
-
117
-
118
-
119
-
120
-
121
-
122
-
123
-
124
-
125
-
126
-
127
-
128
-
129
-
130
-
131
-
132
-
133
-
134
-
135
-
136
-
 137
137 -
 138
138 -
 139
139 -
 140
140 -
 141
141 -
 142
142 -
 143
143 -
 144
144 -
 145
145 -
 146
146 -
 147
147 -
148
-
149
-
150
-
151
-
152
-
153
-
154
-
155
-
156
-
157
-
158
-
159
-
160
-
161
-
162
-
163
-
164
-
165
-
166
-
167
-
168
-
169
-
170
-
171
-
172
-
173
-
174
-
175
-
176
-
177
-
178
-
179
-
180
-
181
-
182
-
183
-
184
-
185
-
186
-
187
-
188
-
189
-
190
-
191
-
192
-
193
-
194
-
195
-
196
-
197
-
198
-
199
-
200
-
201
-
202
-
203
-
204
-
205
-
206
-
207
-
208
-
209
-
210
-
211
-
212
-
213
-
214
 |
 |