Canon CanoScan FB 1200S Printing Guide - Page 25
Cropping Part of an Image, Moving an Image, Zooming In and Out, Creating a Negative Image
 |
View all Canon CanoScan FB 1200S manuals
Add to My Manuals
Save this manual to your list of manuals |
Page 25 highlights
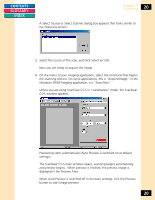
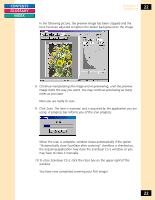
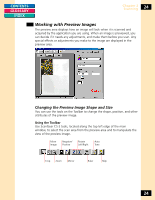
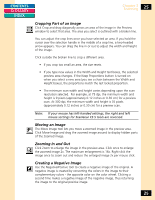
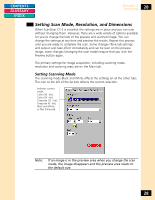
CONTENTS GLOSSARY INDEX Chapter 3 Scanning 25 Cropping Part of an Image Click Crop and drag diagonally across an area of the image in the Preview window to select that area. The area you select is outlined with a broken line. You can adjust the crop lines once you have selected an area. If you hold the cursor over the selection handle in the middle of a crop line, a two-headed arrow appears. You can drag the line in or out to adjust the width and height of the image. Click outside the broken line to crop a different area. • If you crop too small an area, the size resets. • If you type new values in the Width and Height text boxes, the selected preview area changes. If the Keep Proportions button is turned on when you select a new area (you see a chain between the Width and Height boxes), the proportions match the last locked proportion. • The minimum scan width and height varies depending upon the scan resolution selected. For example, at 75 dpi, the minimum width and height is 9 pixels (approximately 0.12 inches or 0.30 cm) for a preview scan. At 300 dpi, the minimum width and height is 35 pixels (approximately 0.12 inches or 0.30 cm) for a preview scan. Note: If your mouse has left-handed settings, the right and left mouse settings for ScanGear CS-S tools are reversed. Moving an Image The Move Image tool lets you move a zoomed image in the preview area. Click Move Image and drag the zoomed image around to display hidden parts of the zoomed image. Zooming In and Out Click Zoom to enlarge the image in the preview area. Click once to enlarge the zoomed image 2x. The maximum enlargement is 16x. Right-click the image once to zoom out and reduce the enlarged image 2x per mouse click. Creating a Negative Image Use the Negative/Positive tool to create a negative image of the original. A negative image is created by converting the colors in the image to their complementary colors - the opposite color on the color wheel. Clicking a second time makes a negative image of the negative image, thus returning the image to the original positive image. 25
-
 1
1 -
2
-
3
-
4
-
5
-
6
-
7
-
8
-
9
-
10
-
11
-
12
-
13
-
14
-
15
-
16
-
17
-
18
-
19
-
 20
20 -
 21
21 -
 22
22 -
 23
23 -
 24
24 -
 25
25 -
 26
26 -
 27
27 -
 28
28 -
 29
29 -
 30
30 -
31
-
32
-
33
-
34
-
35
-
36
-
37
-
38
-
39
-
40
-
41
-
42
-
43
-
44
-
45
-
46
-
47
-
48
-
49
-
50
-
51
-
52
-
53
-
54
-
55
-
56
-
57
-
58
-
59
-
60
-
61
-
62
-
63
-
64
-
65
-
66
-
67
-
68
-
69
-
70
-
71
-
72
-
73
-
74
-
75
-
76
-
77
-
78
-
79
-
80
-
81
-
82
-
83
-
84
-
85
-
86
-
87
-
88
-
89
-
90
-
91
-
92
-
93
-
94
-
95
-
96
-
97
-
98
-
99
-
100
-
101
-
102
-
103
-
104
-
105
-
106
-
107
-
108
-
109
-
110
-
111
-
112
-
113
-
114
-
115
 |
 |