Canon CanoScan FB 1200S Printing Guide - Page 72
Starting ScanGear Toolbox CS, About the ScanGear Toolbox CS Bar
 |
View all Canon CanoScan FB 1200S manuals
Add to My Manuals
Save this manual to your list of manuals |
Page 72 highlights
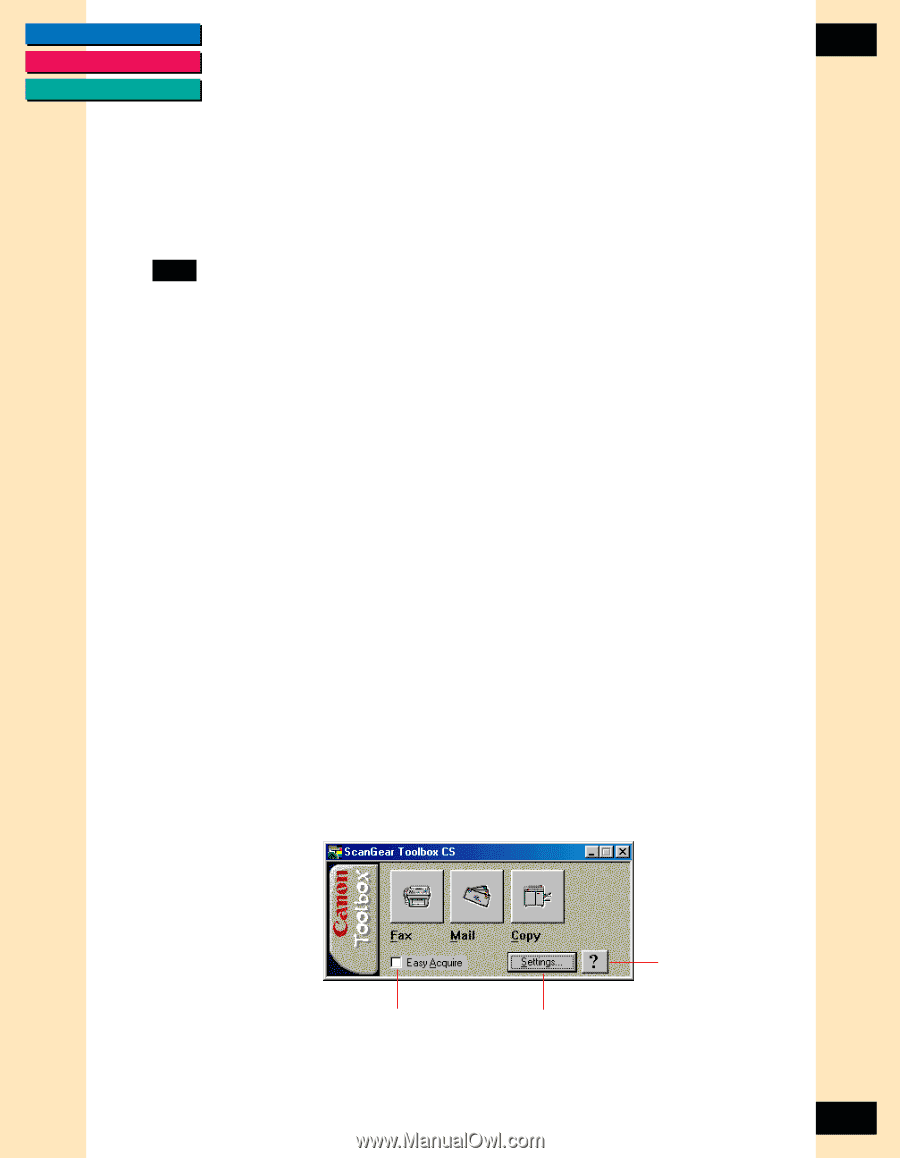
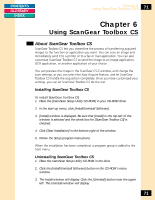
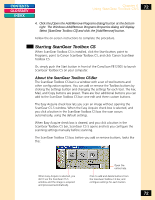
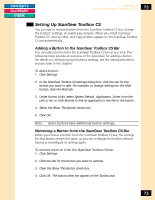
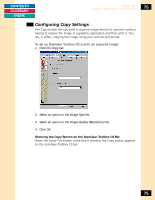
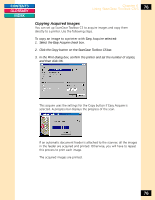
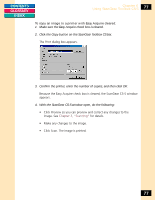
CONTENTS GLOSSARY INDEX Chapter 6 Using ScanGear Toolbox CS-S 72 4. Click the [Open the Add/Remove Programs dialog] button at the bottom right. The Windows Add/Remove Programs Properties dialog will display. Select [ScanGear Toolbox CS] and click the [Add/Remove] button. Follow the on-screen instructions to complete the procedure. Starting ScanGear Toolbox CS When ScanGear Toolbox CS is installed, click the Start button; point to Programs, point to Canon ScanGear Toolbox CS, and click Canon ScanGear Toolbox CS. Or, simply push the Start button in front of the CanoScan FB1200S to launch ScanGear Toolbox CS on your computer. About the ScanGear Toolbox CS Bar The ScanGear Toolbox CS bar is a window with a set of tool buttons and other configuration options. You can add or remove the Toolbox buttons by clicking the Settings button and changing the settings for each tool. The Fax, Mail, and Copy buttons are preset. There are four additional buttons you can add to the ScanGear Toolbox CS bar: one edit and three custom buttons. The Easy Acquire check box lets you scan an image without opening the ScanGear CS-S window. When the Easy Acquire check box is selected, and you click a button in the ScanGear Toolbox CS bar, the scan occurs automatically, using the default settings. When Easy Acquire check box is cleared, and you click a button in the ScanGear Toolbox CS bar, ScanGear CS-S opens and lets you configure the scanning settings manually before scanning. The ScanGear Toolbox CS bar, before you add or remove buttons, looks like this: Open the online help. When Easy Acquire is selected, you don't see the ScanGear CS-S window and the image is acquired and processed automatically. Click to add and delete buttons from the ScanGear Toolbox CS bar, and configure settings for each button. 72
-
 1
1 -
2
-
3
-
4
-
5
-
6
-
7
-
8
-
9
-
10
-
11
-
12
-
13
-
14
-
15
-
16
-
17
-
18
-
19
-
20
-
21
-
22
-
23
-
24
-
25
-
26
-
27
-
28
-
29
-
30
-
31
-
32
-
33
-
34
-
35
-
36
-
37
-
38
-
39
-
40
-
41
-
42
-
43
-
44
-
45
-
46
-
47
-
48
-
49
-
50
-
51
-
52
-
53
-
54
-
55
-
56
-
57
-
58
-
59
-
60
-
61
-
62
-
63
-
64
-
65
-
66
-
 67
67 -
 68
68 -
 69
69 -
 70
70 -
 71
71 -
 72
72 -
 73
73 -
 74
74 -
 75
75 -
 76
76 -
 77
77 -
78
-
79
-
80
-
81
-
82
-
83
-
84
-
85
-
86
-
87
-
88
-
89
-
90
-
91
-
92
-
93
-
94
-
95
-
96
-
97
-
98
-
99
-
100
-
101
-
102
-
103
-
104
-
105
-
106
-
107
-
108
-
109
-
110
-
111
-
112
-
113
-
114
-
115
 |
 |