Canon CanoScan FB 1200S Printing Guide - Page 60
Matching Scan Resolution to Purpose, Scanning Techniques
 |
View all Canon CanoScan FB 1200S manuals
Add to My Manuals
Save this manual to your list of manuals |
Page 60 highlights
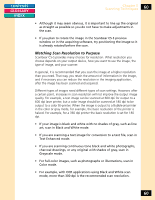
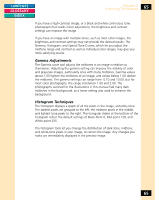
CONTENTS GLOSSARY INDEX Chapter 5 Scanning Techniques 60 • Although it may seem obvious, it is important to line up the original as straight as possible so you do not have to make adjustments in the scan. • If you plan to rotate the image in the ScanGear CS-S preview window or in the acquiring software, try positioning the image so it is already rotated before the scan. Matching Scan Resolution to Purpose ScanGear CS-S provides many choices for resolution. What resolution you choose depends on your output device, how you want to use the image, the type of image, and your scanner. In general, it is recommended that you scan the image at a higher resolution than you need. That way, you retain the amount of information in the image, and if necessary you can reduce the resolution in the imaging application, after the image has been scanned and acquired. Different types of images need different types of scan settings. However, after a certain point, increases in scan resolution will not improve the output image quality. For example, a text image can be scanned at 600 dpi for output to a 600 dpi laser printer, but a color image should be scanned at 180 dpi to be output to a color BJ-printer. When the image is output to a Bubble jet printer in the color or gray mode, for example, the basic resolution of the printer is halved. For example, for a 360 dpi printer the basic resolution is set for 180 dpi. • If your image is black and white with no shades of gray, such as line art, scan in Black and White mode. • If you are scanning a text image for conversion to a text file, scan in Text Enhanced mode. • If you are scanning continuous-tone black and white photographs, charcoal drawings, or any original with shades of gray, scan in Grayscale mode. • For full-color images, such as photographs or illustrations, scan in Color mode. • For example, with OCR applications using Black and White scan mode, more than 300 dpi is the recommended scan resolution. 60
-
 1
1 -
2
-
3
-
4
-
5
-
6
-
7
-
8
-
9
-
10
-
11
-
12
-
13
-
14
-
15
-
16
-
17
-
18
-
19
-
20
-
21
-
22
-
23
-
24
-
25
-
26
-
27
-
28
-
29
-
30
-
31
-
32
-
33
-
34
-
35
-
36
-
37
-
38
-
39
-
40
-
41
-
42
-
43
-
44
-
45
-
46
-
47
-
48
-
49
-
50
-
51
-
52
-
53
-
54
-
 55
55 -
 56
56 -
 57
57 -
 58
58 -
 59
59 -
 60
60 -
 61
61 -
 62
62 -
 63
63 -
 64
64 -
 65
65 -
66
-
67
-
68
-
69
-
70
-
71
-
72
-
73
-
74
-
75
-
76
-
77
-
78
-
79
-
80
-
81
-
82
-
83
-
84
-
85
-
86
-
87
-
88
-
89
-
90
-
91
-
92
-
93
-
94
-
95
-
96
-
97
-
98
-
99
-
100
-
101
-
102
-
103
-
104
-
105
-
106
-
107
-
108
-
109
-
110
-
111
-
112
-
113
-
114
-
115
 |
 |
