Canon CanoScan FB 1200S Printing Guide - Page 73
Setting Up ScanGear Toolbox CS, Adding a Button to the ScanGear Toolbox CS Bar
 |
View all Canon CanoScan FB 1200S manuals
Add to My Manuals
Save this manual to your list of manuals |
Page 73 highlights
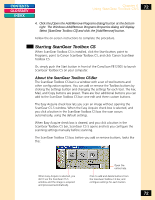
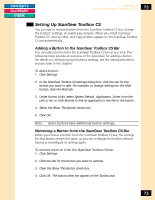
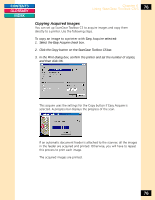
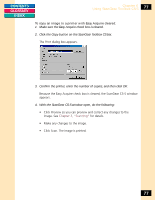
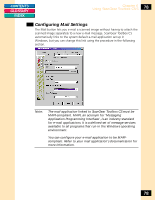
CONTENTS GLOSSARY INDEX Chapter 6 Using ScanGear Toolbox CS-S 73 Setting Up ScanGear Toolbox CS You can add or remove buttons from the ScanGear Toolbox CS bar, change the buttons' settings, or enable Easy Acquire. When you install ScanGear Toolbox CS, the Fax, Mail, and Copy buttons appear on the ScanGear Toolbox CS bar automatically. Adding a Button to the ScanGear Toolbox CS Bar You can add a button from the ScanGear Toolbox CS bar at any time. The following steps provide an overview of the procedure for adding a button. For details on configuring each button's settings, see the individual button's sections later in this chapter. To add a button: 1. Click Settings. 2. In the ScanGear Toolbox CS settings dialog box, click the tab for the button you want to add. For example, to change settings for the Mail button, click the Mail tab. 3. Under button Links, select System Default, Application, Driver from the Link to list, or click Browse to link an application's .exe file to the button. 4. Select the Show This Button check box. 5. Click OK. Note: Some buttons have additional button settings. Removing a Button from the ScanGear Toolbox CS Bar When you remove a button from the ScanGear Toolbox CS bar, the settings for that button remain the same, so you can re-display the button without having to reconfigure its settings again. To remove a button from the ScanGear Toolbox CS bar: 1. Click Settings. 2. Click the tab for the button you want to remove. 3. Clear the Show This Button check box. 4. Click OK. The button does not appear on the Toolbox bar. 73
-
 1
1 -
2
-
3
-
4
-
5
-
6
-
7
-
8
-
9
-
10
-
11
-
12
-
13
-
14
-
15
-
16
-
17
-
18
-
19
-
20
-
21
-
22
-
23
-
24
-
25
-
26
-
27
-
28
-
29
-
30
-
31
-
32
-
33
-
34
-
35
-
36
-
37
-
38
-
39
-
40
-
41
-
42
-
43
-
44
-
45
-
46
-
47
-
48
-
49
-
50
-
51
-
52
-
53
-
54
-
55
-
56
-
57
-
58
-
59
-
60
-
61
-
62
-
63
-
64
-
65
-
66
-
67
-
 68
68 -
 69
69 -
 70
70 -
 71
71 -
 72
72 -
 73
73 -
 74
74 -
 75
75 -
 76
76 -
 77
77 -
 78
78 -
79
-
80
-
81
-
82
-
83
-
84
-
85
-
86
-
87
-
88
-
89
-
90
-
91
-
92
-
93
-
94
-
95
-
96
-
97
-
98
-
99
-
100
-
101
-
102
-
103
-
104
-
105
-
106
-
107
-
108
-
109
-
110
-
111
-
112
-
113
-
114
-
115
 |
 |