Canon CanoScan FB 1200S Printing Guide - Page 45
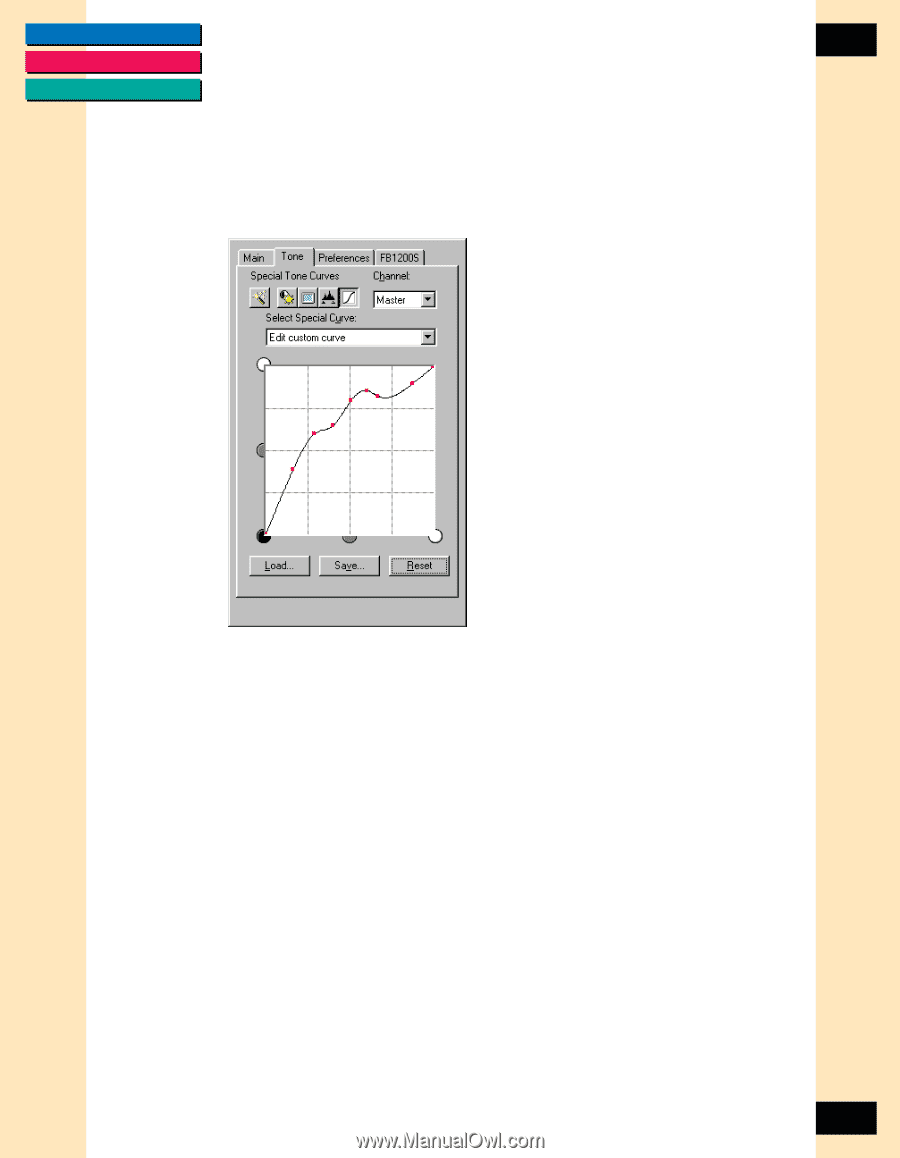
in the following ways, Click Reset to undo a change to the curve.
 |
View all Canon CanoScan FB 1200S manuals
Add to My Manuals
Save this manual to your list of manuals |
Page 45 highlights
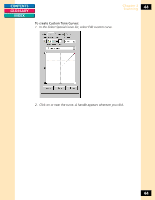
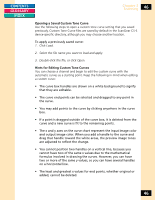
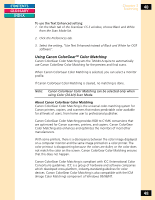
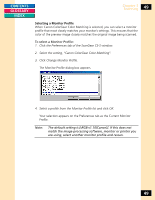
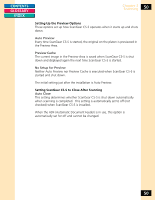
CONTENTS GLOSSARY INDEX Chapter 3 Scanning 45 3. Position your cursor over the handle. The cursor becomes a crosshair, indicating that you can drag the curve handle. Drag the handle and release. The curve remains where you moved it, and the image in the preview area reflects the change in tone. You can specify up to 15 anchor points, including the end points. 4. Because the curve reflects mathematical calculations related to the image tones, it does not move exactly where you want. You can move the curve in the following ways: • Drag a curve handle up or down. • Click on another part of the curve to set a new handle. You can have as many handles as you want. However, it is best to experiment and set your handles at points in the curve where you want to bend it. • To remove a handle, drag it off the curve, or right-click the handle. 5. Click Reset to undo a change to the curve. 6. Click Save to save your custom curve. 7. Specify a file name and click OK. The curve is saved in the location you specify. 45
-
 1
1 -
2
-
3
-
4
-
5
-
6
-
7
-
8
-
9
-
10
-
11
-
12
-
13
-
14
-
15
-
16
-
17
-
18
-
19
-
20
-
21
-
22
-
23
-
24
-
25
-
26
-
27
-
28
-
29
-
30
-
31
-
32
-
33
-
34
-
35
-
36
-
37
-
38
-
39
-
 40
40 -
 41
41 -
 42
42 -
 43
43 -
 44
44 -
 45
45 -
 46
46 -
 47
47 -
 48
48 -
 49
49 -
 50
50 -
51
-
52
-
53
-
54
-
55
-
56
-
57
-
58
-
59
-
60
-
61
-
62
-
63
-
64
-
65
-
66
-
67
-
68
-
69
-
70
-
71
-
72
-
73
-
74
-
75
-
76
-
77
-
78
-
79
-
80
-
81
-
82
-
83
-
84
-
85
-
86
-
87
-
88
-
89
-
90
-
91
-
92
-
93
-
94
-
95
-
96
-
97
-
98
-
99
-
100
-
101
-
102
-
103
-
104
-
105
-
106
-
107
-
108
-
109
-
110
-
111
-
112
-
113
-
114
-
115
 |
 |