Canon CanoScan FB 1200S Printing Guide - Page 37
Using the Auto Tone Setting, and the image in the preview area changes to reflect the tone correction.
 |
View all Canon CanoScan FB 1200S manuals
Add to My Manuals
Save this manual to your list of manuals |
Page 37 highlights
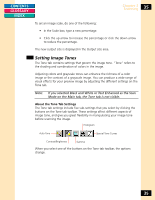
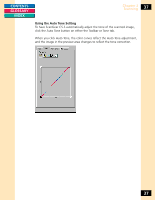
CONTENTS GLOSSARY INDEX Chapter 3 Scanning 37 Using the Auto Tone Setting To have ScanGear CS-S automatically adjust the tone of the scanned image, click the Auto Tone button on either the Toolbar or Tone tab. When you click Auto Tone, the color curves reflect the Auto Tone adjustment, and the image in the preview area changes to reflect the tone correction. 37
-
 1
1 -
2
-
3
-
4
-
5
-
6
-
7
-
8
-
9
-
10
-
11
-
12
-
13
-
14
-
15
-
16
-
17
-
18
-
19
-
20
-
21
-
22
-
23
-
24
-
25
-
26
-
27
-
28
-
29
-
30
-
31
-
 32
32 -
 33
33 -
 34
34 -
 35
35 -
 36
36 -
 37
37 -
 38
38 -
 39
39 -
 40
40 -
 41
41 -
 42
42 -
43
-
44
-
45
-
46
-
47
-
48
-
49
-
50
-
51
-
52
-
53
-
54
-
55
-
56
-
57
-
58
-
59
-
60
-
61
-
62
-
63
-
64
-
65
-
66
-
67
-
68
-
69
-
70
-
71
-
72
-
73
-
74
-
75
-
76
-
77
-
78
-
79
-
80
-
81
-
82
-
83
-
84
-
85
-
86
-
87
-
88
-
89
-
90
-
91
-
92
-
93
-
94
-
95
-
96
-
97
-
98
-
99
-
100
-
101
-
102
-
103
-
104
-
105
-
106
-
107
-
108
-
109
-
110
-
111
-
112
-
113
-
114
-
115
 |
 |
CONTENTS
GLOSSARY
INDEX
37
37
Chapter 3
Scanning
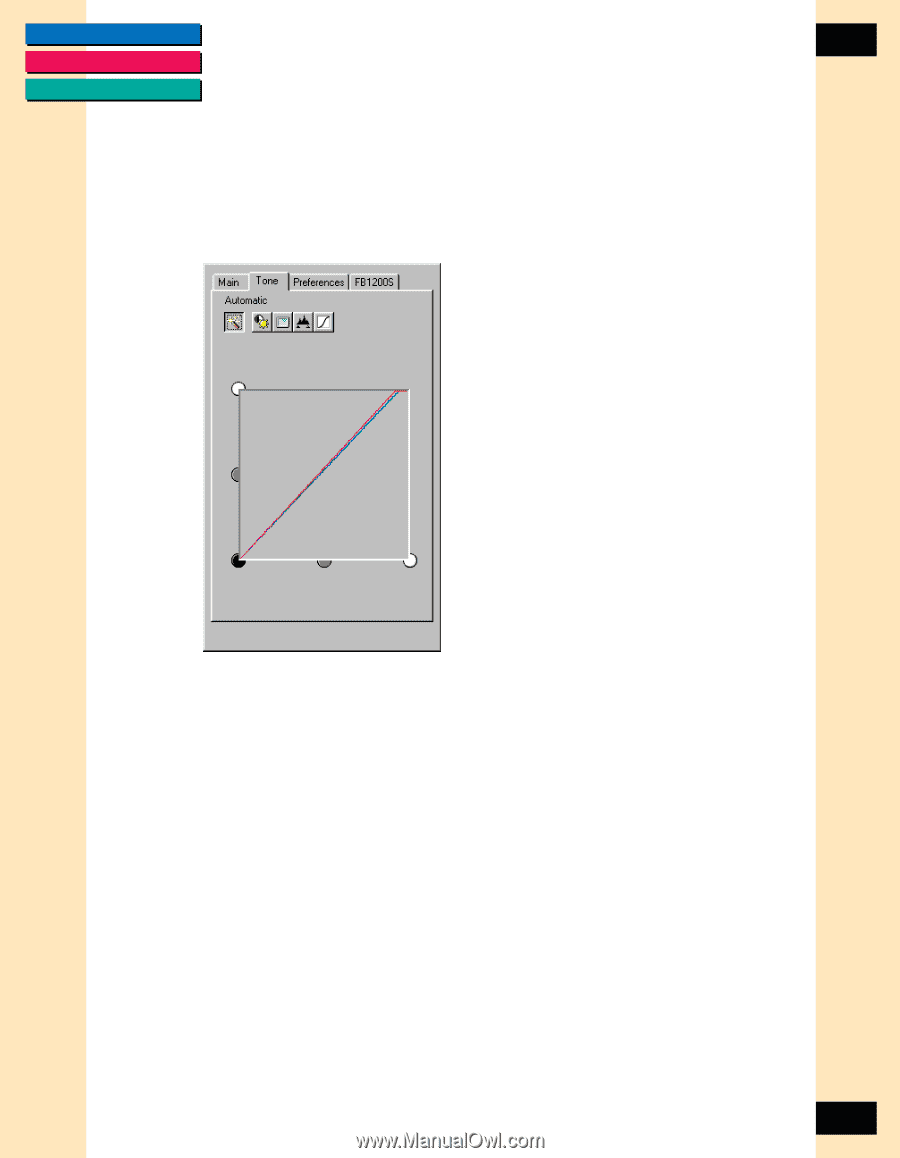
Using the Auto Tone Setting
To have ScanGear CS-S automatically adjust the tone of the scanned image,
click the Auto Tone button on either the Toolbar or Tone tab.
When you click Auto Tone, the color curves reflect the Auto Tone adjustment,
and the image in the preview area changes to reflect the tone correction.