Canon CanoScan FB 1200S Printing Guide - Page 33
Setting Units of Measurement, Setting Image Width and Height, Maintaining Image Proportion
 |
View all Canon CanoScan FB 1200S manuals
Add to My Manuals
Save this manual to your list of manuals |
Page 33 highlights
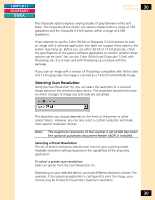
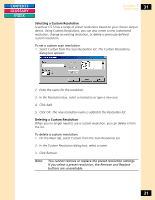
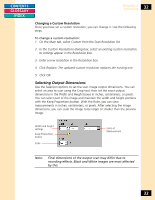
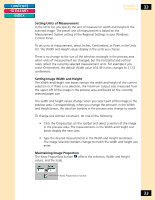
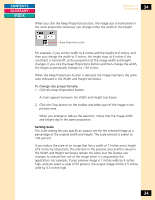
CONTENTS GLOSSARY INDEX Chapter 3 Scanning 33 Setting Units of Measurement In the Units list, you specify the unit of measure for width and height of the scanned image. The preset unit of measurement is based on the Measurement System setting of the Regional Settings in your Windows Control Panel. To set units of measurement, select Inches, Centimeters, or Pixels in the Units list. The Width and Height values display in the units you choose. There is no change to the size of the selection rectangle in the preview area when units of measurement are changed, but the horizontal and vertical rulers reflect the currently selected measurement units. For example if you select Centimeters, the default Width value of 8.49 inches changes to 21.57 centimeters. Setting Image Width and Height The Width and Height text boxes contain the width and height of the current selection or, if there is no selection, the maximum output size, measured from the upper left of the image in the preview area and based on the currently selected paper size. The width and height values change when you select part of the image in the preview area. Correspondingly, when you change the amounts in the Width and Height boxes, the selection borders in the preview area change to match. To change size without constraint, do one of the following: • Click the Crop button on the toolbar and select a section of the image in the preview area. The measurements in the Width and Height text boxes display the new sizes. • Type the desired measurements in the Width and Height text boxes. The image selection borders change to match the width and height you enter. Maintaining Image Proportion The Keep Proportions button affects the selection, Width and Height values, and the scale. Keep Proportions inactive 33
-
 1
1 -
2
-
3
-
4
-
5
-
6
-
7
-
8
-
9
-
10
-
11
-
12
-
13
-
14
-
15
-
16
-
17
-
18
-
19
-
20
-
21
-
22
-
23
-
24
-
25
-
26
-
27
-
 28
28 -
 29
29 -
 30
30 -
 31
31 -
 32
32 -
 33
33 -
 34
34 -
 35
35 -
 36
36 -
 37
37 -
 38
38 -
39
-
40
-
41
-
42
-
43
-
44
-
45
-
46
-
47
-
48
-
49
-
50
-
51
-
52
-
53
-
54
-
55
-
56
-
57
-
58
-
59
-
60
-
61
-
62
-
63
-
64
-
65
-
66
-
67
-
68
-
69
-
70
-
71
-
72
-
73
-
74
-
75
-
76
-
77
-
78
-
79
-
80
-
81
-
82
-
83
-
84
-
85
-
86
-
87
-
88
-
89
-
90
-
91
-
92
-
93
-
94
-
95
-
96
-
97
-
98
-
99
-
100
-
101
-
102
-
103
-
104
-
105
-
106
-
107
-
108
-
109
-
110
-
111
-
112
-
113
-
114
-
115
 |
 |