Canon CanoScan FB 1200S Printing Guide - Page 27
Specifying How the Image is Previewed, button before changing the width or height values.
 |
View all Canon CanoScan FB 1200S manuals
Add to My Manuals
Save this manual to your list of manuals |
Page 27 highlights
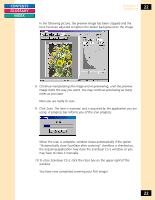
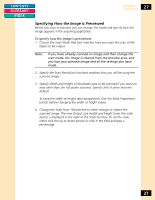
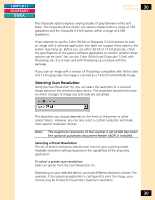
CONTENTS GLOSSARY INDEX Chapter 3 Scanning 27 Specifying How the Image is Previewed Before you scan or preview, you can change the mode and specify how the image appears in the acquiring application. To specify how the image is previewed: 1. Choose the Scan Mode that best matches how you want the scan of the object to be output. Note: If you have already scanned an image and then change the scan mode, the image is cleared from the preview area, and you lose your preview image and all the settings you have made. 2. Specify the Scan Resolution that best matches how you will be using the scanned image. 3. Specify Width and Height of the platen area to be scanned if you want an area other than the full platen scanned. Specify Units if other than the default. To keep the width to height ratio (proportion), click the Keep Proportions button before changing the width or height values. 4. Change the Scale from 100 percent to either enlarge or reduce the scanned image. The new Output size (width and height times the scale factor) is displayed to the right of the Scale text box. To set the scale, either click the up or down arrows or click in the field and type a percentage. 27
-
 1
1 -
2
-
3
-
4
-
5
-
6
-
7
-
8
-
9
-
10
-
11
-
12
-
13
-
14
-
15
-
16
-
17
-
18
-
19
-
20
-
21
-
 22
22 -
 23
23 -
 24
24 -
 25
25 -
 26
26 -
 27
27 -
 28
28 -
 29
29 -
 30
30 -
 31
31 -
 32
32 -
33
-
34
-
35
-
36
-
37
-
38
-
39
-
40
-
41
-
42
-
43
-
44
-
45
-
46
-
47
-
48
-
49
-
50
-
51
-
52
-
53
-
54
-
55
-
56
-
57
-
58
-
59
-
60
-
61
-
62
-
63
-
64
-
65
-
66
-
67
-
68
-
69
-
70
-
71
-
72
-
73
-
74
-
75
-
76
-
77
-
78
-
79
-
80
-
81
-
82
-
83
-
84
-
85
-
86
-
87
-
88
-
89
-
90
-
91
-
92
-
93
-
94
-
95
-
96
-
97
-
98
-
99
-
100
-
101
-
102
-
103
-
104
-
105
-
106
-
107
-
108
-
109
-
110
-
111
-
112
-
113
-
114
-
115
 |
 |